ICM Controls ICM282A OEM Replacement, Carrier HK42FZ004, HK42FZ007, HK42FZ008, HK42FZ009, HK42FZ011, HK42FZ013, HK42FZ016 and HK42FZ0-xx Series Furnace Control Board Module


Key features
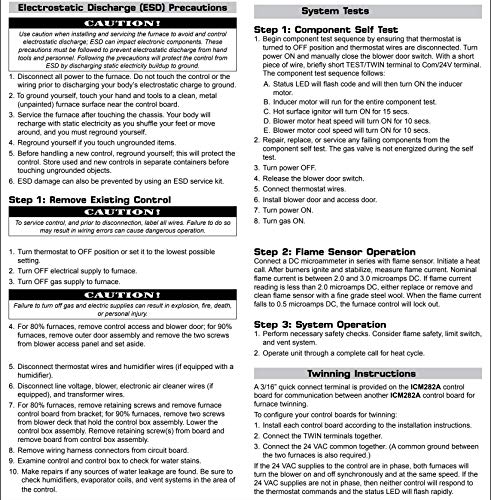
- •Controls gas valve, ignitor, blower motor, inducer, humidifier and air cleaner
- •Software for enhanced controls operation in counterflow and downflow furnace applications
- •Designed for 100% gas shutoff in case of ignition failure
- •Twinning compatible with another ICM282A control
- •Replaces Carrier: HK42FZ004, HK42FZ007, HK42FZ008, HK42FZ009, HK42FZ011, HK42FZ013, HK42FZ016
- •Compatible with 24 VAC standard thermostat
ICM Controls ICM282A OEM Replacement, Carrier HK42FZ004, HK42FZ007, HK42FZ008, HK42FZ009, HK42FZ011, HK42FZ013, HK42FZ016 and HK42FZ0-xx Series Furnace Control Board Module
List Price: $317.96$286.16DEALYou Save: $31.80 (10%)
Free shippingFree Returns – 30 daysFree Order CancellationSecure Payment2–3 Days DeliveryGet It June 25, 2026In Stock (7)No marketing spamNo account requiredFulfilment by FedEx / Amazon / UPS / ShipwirePayPal / Card Buyer Protection
Customer Reviews
Reviews sourced from verified Amazon purchasers4.6
out of 5
Based on 10 reviews
5★
100%
4★
0%
3★
0%
2★
0%
1★
0%
I really like the self test feature that pointed me to a ...
Michael Rosenstock•September 12, 2017
I used this to replace a suspect board in a Bryant furnace. The instructions were straight forward but I had to search a bit to find where to hook the red wire from the blower motor. They included several adapter cables I didn't need. I really like the self test feature that pointed me to a defective induction motor. Perhaps the board was not bad, but I replaced it and the induction motor and all is well. Maybe I have a spare now. Just a note: the local service company wanted $180 just to look at it and no parts. I am way ahead.
Worked great, easy to install
Jason Hendricks•June 6, 2017
Worked great, easy to install. The wiring diagram looks REALLY confusing the first time you see it, especially if you're not used to them. But it's actually very simple to replace each wire individually from the old motherboard to the new one. And it can be done with no specialty tools, just a screwdriver. I did have to mount the board 'upside down' to get the LED light (which indicates error messages) aligned to the viewing window on the panel door - so just be sure to think of that when mounting. Saved hundreds of dollars doing it myself.
Great replacement control board. Not an exact replacement, but easy enough.
couriersean•March 6, 2017
This unit worked for my control board # HK42FZ009 replacement. If you don't know your board number, don't ask somebody else for it. Simply take the control board off the furnace, and pull it apart just enough to get a picture of the part number off the board with your phone and flash. If you aren't comfortable doing this, you should not buy this part, as you will be taking the entire board out and apart to do this replacement. You don't need to be a furnace tech or electrician to replace this unit, but you do need to be able to follow directions. For my unit, I went through the old schematics to cross reference which wires went where to verify I was doing it correctly. You probably should do the same, but this is America and I'm not going to tell you how to live your life. Other reviews have said the same things I am about to go through, but I will try to group all these tips into one newer review.
I had an issue where if I wiggled the wires on the old board, my furnace would turn off and on like a light switch. Every cycle would vibrate the wires until it would shut off. I talked to a furnace tech, who told me there's no way to diagnose a board, you just have to replace it and see if that fixes the problem. I'm not sure on his diagnostic statement, but with his quote of $400+ with no guarantee, I passed. I wasn't sure if I needed a new board, new plugs or both, but when I saw the wiring harness with this universal unit for $128, I figured it should repair both. If you had to, you could cut the plugs off, twist the wires together to eliminate the plugs in question. I did not have to do this thankfully.
1. For my 80% furnace, you discard the old control board box, and mount this board right to the furnace in the original spot. This unit didn't fit inside the original plastic protective box. Seems weird to have the board exposed like this, but that's how they made it. I saved my old board and the plastic box just in case anything happens. Mount it before plugging anything in to help avoid static shock or dropping the new unit.
2. Take tons of pictures of the wires and the post name it is plugged into. I use different colored tape and zip ties to differentiate each wire and make sure I can read the post name and see the wire in each picture, because this is not an exact replacement (at least for my unit). You have to read the instructions (really). For the most part, the wires end up going back onto the same named post (Spare 2-->Spare 2, PL1-->PL1, COOL-->COOL), but none of the plug locations are the same (geographically) and a few have different names. COM became BLW (despite there being a COM on the board).
3. Neutral wires: there's 3 or 4 of them and it doesn't matter how you place them within the grouping of NEU posts which are in an "L" configuration amongst other posts, just make sure it is in fact a Neutral post. I personally think they should be off on their own, individually labeled or at least in a straight line to help clarify, but I'm sure the manufacturer has their reason for this.
4. Testing. The instructions tell you to briefly short two posts on the control board. I held mine for a FEW seconds (too long, read on) and nothing happened except a rapid flashing led light telling me I need to reverse polarity. I checked my work, reset the unit, and shorted the unit for not even a second and it cycled through the test without a hitch. If you just tap the wire against the post, nothing will happen (no LED flashing, no function test).
I'm happy to report this unit has been working without issue for the last 16 hours, where the old unit cut out every 15 minutes. I am confident in this unit and my repair. The plugs are all solid, and the control board functions just as it should.
Thank you, thank you, thank you !
Susan Mitchell•December 29, 2016
After 21 years in service our heater stopped working. We had our trusted HVAC guy come by to diagnose the problem. We were told the issue was a control board or a short with the thermostat. Unfortunately, they did not want to fix our furnace -said the OE boards are not made/available any longer- but suggested replacement -at $6k !! -we have a dual system. I truly have no problem with professionals making a fair profit, as I respect their knowledge and skills. However, when faced with a huge cost for furnace replacement I simply had to do a bit of on-line investigative work before I made the decision. That's when I found this board on Amazon. Thanks to other reviews providing details (leading to a bit of confidence) that that this was truly plug and play, and knowing that I could handle removal of the old board and install of the new, I went for it. Sure glad I did. Furnace came on like a champ once the board was replaced. In my view, the keys to success for this project is to thoroughly know what board you currently have so that you can get the correct replacement. Then it is simply a matter of logging which wires came from what terminal so that you can reconnect the wires to the correct terminals on the new board. I used my phone to take several pictures before taking out the old board. Truth be told, the directions that came with the new board would have been enough in my case, but I wanted to have the extra measure of security in knowing how the wires were connected originally.. It's only been 30 minutes since I tested the furnace, but if the situation changes I'll update this review accordingly.
Fifteen minutes on install and we have heat again
BillTVA•December 28, 2016
Carrier furnace was showing a code 31 (inducer pressure). The inducer motor started off coming on and then stopping within a few seconds and then eventually didn't come on at all. The furnace would go through it's call for heat cycle and then just click when calling for the inducer to start. Checked voltage and continuity of pressure sensor and also tested inducer motor standalone. Both were fine indicating a problem with the control board. This was an exact replacement for my Carrier 58PAVXXXX furnace and all connections moved over like for like. In fifteen minutes the new board was in and the furnace fired up immediately. I am confident this easy repair saved me at least $500. The part arrived in two days and was exactly as indicated.
Page 1 of 2


