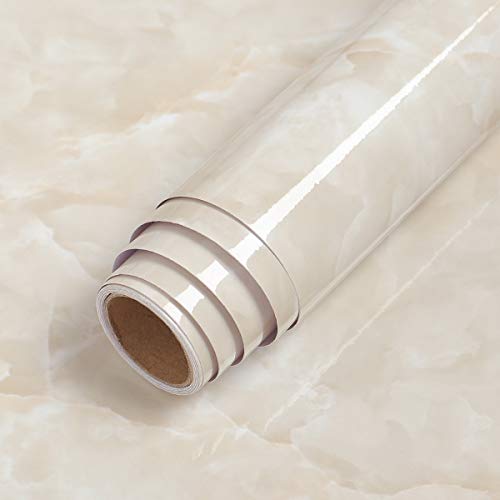
d-c-fix 346-0306 Decorative Self-Adhesive Film, Grey Marble, 17" x 78" Roll


Key features
- •This decorative self-adhesive film transforms flat surfaces and is safe to apply to walls, kitchen cupboards, furniture, shelves and more creating a unique, personalized look
- •D-C-Fix films are ideal for DIY home décor renovations making them simple and affordable with minimal equipment required
- •Quick and easy to install - just peel and stick
- •Durable vinyl film cleans easily and is water resistant
- •Films have trimming gridlines on the back for precise measurements and are fully removable without leaving a residue
d-c-fix 346-0306 Decorative Self-Adhesive Film, Grey Marble, 17" x 78" Roll
List Price: $37.62$33.86DEALYou Save: $3.76 (10%)
Free shippingFree Returns – 30 daysFree Order CancellationSecure Payment2–3 Days DeliveryGet It June 23, 2026In Stock (30)No marketing spamNo account requiredFulfilment by FedEx / Amazon / UPS / ShipwirePayPal / Card Buyer Protection
Customer Reviews
Reviews sourced from verified Amazon purchasers4.5
out of 5
Based on 10 reviews
5★
80%
4★
20%
3★
0%
2★
0%
1★
0%
easy to cover the tiles with the film
zhen✓ Verified Purchase•July 30, 2016
used a little more than one roll for a quick makeover for an ugly fireplace in a rental apartment; easy to cover the tiles with the film, and could stretch the film out about 1 mm if had cut the strip too short; makes a huge difference for minimal effort/price; don't think anyone would be squinting down at the floor to notice the pixelated pattern
Medusa Your Whole Life With Faux Stone
Spencer House✓ Verified Purchase•April 22, 2016
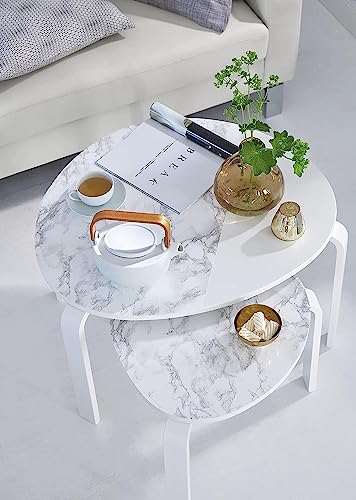
So Pinteresting! I used this adhesive film to turn two cheap IKEA tables into less cheap looking IKEA tables because I'm not made of money but I would like others to believe I am. Super simple to use and a ton of it for the price I was really pleased overall. The pattern actually looks like marble not a weird pixel-y repetitive pattern so that's great as well. Also it was delivered same day which was miraculous as my DIY initiative tends to fade approximately 48 hours after I discover a project I want to do.
A seriously awesome product for small projects
Blair T.✓ Verified Purchase•January 28, 2016
I used this marble contact paper as part of a makeover on two ikea dressers. I was hopeful yet skeptical, so I was thrilled at the quality and the results! It looks amazingly real! Everyone who sees it has thought that it was real - I only know this because I proudly announce, "DUDEEEEEEE THIS IS CONTACT PAPER!" to anyone that sees them, whether they care to know or not.
It's only a little bit of a pain in the butt to put on, which is ok because I expected it to be a large pain in the butt.
Here are a few tips:
1) I think the most important thing is to unroll it slowly as you work so that you can hold the excess paper as tight and taut as possible while you smooth it on. I used a 6 inch plastic ruler to work out the air bubbles. Slow and steady wins the race when putting this on, but the results are worth it for the money!
2) I followed the suggestion of another reviewer and googled "how to do corners with contact paper" and found a lot of helpful suggestions. As usual, the internet makes everything look a little bit easier than it really is, but I was able to finagle a few ideas together and make them work for me.
3) The paper was just a little too narrow to cover the entire top of the dressers, so I had to use two strips. There's a seam where the two meet - this would be almost impossible to avoid as it's not an actual slab of marble and I am not some sort of contact paper whisperer. For my purposes, this is totally fine - I used as wide of a piece as possible and then used a smaller strip at the back of the dresser. Since the dressers are against a wall, and I have various tchotchkes on them, it's really not noticeable. If you are covering a large and/or highly visible surface, this something I would consider.
It's hard to get the patterns to match up along a seam - and even if you did, it would likely mean wasting a lot of paper AND the seam would still be visible if you were looking at it from close up. If this is the type of thing that would drive you bonkers, it might not be the right fit for you. I also think curved surfaces/corners would be tough. Do-able for those folks out there that are pluckier and more patient than me, but I probably would have lost my marbles.
4) Have your tools laid out within arm's reach before you start - once you remove the backing from the adhesive, it's really all systems go time. Here are the things I found most helpful:
"¢ Plastic ruler to use for a "squeegee". Obviously it doesn't have to be plastic, or even a ruler, but you are going to want something rigid/strong for this. I found the advantage of the ruler to be that there's no handle - I did this project on my own, so I found myself contorted at odd angles for much of the time, and a squeegee handle would have been unwieldy to manage.
"¢ Scissors
"¢ X-acto knife - I used the scissors for making big cuts and the x-acto knife for cleaning up the edges and doing the corners.
"¢ Pencil - helpful to measure/mark the back of the paper for extra strips/pieces.
All in all, for the price, it's a seriously awesome product for small projects. I ended up needing to buy two rolls for this project (two dressers), but have most of the second roll leftover for a rainy day DIY.
DIYers come and get it!
Amazon Customer✓ Verified Purchase•September 21, 2015
Much higher quality than what you get at the local hardware store. I used it to cover my ugly rental laminate counters for a posher look. The stretch and stickiness in the product makes installation pretty forgiving for the DIYer. I would purchase this again. My only complaint is that it is such a small amount. I had a pretty small area to cover and it pretty much used up the entire roll.
Perfect!!!
shaunae thomas✓ Verified Purchase•August 10, 2015
Love it!!! Changes then entire look without breaking the bank!!
Page 1 of 2