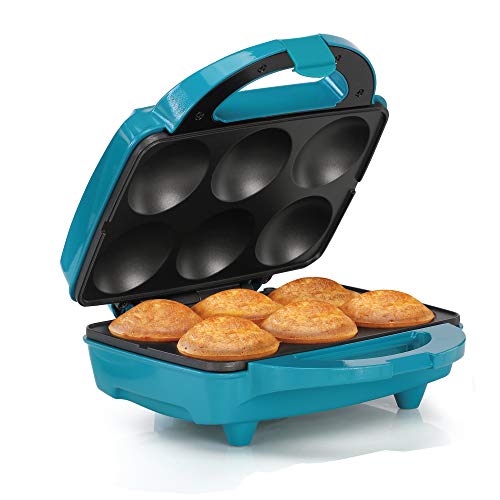
Holstein Housewares - Non-Stick Cupcake Maker, Teal - Makes 6 Cupcakes, Muffins, Cinnamon Buns, and more for Birthdays, Holidays, Bake Sales or Special Occasions


Key features
- •Bake up to 6 delicious treats in only a few minutes with this colorful Cupcake Maker
- •Cooking and cleaning is easy with non-stick coated cooking surfaces
- •Know when the maker is on, preheated, and ready to cook with the handy indicator light
- •Save space in the kitchen with the upright storage feature
- •With a safety lock built into the convenient carry handle and non-slip base, keep the maker securely closed and in place while cooking
Holstein Housewares - Non-Stick Cupcake Maker, Teal - Makes 6 Cupcakes, Muffins, Cinnamon Buns, and more for Birthdays, Holidays, Bake Sales or Special Occasions
List Price: $95.44$85.90DEALYou Save: $9.54 (10%)
Free shippingFree Returns – 30 daysFree Order CancellationSecure Payment2–3 Days DeliveryGet It June 24, 2026In Stock (1)No marketing spamNo account requiredFulfilment by FedEx / Amazon / UPS / ShipwirePayPal / Card Buyer Protection
Customer Reviews
Reviews sourced from verified Amazon purchasers4.5
out of 5
Based on 10 reviews
5★
80%
4★
20%
3★
0%
2★
0%
1★
0%
Fun product
Ssrtip✓ Verified Purchase•July 30, 2023
I really like this product. I used a spatula to turn the cupcakes over and tongues with rubber ends. Otherwise I burn myself. Fast and easy. Be careful with the lid. It seems loose to me. You will enjoy. I didn't fill them all up and no problems.
Fun little tool
Bloomy✓ Verified Purchase•June 28, 2023
We bought this for our 10 year old who LOVES cupcakes and loves baking, but she is nervous to use an oven by herself. We thought that this would be a better choice than an Easy Bake Oven, and I've been surprised at how well this little guy works! She has made a few batches that came out undercooked in the middles, but for the most part we just keep them in for the whole 10 minutes and it seems to work great. We have noticed that if you want the tops to fill the whole cavity you have to fill the batter to the top of the cupcake liner (oh, we use liners every time... I know they're optional, but seems more like a muffin without a liner). They still cook if they're not filled that high, they just make a smaller cupcake. We have tried quite a few different recipes and it is the same with all of them.
Holstein Fun Cupcake Maker
S. Whitworth✓ Verified Purchase•June 13, 2023
This is a very light weight cupcake maker that fits very well on my kitchen counter. I am thinking about getting one more, so I can make a dozen cupcakes at a time. I just received this cupcake maker and used it last night to make confetti cupcakes. It was a big hit with my nine year old daughter. Just make your cupcake batter up and place it in oiled non-stick cups of the machine, or use paper cups. Do have plenty of decorations and icing on hand. Kids and adults love getting involved in decorating the cupcakes. One other hint I will add is not to make your batter too thin. The thicker batter is recommended for this machine. I highly recommend it. You can whip out cupcakes like a pro with it.
Works great! Cupcakes came out great
Dorothy Vermeire✓ Verified Purchase•June 9, 2023
Works great! Cupcakes came out great. Depending on how much batter you put in it you can make flat cupcakes or domed cupcakes. The domed ones become darker on top though. There is a little bit of uneven browning but it is a negligible amount. They are kinda hard to get out when they are finished and I am trying to find the best technique for that. I tried a small spatula but that kinda dented the side of my cupcakes. And thongs didn't seem to work either.
I use paper cups and it works great. I also tried without cups and without cooking spray and they came out with no problem. But I guess using some spray is a good idea though when using no liners. The manual says silicone liners work too but I haven't tried it yet.
I used batter from scratch but you can use box mixes too ...and I will.
The unit is also very easy to clean! Just wipe of with a wet cloth and dry with dry cloth. So much easier than trying to clean a waffle iron. I use a nr. 20 ice cream scoop for the batter and this method didn't leave a single drop of batter on the plates.
So to sum up...LOVE it...some techniques to be figured for best use...but love it. Happy I purchased.
Cook time of 5 minutes is about right....
tiasmom0707✓ Verified Purchase•May 31, 2023
Received unit today and decided to make cupcakes from a yellow sugar free cake mix. I didn't want to invest time, effort or ingredients in a homemade batch of batter until I tested the maker first. The mix was a good economical way to run tests and determine a correct cooking time. I always add a little extra oil for moistness and was curious how that would turn out. For flavor I added a small box of dry lemon jello mix and lemon extract.
Tested with paper cupcake liners on the first go. Preheated unit until the green light came on then inserted liners, added batter and closed the lid. (Of course unit had to reheat after lid being opened.) Once the green light came on (again) I set the microwave timer for a 7 minute cook time. Other than the top of the cupcakes getting a little hard, the cupcakes came out well and looked good. The tops were browned but didn't appear or taste burnt, they were just a little hard (but still edible). All 6 cupcake tops were evenly browned.
After 5 minutes of cool down, I ran another batch with paper liners and cooked for 6 minutes after the unit reheated. Still a little hard on top, but
better.
Foil liners were used for the final batch, also with nice results. Since the cupcakes go through part of the cooking process while the unit is reheating, I cut the cook time back further to 5 minutes after the green indicator light came on. Cupcakes were moist and enjoyable.
Overall I am satisfied with the unit and the final results. Quick and easy way to make treats - without using the energy of heating up an oven.
My only other comment would be it seems redundant to preheat the unit only to have it preheat again once the liners are filled and the lid is closed. With the amount of heat that escapes while loading batter into the liners, I believe my next test will be to skip preheating before loading the batter and just begin the 5 minute timer when the batter is loaded and the green indicator light comes on. Will post again at that time.
Page 1 of 2