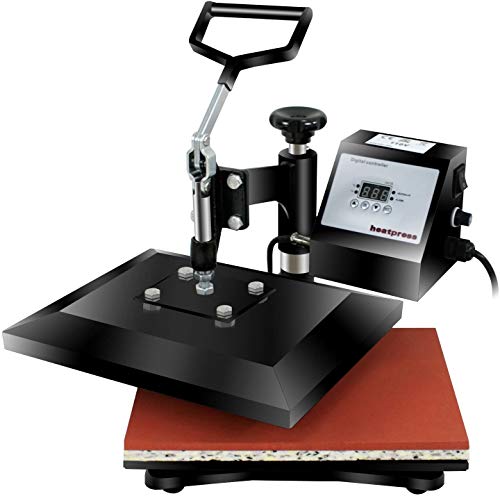
PowerPress HPM-1515-U4 5 in 1 Multifunction Sublimation Heat Press Machine for T-Shirts, Mug,and Cap, 15"x12", Black, Brown


Key features
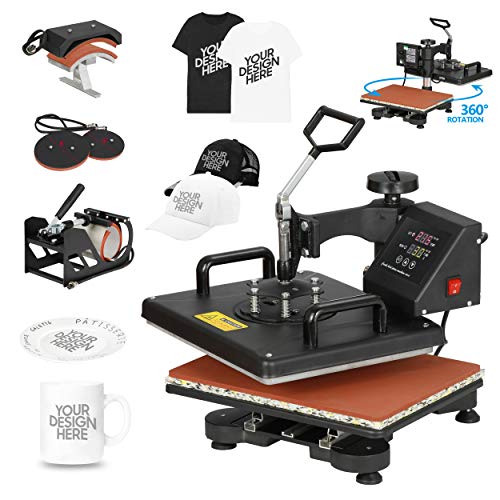
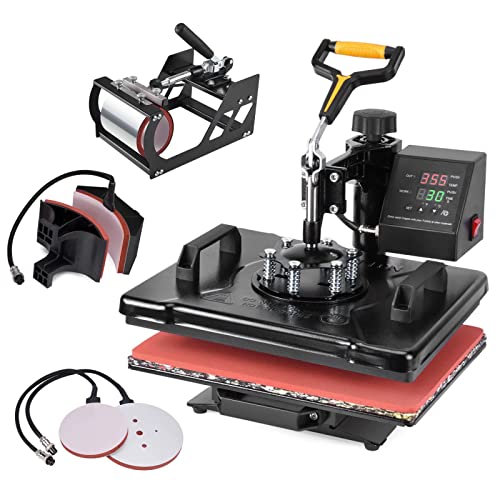
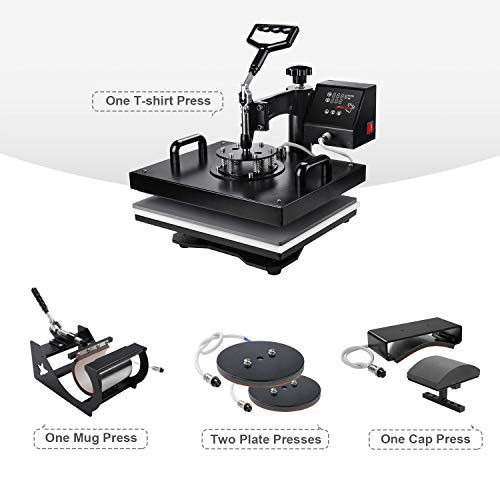
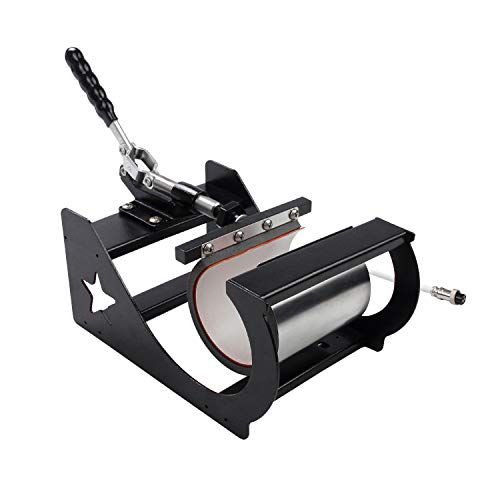
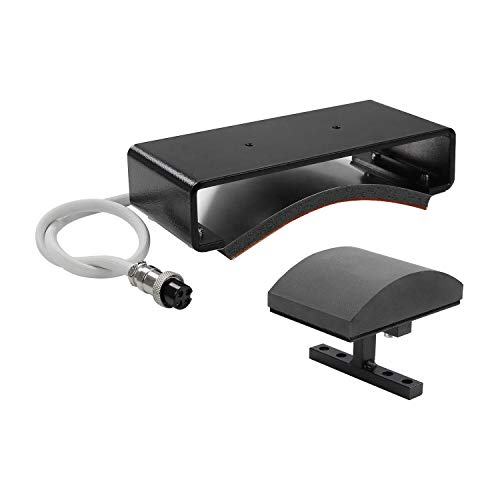
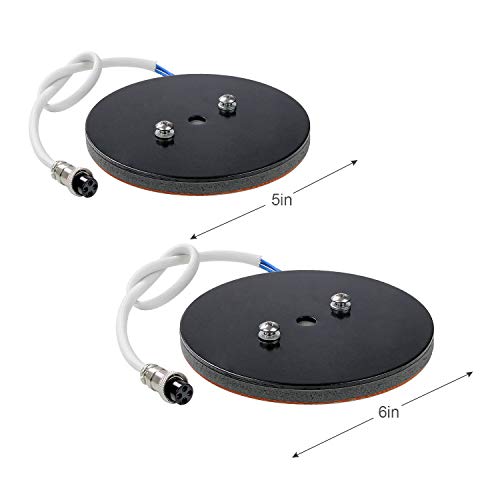
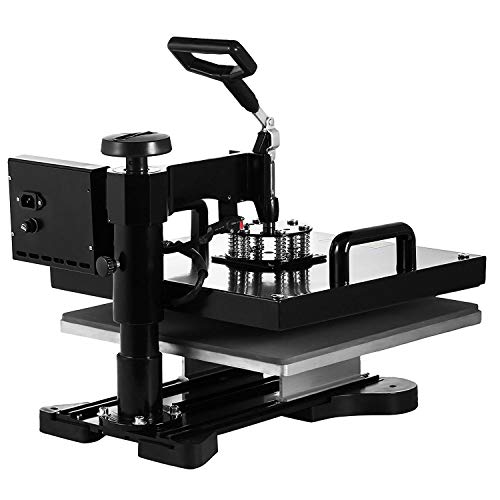
- •This 5 in 1 heat press machine with 2in1 digital controller is out now. This swing-away heat press boasts all of the must-have attachments. This includes 2xPlate presses, 1xmug and 1xHat press.
- •Heating board size: 12" x 15"; Power: 1250W; Temp range: 32 - 399℉ Fahrenheit Degree
- •Heating cup size: 3"-3.5" Diameter (11oz); Heating hat size: 6" x 3" (Curved)
- •Heating plate Press#1.5" Max Diameter; Heating Plate Press #2.6" Max Diameter
- •Brand: PowerPress
PowerPress HPM-1515-U4 5 in 1 Multifunction Sublimation Heat Press Machine for T-Shirts, Mug,and Cap, 15"x12", Black, Brown
List Price: $305.54$274.99DEALYou Save: $30.55 (10%)
Free shippingFree Returns – 30 daysFree Order CancellationSecure Payment2–3 Days DeliveryGet It June 24, 2026In Stock (1)No marketing spamNo account requiredFulfilment by FedEx / Amazon / UPS / ShipwirePayPal / Card Buyer Protection
Customer Reviews
Reviews sourced from verified Amazon purchasers4.4
out of 5
Based on 10 reviews
5★
50%
4★
30%
3★
20%
2★
0%
1★
0%
The finish and quality are AMAZING!
Lori In Vegas•January 23, 2018
Such an awesome deal!!! The directions were a bit hard with no words but everything is better than I could have ever expected for $50!!! Lowe's sells this SAME one but theirs is $100 more and the finish is a spray painted black.
The holes were drilled at 16" on the metal rail so some of them lined up with my studs. I mounted the rail on the top board of my door frame and installed another board in line with it on the left side. By mounting on a board you don't have to hit studs and it brings the door farther from the wall so it will clear the molding around the door opening.
Extremely happy with my outcome. By DIYMy door and hardware came in under $100!!!! Less than the cost of the hardware alone at hardware stores
Just what we wanted, at a great price!
SmartShopper•May 31, 2017
Amazing deal. We looked at Home Depot and Lowe's and these are all $200+ (i think those might come with the stylish barn/country looking door). This is just the hardware and doesn't include a door, but that's what we wanted! We just bought a $30 door from Home Depot, it looks great and works great!
Everything is great quality and it all feels sturdy. I'd suggest screwing into some studs, i don't know how well this would hold just on the drywall, i probably wouldn't trust it. If it gets slammed a lot you might have to adjust the stop that mounts on the rail every once and a while. We have only had to do it once in two months but my wife slams it shut hard so i'm surprised we haven't had to more.
Everything is great quality and it all feels sturdy. I'd suggest screwing into some studs, i don't know how well this would hold just on the drywall, i probably wouldn't trust it. If it gets slammed a lot you might have to adjust the stop that mounts on the rail every once and a while. We have only had to do it once in two months but my wife slams it shut hard so i'm surprised we haven't had to more.
Looks great
Derek G.•March 11, 2017
Looks great only complaint is holes are predrilled so you have to have perfect stud spacing and then hopefully the support bar lines up with the studs where you want it.
Here are the tools you need!
Nicholas LeQuia•February 24, 2017
This is a good product. I installed a large solid wood door and I'm happy with the way it looks. Here is what you need to know about the installation process:
There are no good instruction that come with the set
Two different screw types are given for the support bar so you can choose if you want to use the anchors or wood screws that will have to go directly into support beams/studs
You need a ratchet set, impact drill, adapters for drill, level, good drill bits, possibly a hack saw and patience
It took me three hours to install this door between driving to the hardware store to buy a better level, tracking down my tools and finally making the holes and installing it. My home is older so stud 2x4's were not easy to find and did not line up with the pre-drilled holes on the track. This was an easy fix however. I simply used a sturdy drill bit and some oil to cool down the metal as I drilled through it. You will need to be very careful to line up your holes in the wall with those in the track. This is a fun project. I also had to use my hack saw to shorten the bolts used to attach the glider wheels to the door. These bolts were simply too long for the thickness of my door. I would plan to have either a hack saw or something else to shorten these bolts. The finish is very appealing. After proper installation I can do pull-ups from the guide rail because it is very sturdy. I would recommend that at least half your screws used on the slide rail were installed into studs rather than using the anchors. I don't believe it would be sufficiently sturdy to hold a door if you only used anchors.
Really great product
mnmarkos•August 6, 2016
Purchased a while back and just got around to putting it up. The only reason that I am marking it down is because the whole didn't line up (which I knew going in), and the instructions were not all that great. That being said, the Pro's far outweigh the Con's for the is product.
Cons:
- The inserts provided are for cement walls (don't have that here in the US); not a huge issue, just took me a minute to figure out that I didn't need them
- Predrilled holes were set at 16" (I think); again, not a huge deal, I just found where the studs were and drilled new holes
- Directions; the installation of the stoppers is AFTER you have everything bolted up. When moving the holes, this may mean that the stops are on the "inside" of the bolts and should be installed first. Lesson learned.
Pros:
- Cost; you will not find a better product for this price
- Installation; even with the limited directions, with a little thinking through this was pretty easy to install. Not a problem for you average DIY'er
- Look; this looks great... its exactly what you would hope for when installing a sliding door
- Sturdy; I decided I would make my own door. While I am not sure of the weight, I didn't hesitate to put the door on the rail
- Ease; for the most part, I installed this solo. At some point you will need an extra set of hands (and ladder), but once you get things lined up and first bolt in, you should be off and running.
Page 1 of 2