Wilton Easy Layers 5-Piece Layer Cake Pan Set, 6-Inch, Steel


Key features
- •The innovative pans in this set are 3/4-inch thick, the perfect depth for a multilayered cake
- •Non-stick coating means easy release and cleanup
- •One batch of batter is enough to fill all five pans, and most ovens have the space to accommodate all five pans baking at once. Recipes included
- •Individual pan dimensions: 6 in dia. X .075 in. high (15.2 cm dia. X 1.9 cm high)
- •Dishwasher safe
Wilton Easy Layers 5-Piece Layer Cake Pan Set, 6-Inch, Steel
List Price: $22.25$20.03DEALYou Save: $2.22 (10%)
Free shippingFree Returns – 30 daysFree Order CancellationSecure Payment2–3 Days DeliveryGet It June 22, 2026In Stock (4)No marketing spamNo account requiredFulfilment by FedEx / Amazon / UPS / ShipwirePayPal / Card Buyer Protection
Customer Reviews
Reviews sourced from verified Amazon purchasers4.1
out of 5
Based on 10 reviews
5★
70%
4★
10%
3★
10%
2★
0%
1★
10%
Bit of a shift if you're used to larger pans!
lovendestroy✓ Verified Purchase•July 17, 2018
Great little pans. Just a word of advice... Do not attempt to use a regular amount of cake batter between these pans. Don't get all smarty pants like me and measure the entire batter and divide it by 5. It won't work. I should have known better, but hey, sometimes brain farts just happen. Basically, what I'm saying is, don't fill up the pans all the way to the top. I know to most bakers, novice and pro alike, that sounds like a "no, duh!" concept, but I figured I'd share my embarrassment to keep someone else from getting cake batter all over the bottom of their oven. Fill them maybe 1/3 of the way. There's a specific gram amount that works, but alas I can no longer remember it. It does come with a great little book of recipes that I didn't bother to look at since the cake I was making was not in the booklet... Read it. It will give you an idea on ratio of batter to pan. :)
Easy to use, non stick, digital scale suggested!
S FL girl✓ Verified Purchase•November 23, 2017
I had no problems using this. Pretty easy to turn them over and tap the bottoms to make the layers come away from the pans once cool. I used regular cooking spray, not even the floured kind.
It was even easier to level the tops of each layer than with traditional cake pans as the pan itself makes a great guide, since they are so short. With a traditional pan, you'd have to turn the layer out and use the toothpick method or one of the wire cutters or something. This was so easy, use any long serrated knife in your kitchen.
Definitely use a digital scale and weigh your cake ingredients as they go into your mixing bowl and then divided by 5 and put approximately that much in each pan. Allow yourself a little wiggle room for waste. For example, according to my measurements I should have gotten about 178 grams in each pan but deliberately only tried to put 175 into each pan. because inevitably something gets stuck to the mixing bowl or spatula or whatever., you're not getting EVERY gram out so give yourself a tiny bit of wiggle room.
I almost ran out of frosting so I definitely should have doubled the recipe to accommodate the extra filling between layers as other reviewers suggested.
Somewhere between 18 and 20 minutes at 300 to 325 at most. I would reduce the usual cooking temperature so that the cake doesn't rise too fast. This decreases the size of the dome and you won't have to cut as much away. I did that and it worked for me for a cake that was usually 350.
After trimming I ended up with one cup (I know this because that is the size of the storage container that I put the waste in for use later, you can dry it out on the counter or in the cooling oven and then crumb it in your food processor to use it to decorate this, or another cake) full of cake trimming, so, not too much waste.
I used a regular sized decorative paper straw right down the middle to keep all the layers from sliding. Bubble tea straws which usually work for most cakes but tin this case they are so big that I thought they would take too big of a scoop out of this cake.
If you are too rushed to make your own cake recipe from scratch and you are going to use boxed mix, notice that in some of the pictures some people have really perfect looking cakes with a really tight crumb and other people have these kind of light puffy airy cakes that are harder to frost and also rise a lot and look sort of like a wide spongy cake? You can still cheat and use boxed mix, but make it stay flatter with a tighter moist crumb by using full-fat ingredients. If the recipe calls for water, use full fat milk or cream or even sour cream or yogurt. If it says 3 eggs, do two eggs and two yolks or just add an extra yolk. Use oil, not butter. Butter is 20% water. Coconut oil has a lovely neutral flavor for desserts. Personally, I add an egg yolk and use alcohol, usually half vodka and half either Amaretto or Kahlua and I always add a tablespoon of coffee powder to any chocolate cake, you won't taste the coffee, but it will add depth. I always use coconut oil. I find that just doing that will do the trick even with box mix if I make sure the baking temperature is a little low to minimize rise. I usually don't get to use full fat dairy products as someone in my household is dairy-free.
This was really easy and I'm absolutely going to get the larger 8 inch version, so much simpler than previous methods of layer trimming!
I also bought the 8in cardboard cake circles and there was room for some decorative items at the bottom. I also needed to be able to transport this cake and it is unusually tall - the only (affordable) cake carrier I could find that was tall enough to accommodate this cake for travel was the "Better Homes and Gardens Clear cake carrier" which I got for around $13 at wmt. The dimensions for that carrier were
13.00L x 13.00 W x 9.72H Inches and it also had a cupcake layer so that you could carry two levels of cupcakes.
Again, because of the unusual height of this cake, and because I can't be bothered to work too hard at this - I got the Wilton Decorate Smart 3-Piece Icing Comb Set on Amazon for under $5 (wait for sales). At 9" tall, these combs were the only ones I could find that were tall enough and wouldn't require me to try to match up lines using a shorter icing comb!
Hope those tips help others!
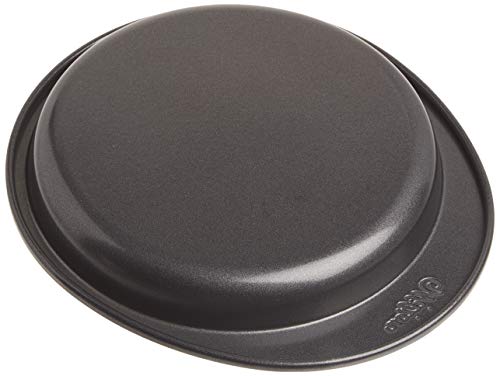
More bowl than pan.
Teapot John✓ Verified Purchase•September 2, 2017
These nest which saves on storage space. Big mistake. These are curved at the bottom result in a much different edge profile of the cake than depicted in the photograph. Quite simply the resulting cake layers are round at the edges rather than flat. Not for the product I had hoped for.
Durable, Perfect Size plus Tips for perfecting your cake
M. and S.✓ Verified Purchase•August 8, 2017
I've been using these cake pans for several months. They are high-quality cake pans and are absolutely PERFECT!! Before using them, I watched a few tutorials that Wilton has up on Youtube, to figure out the right amount of batter to use. I highly recommend that you WEIGH out each of your pans with batter EQUALLY, in order to get the best results. Fill the pans up to 3/4, as well. Also, these pans only need to be cooked in a 325 deg oven and for about 15-18 mins.
Can't say enough good things about these pans. They come with a few cake recipes, which I've tried and they're delicious!!!
Can't say enough good things about these pans. They come with a few cake recipes, which I've tried and they're delicious!!!
Super fun!
WorkingMom365✓ Verified Purchase•May 23, 2017
This is the coolest little cake concept! First off, the pans are tiny, just be prepared, but by the time you stack all the layers, it works and you just need a sliver of cake. I started out with two white cake mixes in two seperate bowls and two colors, pastel green and pastel blue. I added a little food coloring to each bowl of batter, mixed and poured to fill 1/2 of the first pan. Next, added a few more drops and mixed again, and poured another pan. Repeated this again. With the left over batter, I made two regular sized cakes and stacked them, just for fun.
Page 1 of 2


