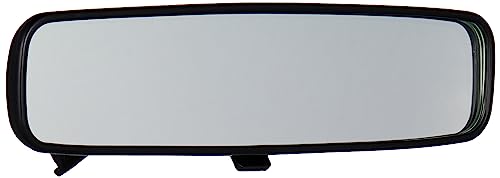
Gentex 50-GENK2AM Auto-Dimming Rear View Mirror by Gentex


Key features
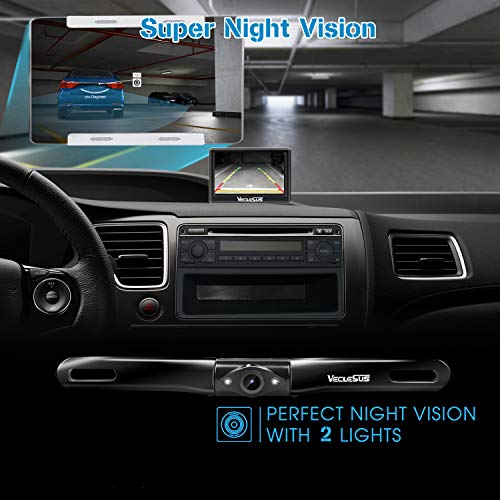
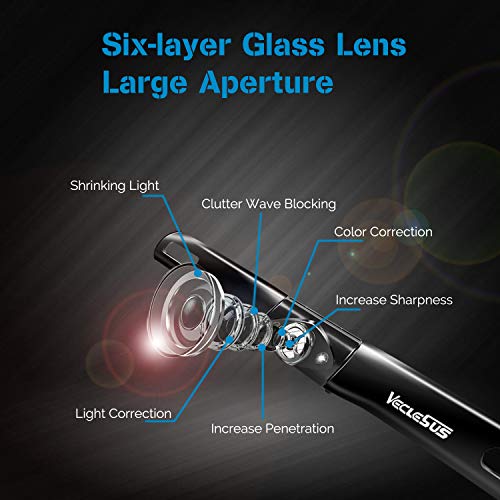
- •No transport delay and widely available: 0.45MP license plate rear view camera without any transport delay with professional imported chips inside, which makes it available to most of the car.
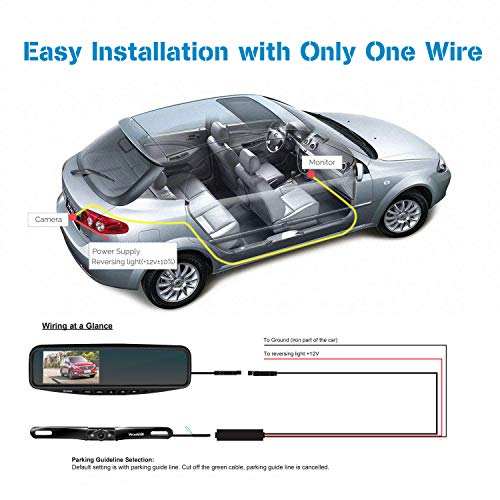
- •Easy Installation: Just fix the mirror monitor on the rear view mirror. Drilling-free design backup camera makes you get it fixed on the license plate in several minutes. Both the mirror monitor and camera get power from 12V reversing light with one wire. You do not need to get power for the monitor again.
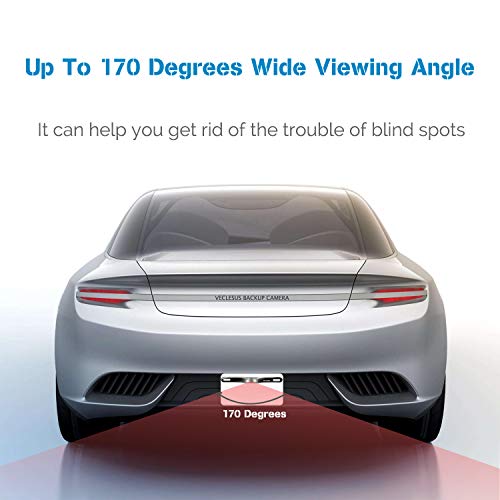
- •Super night vision and wide field of view: Vertical view angle adjustable, 170° large viewing angle, super night vision effect. IP68 waterproof standard can secure your parking, no matter what the weather. This license plate camera and the mirror monitor kit gives you a clear image when you reverse your car.
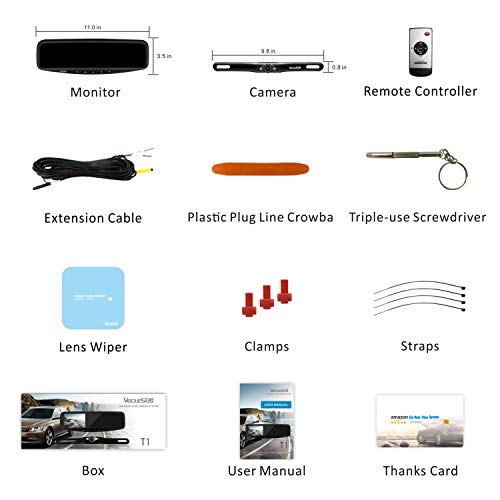
- •Exquisite product and packaging design: It has the front-end all-metal construction and is packed in a beautiful gift box. Thus, it is not only for home use but also for a present.
- •Professional after-sales service: The products offer return & exchange within 30 days, quality warranty service within two years, we will quickly respond to any questions you may have within 24 hours. Please contact us [[email protected]] and we will give you a satisfactory reply absolutely!
Gentex 50-GENK2AM Auto-Dimming Rear View Mirror by Gentex
List Price: $121.04$108.94DEALYou Save: $12.10 (10%)
Free shippingFree Returns – 30 daysFree Order CancellationSecure Payment2–3 Days DeliveryGet It June 23, 2026In Stock (30)No marketing spamNo account requiredFulfilment by FedEx / Amazon / UPS / ShipwirePayPal / Card Buyer Protection
Customer Reviews
Reviews sourced from verified Amazon purchasers4.5
out of 5
Based on 10 reviews
5★
60%
4★
40%
3★
0%
2★
0%
1★
0%
2019 Base XLT Explorer- how to install
The Veg✓ Verified Purchase•August 10, 2023
For those installing this to replace a standard mirror and they own a 2019 XLT base Explorer, read on.
First, the mirror looks good and I doubt most will be able to tell it's not stock.
Second, installation is easy, if you know the color codes on your wires of the map lights. I didnt. O.o I finally got it, but let's just say just because a wire has green on it, does not necessarily make it a ground.
Last, instructions.
1) Use a flat head screwdriver and insert at the base of the old mirror where it mates to the window. Pry out as you pull up on the mirror. If in doubt, google it. There are plenty of videos showing you how to do this.
2) Pull down on the sunglass/map light assembly gently. It will pull right out and unplug the wire from the lights. Set the assembly aside.
3) Get a machine screw with a head big enough to not pass thru the ground wire loop on the wiring for the new mirror. This will be your ground.
4) Get a drill and drill bit for drilling a hole for the ground screw. Use the minor diameter size for your drill bit for the screw size you are using.
5) Drill into the metal plate attached to the roof in the sunglass/map light cavity. Making sure it is NOT the roof of the car. Double check the distance between the plate and the roof. I had about two inches. Make sure your ground screw is not too long to inadvertently pierce the roof. That would be bad.
6) Install ground screw and wire.
7) Attach the red IDC clip to the yellow and green wire.
8) Push the clip of the other wire for the mirror into the back of the IDC clip.
9) Feed wires thru opening in cavity against windshield.
10) Zip tie excess neatly. Or cut and splice.
11) Plug wires into back of mirror.
12) Slide mirror into position on windshield and tighten the torx set screw.
13) Start car. Green light should be on in the front of the mirror.
14) Test by covering the sensor on the back of the mirror. It should dim.
15) Reinstall the sunglass/map light assembly. Make sure you plug the lights in.
You should be done
Should have came with a wired fuse or fuse tap
Rahul N Narvekar✓ Verified Purchase•August 8, 2023
Good for the most part, would have been 5 stars if it came with a fuse tap, or even if the installation wire came attached with a fuse. Had to go to autozone to buy a fuse tap to hook up to my fusebox. My 2021 Rav4's internal fuse box actually turned out to have two spare fuses. After connecting the ground to a bolt installation was actually relatively seamless. Dims well at night, but sometimes the dimming is excessive.
Mirror is OEM quality but rattles after a year of use
Kate N.✓ Verified Purchase•August 5, 2023
The mirror is OEM quality, so it os very good. It functions to OEM quality as well. Installation is easy if able to connect to a 12V power source. I attached it with proper installation materials to the overhead lighting section which powers off about 10 minutes after locking the vehicle. So that worked pretty well. I did use the little cable channel to hide the wiring. What I don't like is that this mirror after a year of use is now a little loose around the ball joint. It would be difficult to find anything better than Genxtex however. The rattle does not create a noise and in most road conditions does not negatively affect its function. Most people might not even notice except when you move the mirror for adjustment.
Works as described!
Ben✓ Verified Purchase•August 3, 2023
I installed this rearview mirror using a fuse tap on my 05 Camry LE. I found a 10amp fuse that keys on in the fuse box inside the car and grounded to a bolt. It works great!
Works great, with some annoyances
TheFlyingDharma✓ Verified Purchase•July 4, 2023
Once this mirror is installed properly it's great. It dims quickly when needed, but not so quickly that it's jarring, and the green power LED is dim enough to not distract you while driving, though it would be nice if you could turn off just the LED altogether.
However, I have two main complaints related to installation:
1) They don't include a wire cover. It's a tiny piece of plastic that goes a long way toward making the install look professional, but instead of including it they'd rather sell it separately for another $11.
2) The wires that come with it are just a bit too short to reach the stereo head unit, which would probably be the simplest place for most people to find a hot accessory wire to splice into. Instead I had to go probing factory harnesses in the passenger-side A-pillar for a suitable connection.
Page 1 of 2