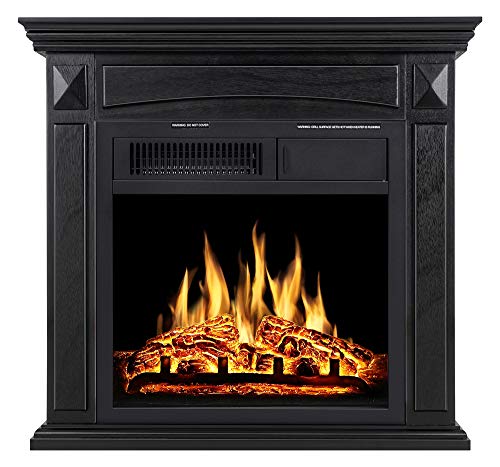
PuraFlame Western Electric Fireplace Insert with Fire Crackling Sound, Remote Control, 750/1500W, Black, 22 53/64 Inches Wide, 20 3/64 Inches High


Key features
- •Overall dimensions: Width: 24 4/5" x Height: 21 23/50" x Depth: 8 39/50". For more dimension details, please refer to "User Manual" in "Technical Specification" section.
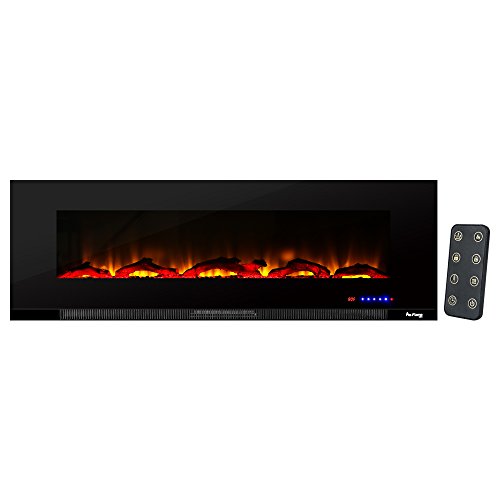
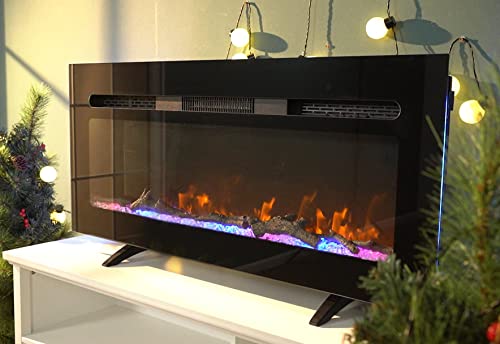
- •3 flame settings with variable intensity and brightness can be used with or without heat all year long; 100% energy saving LED technology. A sleek look with three-sided interior brick wall and clean glass front trim design, without the hassle of cleaning dust or ashes.
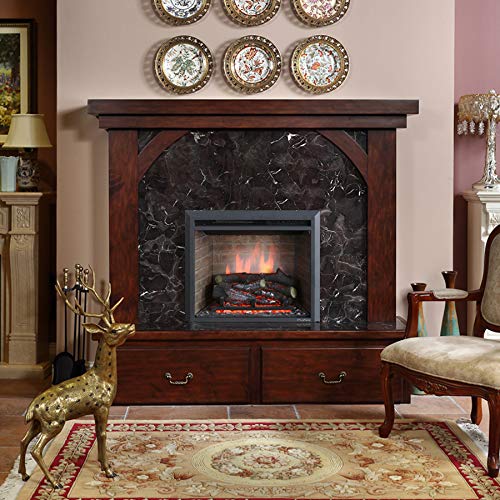
- •Life-like resin log which is 7 3/32" high sitting on the grate above ember bed, that's just what a wood burning fireplace looks like.
- •Adjustable thermostat; A supplemental heat for up to 400 sq. ft. CANNOT be used as a main heat source; Remote control provided for easy operation.
- •Easy to install and uninstall. With flat bottom, the insert can just sit on the floor directly; Plug in and use under a voltage of 120, CANNOT be hard wired. One year warranty but customer service is always ready for help whenever you need. LCC AAWOI
PuraFlame Western Electric Fireplace Insert with Fire Crackling Sound, Remote Control, 750/1500W, Black, 22 53/64 Inches Wide, 20 3/64 Inches High
List Price: $392.84$353.56DEALYou Save: $39.28 (10%)
Free shippingFree Returns – 30 daysFree Order CancellationSecure Payment2–3 Days DeliveryGet It June 24, 2026In Stock (1)No marketing spamNo account requiredFulfilment by FedEx / Amazon / UPS / ShipwirePayPal / Card Buyer Protection
Customer Reviews
Reviews sourced from verified Amazon purchasers4.7
out of 5
Based on 10 reviews
5★
70%
4★
30%
3★
0%
2★
0%
1★
0%
Wow!
Chris Lough✓ Verified Purchase•August 21, 2023
Really nice fake fireplace"¦seriously. Looks great and functions well
Easy insert build.
lanagbishop✓ Verified Purchase•August 12, 2023
Perfect for Price
TJ✓ Verified Purchase•August 9, 2023
I did so much research on electric fireplaces, this one was the most realistic & fit my aesthetics for our budget. It has 3 different color & sound settings. Super impressed!
How to install
kryptonian007✓ Verified Purchase•August 9, 2023
The TOP to BOTTOM measurement of the fireplace opening is the most important. I have the Western 30" and the top to bottom fits perfectly with a 2" space on the left and right side. Remove the metal/glass cover on the fireplace by loosening the bolts located on the inside of the fireplace. Measure from the TOP of the opening to the 'seat' or slab that borders the front of the opening. DO NOT measure to the inside bottom because that will add about 2" inches and you will be wrong. I used 2x4's to frame the sides first and then the inside bottom of the opening. NO NEED TO FRAME THE TOP. I used 'window/door' caulking to caulk all seems inside and out and let it dry. I used cement bolts and a hammer drill to fasten the 2x4's and what I call the 'butterfly' drill bits to recess a hole for the bolt to sit below the wood surface. This permits the insert to slide in/out without hitting the bolts. It takes between 4 and 5 days to convert your fireplace and if you have to hire someone to do it, it will cost some money. I was lucky to have an outlet near my fireplace so wiring it was easy. CONSIDER THE ELECTRICAL CONNECTION BEFORE BUYING THE INSERT. An outlet too far or too much brick to cut through will be expensive. After outlining where to cut the wall I sanded down the texture to find screws/nails that held the wall in place so I could remove them. I used a utility knife to cut the wall so I can reuse what I removed to make it easier. I replaced my outlet box with a larger/deeper box to hold the extra wiring better. My fireplace box is lined with a 1/4" inch steel insert instead of brick. You will notice I had to fill-in the 12 vents that kept the metal from warping. I stuffed in paper and then used the window/door caulking to fill in the gaps. I used a wet paper towel to wipe the caulking to recess and resemble the brick mortar. I used a 2" inch thick by 6" inch thick drill bit designed for steel to drill thru the metal insert. I then used a 2" inch thick by 18" inch long cement drill bit and hammer drill to penetrate 5" inches of brick because there was an 8" inch gap between the metal wall and the stone. I drilled from the fireplace insert side. I used an old thin rod to insert thru the drilled holes and tap on the wooden studs seen in the wall. By listening to where the rod tapped on the wood I marked my hole, drilled and connected thru. Using the rod I ensured I drilled all the way thru to the fireplace. I then inserted the conduit I purchased thru the holes in the wood to ensure I could connect to the outlet box and taped the cable to the thin wire. I pulled the thin wire to pull the cable thru to the fireplace. I used self-drilling/tapping metal screws (NOT those for Aluminum) to fasten the new outlet box in the fireplace making certain it was back enough and high enough for the insert frame to miss it when pushed into place (remember, it penetrates 8" inches into the fireplace box) I used the screws to fasten the bracket to secure the new conduit to the inside of the fireplace and also keep it away from the insert frame. I have pics but do not see where to upload them. Finally, I used 'Meeco's Red Devil' 1 1/2" x 10" inch fireplace insert insulation to insulate the fireplace so cold air doesn't get in or heat gets out. It is self-adhesive and heat resistant so it works great. The insert looks really nice as does the flame. The 'crackling' sound sounds more like one of those Halloween decorations at first but you get used to it. Overall, very good product to convert a fireplace.
Perfect For Our Home Pub
Jason Kunda✓ Verified Purchase•July 18, 2023
I really have no complaints about this 26" version that I recessed into a wall. The flame pattern and flickering log set are very real especially when viewing from further away. Other reviews are correct about how well made and sturdy the firebox is. Upon unboxing I just plugged it in and turned it on. The white power cord is connected to the upper left side of the unit (if you are looking the back end) and extends about 5 feet. In my case, I cut a hole in a wall slightly larger than the size of the fire box and slipped it in. The cut out was made directly in front of an open space behind the wall which happens to be below a staircase landing. So I had plenty of room for at least 8 inches of depth for the unit.
I left about an inch and a half of space between the top of the unit and underneath the top wall cutout. Be advised the inside top of the unit gets very warm when the heat is on high so I will be keeping a close eye on heat build up inside that wall. I can always install a strip of cement board to prevent heat from going up the inside wall. For power I am fortunate this unit is installed about 12 inches above the ceiling in my basement so I ran a dedicated line/receptacle to the ceiling joist and dropped the power cord through a hole in the floor. Wires are totally concealed. Keep in mind this is a glorified space heater so plugging into a plug nearby should be fine as long as there is not too much on that circuit. Because of resistance and voltage drop over length it is never a good idea to use an extension cord for any electrical heat.
The unit simply slides in and there is no need to anchor the frame to the wall unless you drill noticeable holes in the front of the frame. Although the weight of the unit keeps it in place inside the wall I may make a shelf so the back bottom surface can rest. The top, left and right sides have a 1 inch lip; there is no lip on the bottom. I can very easily pull the unit forward from the top and extract it from the cut out if needed for any reason but, as long as the unit works well, I may just caulk the bottom edge and leave it alone.
Heat is blown from the upper left of the unit and the fan is very quiet on high; kind of like the sound of forced air through ceiling vents in a quiet room or computer fan. The room is about 13 X 9 and the ceiling height is about 9 feet and there are 3 good sized windows in the room with lounge chairs directly in front of the windows. There is also two long, forced hot water baseboards for regular heat. The windows in this room (they are about 10 years old) make it drafty in there on very cold days (if highs are in the 20s F) so we hope this will help . I don't think it would heat the room very well if only this unit was used. In fact, I was slightly disappointed with the heat output but a stronger fan would have meant more noise. So we'll see how it goes. That said, if you just came in from being out in the cold and stood in front of the unit it will help to warm you up more quickly.
Page 1 of 2

![26.4\" Electric Fireplace Heater Freestanding Fireplace Space Heater [750/1500W] [Hidden Console] [Overheating Protection] for Living Room Bedroom](https://m.media-amazon.com/images/I/51pzuC9rJ5L._SL500_.jpg)