OSOYOO 3D Printer Controller Kit Ramps 1.4 + Full Graphic Smart Display Controller + Mega2560 + A4988 Stepper Motor Driver for RepRap (Ramps 1.4+12864LCD+Mega2560+A4988Driver)


Key features
- •3D printer Kit guide: 3D printer Kit guide: http://osoyoo.com/driver/3D%20printer%20instructions.pdf
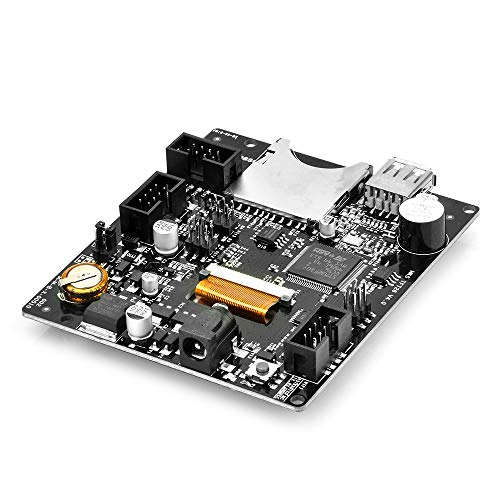
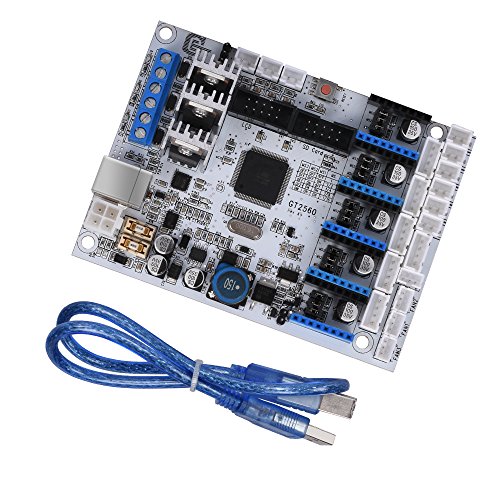
- •3D Printer Controller RAMPS 1.4 interfaces an Arduino Mega2560 board. The modular design includes plug in stepper drivers and extruder control electronics on an Arduino-compatible MEGA shield for easy service, part replacement, upgrade-ability and expansion
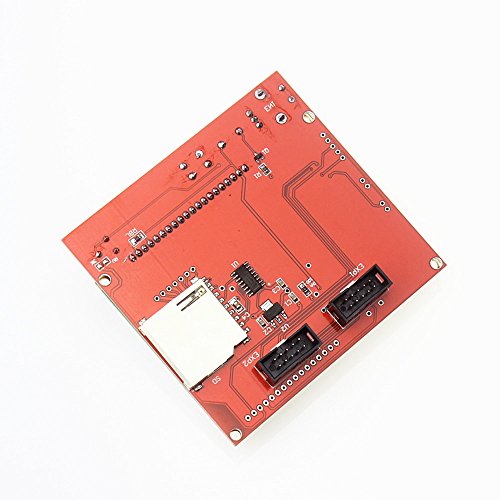
- •With LCD 12864, you can easy connect it to your Ramps board using the "smart adapter" included. After connecting this panel to your Ramps you don't need your pc any more, the Smart Controller supplies power for your SD card. Further more all actions like calibration, axes movements can be done by just using the rotary encoder on the Smart Controller. Print your 3D designs without PC, just with a g-code design stored on the SD card.
- •It is designed to fit the entire electronics needed for a RepRap in one small package for low cost
- •We are professional factory on making all electronics components based on Arduino and Raspberry Pi. And we also have processional engineer team to offer you tutorials which you can start from beginning. all documents (including code)
OSOYOO 3D Printer Controller Kit Ramps 1.4 + Full Graphic Smart Display Controller + Mega2560 + A4988 Stepper Motor Driver for RepRap (Ramps 1.4+12864LCD+Mega2560+A4988Driver)
List Price: $77.27$69.54DEALYou Save: $7.73 (10%)
Free shippingFree Returns – 30 daysFree Order CancellationSecure Payment2–3 Days DeliveryGet It June 23, 2026In Stock (1)No marketing spamNo account requiredFulfilment by FedEx / Amazon / UPS / ShipwirePayPal / Card Buyer Protection
Customer Reviews
Reviews sourced from verified Amazon purchasers4.2
out of 5
Based on 10 reviews
5★
40%
4★
60%
3★
0%
2★
0%
1★
0%
Nice but missing a connector and dim screen.
Jeff Garland✓ Verified Purchase•September 11, 2023
Missing two parts actually but I upgraded to 4 stars based on recent success after getting those...
I contacted the seller and they quickly offered to send replacements for the missing terminal block and jumpers. Overall excellent customer service. I opted to order replacement parts from Amazon instead of wait for the parts or return the whole set for a replacement because I already had the board mounted and I needed to get running early the next week. I was able to get everything configured full step while waiting on the jumpers. It worked fine but was REALLY loud and was lacking torque in the motors. I had the current already set for my motors and opted not to try to turn that up any more. Once the jumpers arrived I set it for 1/16 steps and changed the code in the configuration.h and it has happily been running for about 2 days non-stop. I have printed items as small as a pencil eraser and as large as a 6 hour print. All in all it runs better and has better print quality than the integrated board I was using and if a driver blows I can just replace it for $3.
Update:
Oh yeah, the screen is dim if only powered through USB but looks great when you get 12V on the RAMPs board.
I would have given it 5 stars if I didn't have to wait for replacement terminal strip plug and jumpers.
Original 3 Star Review...
Missing one part...
Everything arrived in good shape except I am missing the green terminal block that plugs into the power block on the ramps board. I can't hook my printer up until I have that.
I just received mine. It was well packed. The boards were plugged into anti static foam place inside anti static bags, inside a box wrapped in bubble bags inside another box.
In the mean time I connected the boards and the drivers and uploaded Marlin with my printer dimensions and other settings. The Arduino IDE connected just fine with no additional ftdi drivers or antythimg needed and the program uploaded great. The screen is very dim even with the contrast pot turned all the way left. It also does not seem to respond to contrast adjustments in the menus of in the configuration.h. It's readable but dim.
Update:
This board is pretty tough. Halloween is coming so we have been printing Fallout stuff for my boys almost nonstop since I got this. Longest print so far is about 7.5 hours for part of a combat shotgun. We have printed the shotgun, a 10mm pistol a complete T45 helmet and several other things. It runs all day as fast as the kids can remove and restart and then usually we go to bed with it running (away from everything, near us with fire/smoke detectors, etc). So far the control board has been flawless. I didn't tighten the screw enough on one of the heating elements and it popped out of the hole. The smoke detector went off although I was sitting about 3 feet from it and had already smelled it. By the time I got to the printer the heating element was glowing fire red. I let it cool down, swapped heating elements and fired it back up. So far it's printed maybe 30 hours with no ill effects to the board since that happened. That would have blown my old all in one board to pieces. I know because it blew outputs when the thermistor varied too much. Anyway. This seems like a really tough board.
It makes a great laser engraver
Richard Stitz✓ Verified Purchase•September 7, 2023
I bought this kit to make a laser engraver and it works great with Marlin and LightBurn. I've put it through a lot of torture during my learning experience but everything works perfectly and when I build my next machine I plan to start right here.
Works very well indeed.
Mandy✓ Verified Purchase•August 26, 2023
Good price! The only item with an issue was the ramps 1.4a board that had some pins not seated well enough to line up with the arduino, and one pin was not in contact with the pc board (that pin failed a continuity check). The misaligned pins were easy enough to put in position and a minute with a soldering iron fixed the nonconnected pin. The driver boards all worked fine (they came with stick-on heatsinks) and the lcd display was fine with no scratches from the other items. It took a little longer to arrive than the 2 day prime indicated but that could have been amazon. All in all I am quite happy with the package and would buy this again. Remember that no instructions are provided, but can easily be found on the internet.
Nice replacement for PrintrBot's PrintrBoard
AsawariK✓ Verified Purchase•August 22, 2023
Replaced my failed Printrboard in a PrintrBot simple metal. Need some electronics know-how to wire up to the printer since the connections to the printer are not directly compatible, especially the Z-Probe. Make sure to use the correct Marlin version and choose the right LCD interface in the firmware. I used an older firmware and spent 2 days debugging why the LCD did not work, ended up ordering another 4 line LCD controller. If you are planning to use with the LCD always on consider adding an additional 5V supply to the unit using the Vcc pin since with a 12V supply the onboard linear regulator (Mega) needs to dissipate a lot of heat and gets hot, did not have any failures due to this but I added an external step down switch mode regulator for under a dollar from the popular bidding site. Depending on your heated bed you may need add a fan for cooling the MOSFET as it hits around 85C when heating my bed. I would recommend replacing this with a better one just in case. I replaced the stock with a IRF3205 with 50% lower RDSon. There are several case designs available on Thingiverse for this board.
Please watch Thomas Sanladerer's nice video on youtube for configuring this board.
Please watch Thomas Sanladerer's nice video on youtube for configuring this board.
Take your time and it's on par with anything else.
Gracie✓ Verified Purchase•August 20, 2023
Overall, excellent quality I must say. The one exception being a stepper driver that was damaged in shipping. The solder was not done properly or the piece would have not been able to come off. As long as you wire it all in PROPERLY and don't try to speed through, you can have this up and chugging in a few hours. I used ARDUINO and Marlin to program. Did some black magic in Repetier host and Marlin to verify everything would run properly when printing. Looks like all axis and the extruder will be fine. Take your time and this will work wonders. My ramps board is also far less noisy as far as the electronics sound. Once I have it all hooked up and under a load I expect a rise in Db but not to an annoying level. Would buy again and recommend to a patient hobbyist who can take their time and do it right on one try. Not for beginners.
Page 1 of 2