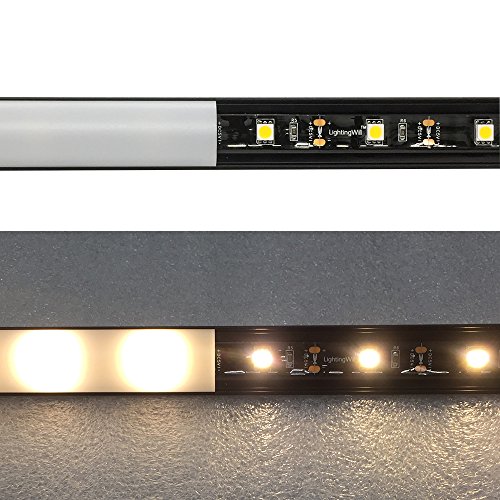
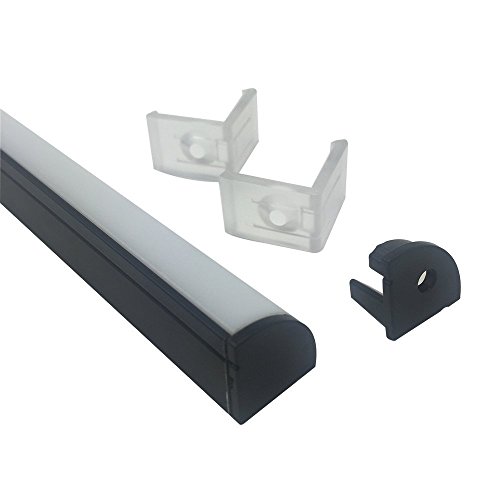
LightingWill 5-Pack V-Shape LED Aluminum Channel System 3.3ft/1M Anodized Black Corner Mount Extrusion for <12mm Width SMD3528 5050 LED Strips with Milky White Cover, End Caps, Clips V02B5


Key features
- •V-shape anodized aluminum channel,better heat dissipation, corner flush mount, for both recessed and surface mount LED lighting projects
- •Fit for PCB width <12mm LED Strips,such as SMD3528, SMD5050 & SMD5630 single row LED strips.
- •Oyster white cover: provide a well diffused light that is comparable to neon effect, protect delicate strips from dust and physical contact.
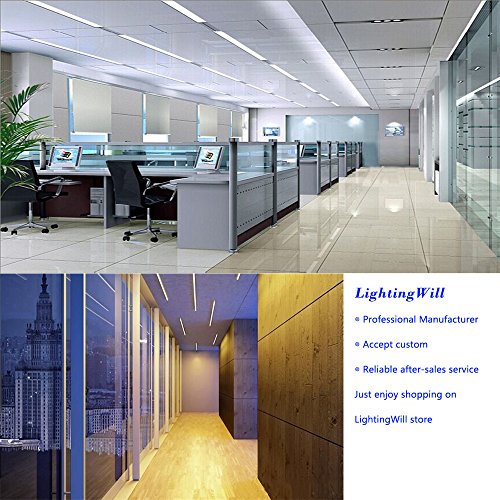
- •It's designed for housing decorative at corners, perfect for indoor/outdoor use, such as showcase, under cabinet, window, door frames, bar and so on.
- •Package includes: 5x 1m/3.3ft per segment with cover(x5), end caps(x10) and mounting clips(x10);For additional end caps please search B01GP873C8; Extra mounting clips please search B01GP871N4 on Amazon
LightingWill 5-Pack V-Shape LED Aluminum Channel System 3.3ft/1M Anodized Black Corner Mount Extrusion for <12mm Width SMD3528 5050 LED Strips with Milky White Cover, End Caps, Clips V02B5
List Price: $88.54$79.69DEALYou Save: $8.85 (10%)
Free shippingFree Returns – 30 daysFree Order CancellationSecure Payment2–3 Days DeliveryGet It June 23, 2026In Stock (1)No marketing spamNo account requiredFulfilment by FedEx / Amazon / UPS / ShipwirePayPal / Card Buyer Protection
Customer Reviews
Reviews sourced from verified Amazon purchasers4.5
out of 5
Based on 10 reviews
5★
70%
4★
30%
3★
0%
2★
0%
1★
0%
GOOD VALUE
Sanc33647✓ Verified Purchase•May 5, 2017
I used this to assemble my own LED light Strips for under counter lighting.
Everything fit precisely and worked as intended.
Of special note the aluminum alloy used for this extrusion is soft and lightweight. That was important because there was a fair amount of mitering inside and outside corners on my project followed by smoothing the slots and edges so the end caps and lenses would fit. In my case it worked really well. They provide 20 end caps, screws, clips and wall plugs. You are free to engineer your own system and attach it as you see fit but with what they provide you get a good system that works.
The LED Strip Lights are (as you know) self adhesive. In my case the aluminum was perfectly clean and I encountered no issues with adhesion.
One successful LED project seems to lead to several more. In my case I will return to this vendor and buy their channels and lens kits again.
Dresses Up Your LED Tape Installation Nicely!!
Peter F. Ferello✓ Verified Purchase•April 4, 2017
I used these channels with WAC Invisiled 24 volt LED tape. The tape fit perfectly in the channel and it really dressed up the installation. The product is lightweight so double stick tape will hold it in place. But, like another Amazon reviewer I opted to screw mine in place. I notched around the screw head so the lens fit flush. You don't need a lot to hold this channel. I used 1/2" # 6 screws and they worked fine. I will post a photo when the backsplash tiling is done.
Exactly What I Needed
KEVIN REDEL✓ Verified Purchase•March 4, 2017
Positives:
- Quick Shipping
- Lenses didn't reduce the light output much
- Generally good quality
Cons:
- Mounting clips seem weak (didn't use, used double sided tape instead)
- Was shorted 2 of the end caps
Notes: I used these to light up a display cabinet. They worked perfectly. Note that the mounting area is about 12mm wide, so the standard 10mm strips fit perfectly. I've found that double sided tape is the way to go for mounting these.
Great manufacturing. Good design. Wished for mounting holes.
erik✓ Verified Purchase•January 7, 2017
I LIKE the shape of the corner style. They fit just behind the front facing of the bottom cabinets well. It allows me to make them virtually unnoticeable.
Although they supply a cheap plastic brackets. I think that mocks the quality extruded aluminum channels and the overall usefull durability of the product having to rely on them. I think I lost them after unpacking... But I have a better plan...
I WISH that they had some mounting holes and screws to make it easier for the average user to install. I don't like having to rely on double stick tape if I can avoid it. Heat, time and a bump or two in it's lifetime may cause them to fall.
SO I applied my own method with great results. Here is what I did to secure it to the cabinets. Pictures should be posted as well.
I chose to purchase tiny + head screws that fit flush between the outer edge where the plastic diffuser is attached. And before the center surface that the lighting strip is adhered to. There is not a lot of room but enough for the right screw. Keep in mind that we are working with very light material so that the right wood or sheet metal screw in the correct places will work just fine. So we don't need very large screws or a ton of them.
Now the trick to get the holes pre-drilled EXACTLY where you need them could have been tricky. But not this way.
First you need to measure your surface width and find a screw head no larger than that.
Then decide how deep you can go into the cabinet you are screwing into. For me it was the back of the cabinet facing. Which was 5/8". And found a screw that was 1/2".
Next you will need a dial caliper to find perfect width of the flat surface of this aluminum you will be screwing into.
Use exactly half of that measurement and adjust your dial caliper to that new setting.
Then lock that setting into the dial caliper and "score" the surface of that aluminum along the whole length. This will be your exact center you've located so that the screw head will lay flat against this tiny surface.
Then plot your screw hole distances according to where you can screw it in. And how long your aluminum channel is cut to. I used 5 screws for one full meter channel. And 2 screws for the 15" and 3 screws for the 24" lengths. And it worked great.
Now use a hole punch to set a defining point at which the first drill bit can catch on and not walk out of center.
Then use a very small drill bit for the first hole.
After you created the first hole with the tiny bit, put that aside for the other holes. Use a second bit to drill the correct size of the screw so it will easily slide threw afterwards. Remember to use a correct size drill bit for this last step. You do not want the hole to large. And you do not want this hole to small for the screw to grab the aluminum. Because you want the screw to cinch down well on the cabinet, not grab the aluminum when you screw it in place.
Now repeat on every hole and you're done!! Hope this helps someone.
Cheers!
p.s. make sure you don't misplace your end pieces. I somehow did this while unpacking, I think.
Great product!
Michael Skoulsky✓ Verified Purchase•November 12, 2016
I bought these for an outdoor deck installation. They were easy to install and look great! They seem solid but I'm anxious to see how they hold up in the Chicago Winter. Delivery was quick. It is unfortunate that delivery on the longer pieces takes forever, I needed these in a hurry but the longer ones would have worked better for my application.
Page 1 of 2

![SeaFrogs [60m/195ft] Professional Underwater Camera Scuba Case Waterproof Diving Housing for Olympus Tough TG-6 tg6, w/Inbuilt Leak Detection Sensor, Vacuum Pump Interface - Black](https://m.media-amazon.com/images/I/41AXzQ2HNKL._SL500_.jpg)
![SeaFrogs Tough TG7 [60m/195ft] Professional Underwater Camera Scuba Case Waterproof Diving Housing for Om System tg7 Olympus Tough TG-7 tg7 - Black](https://m.media-amazon.com/images/I/415owMaabhL._SL500_.jpg)
![SeaFrogs Tough TG7 [60m/195ft] Professional Underwater Camera Scuba Case Waterproof Diving Housing for Om System tg7 Olympus Tough TG-7 tg7 -White](https://m.media-amazon.com/images/I/41x+k7xCkfL._SL500_.jpg)