Meguiar's Keep Clear Headlight Coating, Maintain Like-New Clarity of Your Headlights with an Easy-to-Use Formula and UV Protection that Lasts All Year Long, 4 Ounce Aerosol



Key features
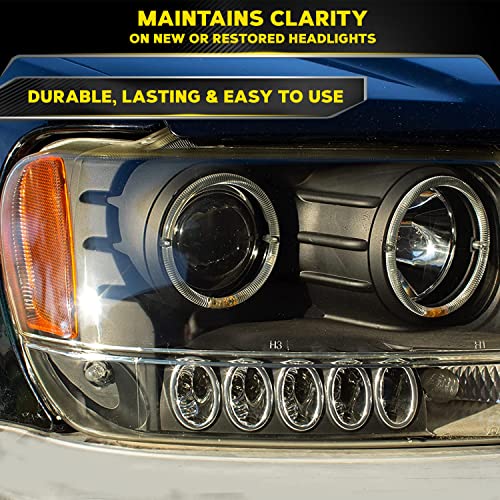
- •CLEAR LIGHTS: Maintains clarity on new or restored headlights
- •UNIQUE FORMULA: Proprietary headlight coating provides durable UV protection
- •A NEW LOOK: Helps keep new headlights looking like new
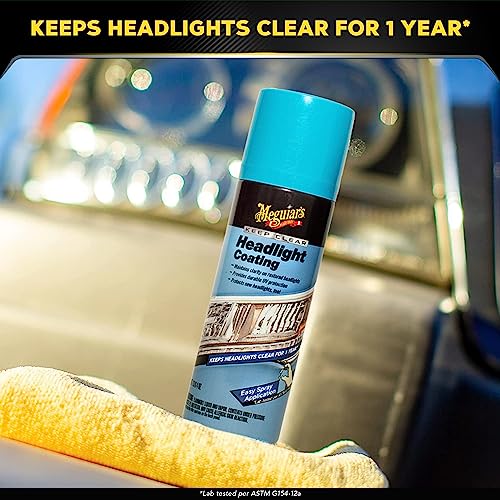
- •LASTS ALL YEAR LONG: Provides headlight clarity for up to a year
- •EASY TO USE: Convenient aerosol spray application
Meguiar's Keep Clear Headlight Coating, Maintain Like-New Clarity of Your Headlights with an Easy-to-Use Formula and UV Protection that Lasts All Year Long, 4 Ounce Aerosol
List Price: $31.02$27.92DEALYou Save: $3.10 (10%)
Free shippingFree Returns – 30 daysFree Order CancellationSecure Payment2–3 Days DeliveryGet It October 27, 2026In Stock (32)No marketing spamNo account requiredFulfilment by FedEx / Amazon / UPS / ShipwirePayPal / Card Buyer Protection
Customer Reviews
Reviews sourced from verified Amazon purchasers4.3
out of 5
Based on 10 reviews
5★
50%
4★
30%
3★
0%
2★
10%
1★
10%
Wow, SO Worth It.
Fella✓ Verified Purchase•September 10, 2017
Wow--this stuff is basically magic. Some people say they bought sand paper to go with this. Don't do that. At least to start. First just use this normally and see what it does for you. Here are some thoughts:
DEFINITELY TAPE. Don't skip the step of masking taping up around your headlights. It doesn't take that long. Use masking tape, painters tape, that kind of tape.
DO IT IN THE SHADE. Definitely do this project in the shade. The reason is that it is so much easier to see if you need to clean the lights more before you spray the coating. In the sun, it will look cleaner than it will in the shade. It's not the end of the world if you do this in the sun, though. I did for most of the process and it looks awesome.
YOU NEED TOWELS. I used two full size towels doing this. You're using the towels for buffing off the cleaning solution and for drying after you clean the light. You need separate towels for those two things.
SCRUB HARD. Put some elbow grease into it when you're doing the Cleaning step.
DON'T WORRY ABOUT PERFECT. Great news--you can do the Cleaning step over and over until you think you got it all clean. When you finish applying the cleaning solution and it dries, buff it off with a dry towel. If you still see darker spots, clean those spots more.
HAZY IS CORRECT AND WEIRD. The weirdest thing about using this stuff is that after you've cleaned the light, it will not look clean. It looks hazy and sort of like it has condensation on it. This is the way it is supposed to look. You'll see. After you buff off the dry cleaning solution, you'll see that the light looks clean but hazy. That's exactly what you want. The next step is magic so get ready.
SPRAYING THE COATING IS MAGIC. The best step is spraying the coating on the clean dry light and it magically turns clear and incredible looking. So satisfying.
DEFINITELY TAPE. Don't skip the step of masking taping up around your headlights. It doesn't take that long. Use masking tape, painters tape, that kind of tape.
DO IT IN THE SHADE. Definitely do this project in the shade. The reason is that it is so much easier to see if you need to clean the lights more before you spray the coating. In the sun, it will look cleaner than it will in the shade. It's not the end of the world if you do this in the sun, though. I did for most of the process and it looks awesome.
YOU NEED TOWELS. I used two full size towels doing this. You're using the towels for buffing off the cleaning solution and for drying after you clean the light. You need separate towels for those two things.
SCRUB HARD. Put some elbow grease into it when you're doing the Cleaning step.
DON'T WORRY ABOUT PERFECT. Great news--you can do the Cleaning step over and over until you think you got it all clean. When you finish applying the cleaning solution and it dries, buff it off with a dry towel. If you still see darker spots, clean those spots more.
HAZY IS CORRECT AND WEIRD. The weirdest thing about using this stuff is that after you've cleaned the light, it will not look clean. It looks hazy and sort of like it has condensation on it. This is the way it is supposed to look. You'll see. After you buff off the dry cleaning solution, you'll see that the light looks clean but hazy. That's exactly what you want. The next step is magic so get ready.
SPRAYING THE COATING IS MAGIC. The best step is spraying the coating on the clean dry light and it magically turns clear and incredible looking. So satisfying.
BEWARE! This product will cloud your polish job instantly!
Brandon✓ Verified Purchase•August 17, 2017
Complete waste of time and money... I polished my headlights to a mirror finish and then I applied the Meguiar's G17804... Instantly the lights clouded up and I thought "Hey maybe once it dries, it will clear up" so I waited 24 hours for it to fully cure as the instructions state. To my disappointment, the headlights remained cloudy and did not look good at all. I decided to buff off the coating which took me about an hour and I just applied a few coats of hardshell wax for uv protection and a mirror finish. I am also pissed off because I bought this junk at $15 and two days later it is $8. The price needs to come a lot lower for the quality of a job that this product did and the amount of time it cost me.
Excellent! But only gets 4 stars for what's missing.
Che✓ Verified Purchase•December 8, 2016
The polish and clear applications in this product are great! But the two cheap little scouring pads that come with it aren't enough to properly get some jobs done. It should have come with a fine grit sandpaper, or at least bigger (and thicker) pads. Other than now knowing ahead of time that I will need to buy my own abrasive pads next time, I would definitely buy again.
Before, during and after photos below.
Before, during and after photos below.
Put the work in and you will be amazed
Nox✓ Verified Purchase•November 12, 2016
The purchase:
I purchased this on amazon and USPS delivered it to someone else (story of the last 4 years living in this town) and I had to go out and purchase this at a store for $10 more than Amazon price. After this annoyance the use of the kit went pretty well.
My review:
I used no extra tools just to see how the process would turn out and I am pretty happy with the results. I followed the instructions exactly as they are in the package so you can see 100% legitimate results in my pictures for this post. It took me about 1.5 hours to finish both of the front headlights (done simultaneously) because I wanted to be very thorough with the process and my headlights have little spurs that stick out in 3 spots, making sanding and buffing a huge annoyance. I have no idea what the manufacturer was thinking when they threw these on the headlights, but it really made things take a bit longer as I also needed to sand down and hand buff the spurs. My headlights were unimaginably bad, which is why I drew out the process for so long, but I am sure you could do it in 45min-1hr on less damaged headlights. I also had to be a bit careful around a crack.
Time breakdown:
Just for a time breakdown I spent about 40 minutes with the low grit paper, 30 with the high grit and the rest of the time went to power drill buffing and hand buffing (remember I had to do the spires by hand both sanding and buffing).
Comparison to toothpaste method:
You will hear about people using toothpaste for this and it seriously works, that's not some kind of joke. If you are pressed for cash that's a great way to go, but from my experience this kit worked much better and it keeps clarity for longer, mostly due to the UV protectant that this comes with. If you have the money get this, if you don't, then stick with the toothpaste method and buy Meguiars UV protectant.
Leftovers:
This is NOT a one use kit. I have way more than enough to do this maybe 5-10 times. I may need some extra sandpaper because those stupid spurs did damage the paper a little, but that's pretty cheap and easy to come by. Normal headlights wouldn't have this issue so I would say you can get maybe 10 uses out of the provided liquids and 4-5 out of the sandpaper. Amazing for the cheap $20 on Amazon. The kit is more like $30-40 in stores, but still a good deal either way.
What I would change:
I would go buy a lower grit sand paper to start with, probably a 1k grit paper would be good enough, then step up to the provided 2k and 3k. The kit worked great, but I can still see a little yellowing on the headlights that I am pretty sure can come off. This is not required for anything lite, but for such a heavily saturated headlight like mine, a 1k is kind of needed. I don't think I would go lower than an 800 though. Other reviews suggested this, but I wanted to first see what this kit could do and with all the leftover material I can easily do this again when I feel like it.
Pictures:
Attached are two pictures (obviously a before and after) from when I used this kit. As a reminder, this is purely done with the kit, no extra tools or sandpaper (save for the power drill to buff). You can see just how badly I needed this kit and how good it works after a 1.5hr job.
Advice:
You get what you put into this process! If you want a quick 30 minute sand/buff job you will get a 30 minute result. 30 minutes wouldn't cut it for my lights and I'm glad I prolonged it to 1.5 hours. You can see the difference between my hard work and some of the faster jobs on these reviews. And again, for headlights like mine, I would suggest buying a sheet of lower grit paper, though this isn't required for good results.
I purchased this on amazon and USPS delivered it to someone else (story of the last 4 years living in this town) and I had to go out and purchase this at a store for $10 more than Amazon price. After this annoyance the use of the kit went pretty well.
My review:
I used no extra tools just to see how the process would turn out and I am pretty happy with the results. I followed the instructions exactly as they are in the package so you can see 100% legitimate results in my pictures for this post. It took me about 1.5 hours to finish both of the front headlights (done simultaneously) because I wanted to be very thorough with the process and my headlights have little spurs that stick out in 3 spots, making sanding and buffing a huge annoyance. I have no idea what the manufacturer was thinking when they threw these on the headlights, but it really made things take a bit longer as I also needed to sand down and hand buff the spurs. My headlights were unimaginably bad, which is why I drew out the process for so long, but I am sure you could do it in 45min-1hr on less damaged headlights. I also had to be a bit careful around a crack.
Time breakdown:
Just for a time breakdown I spent about 40 minutes with the low grit paper, 30 with the high grit and the rest of the time went to power drill buffing and hand buffing (remember I had to do the spires by hand both sanding and buffing).
Comparison to toothpaste method:
You will hear about people using toothpaste for this and it seriously works, that's not some kind of joke. If you are pressed for cash that's a great way to go, but from my experience this kit worked much better and it keeps clarity for longer, mostly due to the UV protectant that this comes with. If you have the money get this, if you don't, then stick with the toothpaste method and buy Meguiars UV protectant.
Leftovers:
This is NOT a one use kit. I have way more than enough to do this maybe 5-10 times. I may need some extra sandpaper because those stupid spurs did damage the paper a little, but that's pretty cheap and easy to come by. Normal headlights wouldn't have this issue so I would say you can get maybe 10 uses out of the provided liquids and 4-5 out of the sandpaper. Amazing for the cheap $20 on Amazon. The kit is more like $30-40 in stores, but still a good deal either way.
What I would change:
I would go buy a lower grit sand paper to start with, probably a 1k grit paper would be good enough, then step up to the provided 2k and 3k. The kit worked great, but I can still see a little yellowing on the headlights that I am pretty sure can come off. This is not required for anything lite, but for such a heavily saturated headlight like mine, a 1k is kind of needed. I don't think I would go lower than an 800 though. Other reviews suggested this, but I wanted to first see what this kit could do and with all the leftover material I can easily do this again when I feel like it.
Pictures:
Attached are two pictures (obviously a before and after) from when I used this kit. As a reminder, this is purely done with the kit, no extra tools or sandpaper (save for the power drill to buff). You can see just how badly I needed this kit and how good it works after a 1.5hr job.
Advice:
You get what you put into this process! If you want a quick 30 minute sand/buff job you will get a 30 minute result. 30 minutes wouldn't cut it for my lights and I'm glad I prolonged it to 1.5 hours. You can see the difference between my hard work and some of the faster jobs on these reviews. And again, for headlights like mine, I would suggest buying a sheet of lower grit paper, though this isn't required for good results.
Really nice Headlight restoration Kit
Marquino Gadget guru✓ Verified Purchase•September 30, 2016
GREAT Headlight Clear Plastic Restoration Kit
Pros:
- Comes with all you need to start
- The Drill Operated Easy Buff Wool Pad works with any drill
- Really easy one Step process (if needed it also comes with extra pads for more difficult headlight with lots of oxidation0
Cons:
- None so far
This Headlight and Clear Plastic Restoration Kit from Maguiar`s is really GREAT and easy to use! I used this on my Audi A4 2005 with little oxidation on my headlights, i just needed to clear it using the one step process.
It took me 30 minutes to get best results 15 minutes per side, i applied few times with the drill pad and once done i could tell the difference right away!!!
Pros:
- Comes with all you need to start
- The Drill Operated Easy Buff Wool Pad works with any drill
- Really easy one Step process (if needed it also comes with extra pads for more difficult headlight with lots of oxidation0
Cons:
- None so far
This Headlight and Clear Plastic Restoration Kit from Maguiar`s is really GREAT and easy to use! I used this on my Audi A4 2005 with little oxidation on my headlights, i just needed to clear it using the one step process.
It took me 30 minutes to get best results 15 minutes per side, i applied few times with the drill pad and once done i could tell the difference right away!!!
Page 1 of 2