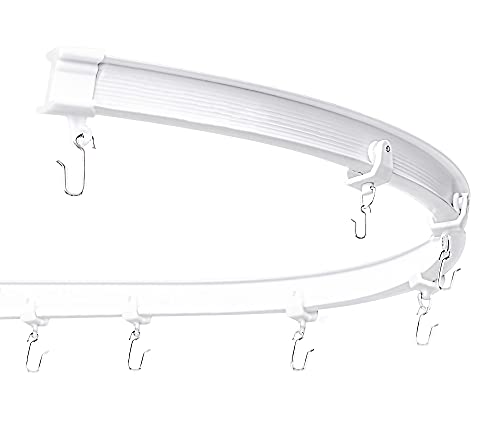
VRSS Flexible Bendable Curved Ceiling Curtain Track, 1 Meter(3.3 ft) for L, U, Circle Shape Shower Curtain Track RV Curtain Track System Room Divider DIY


Key features
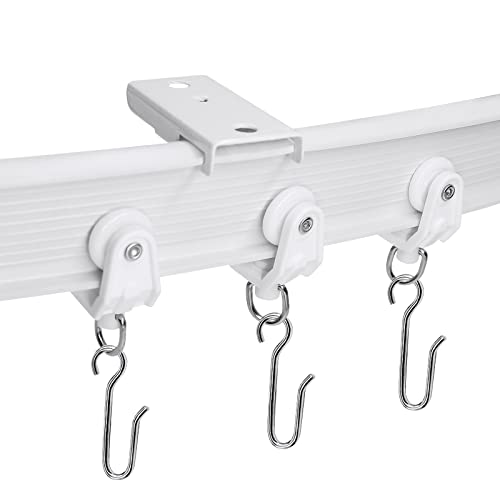
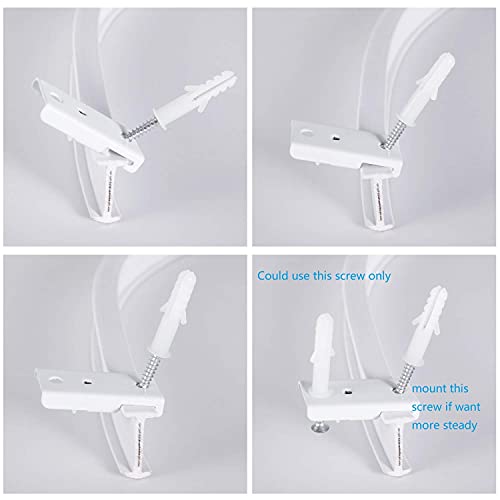
- •Come with 8 rollers, 3 mounting brackets and 6 screws. 2 end stop for the whole track.
- •Also can be Used for Shower Cuatin Track, Straight Window track.
- •Easy to be Bent, Cut Off and Mounted.
- •TOP CEILING Mounting, All the Accessories Include.If need more accessories, please see the PRODUCT DESCRIPTON part follow.
- •All VRSS Brand Product is Suitable for 30 Days Money Back, 60 Days Replacement, 100% Satisfaction Guarantee!
VRSS Flexible Bendable Curved Ceiling Curtain Track, 1 Meter(3.3 ft) for L, U, Circle Shape Shower Curtain Track RV Curtain Track System Room Divider DIY
List Price: $19.38$17.44DEALYou Save: $1.94 (10%)
Free shippingFree Returns – 30 daysFree Order CancellationSecure Payment2–3 Days DeliveryGet It June 23, 2026In Stock (1)No marketing spamNo account requiredFulfilment by FedEx / Amazon / UPS / ShipwirePayPal / Card Buyer Protection
Customer Reviews
Reviews sourced from verified Amazon purchasers4.3
out of 5
Based on 10 reviews
5★
70%
4★
30%
3★
0%
2★
0%
1★
0%
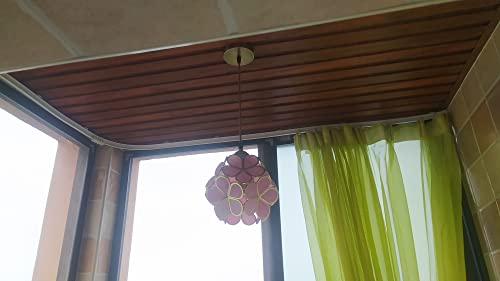
Perfect!
Rena✓ Verified Purchase•December 20, 2023
Exactly what we needed for our L-shaped windows. It comes tightly coiled up so you gotta soften it up first in order to straighten it out. We put it outside in the Arizona sun for a couple of hours and that softened it up nicely so it could be stretched and shaped as needed. Some people will stretched it out and place heavy objects on it for a few hours or soak it in hot water. It was easy to install but we did watch a few YouTube videos first to find what we thought would be the easiest way for installation. Very sturdy and the hooks slide smoothly. Love it!
Exactly what I needed for my tiny RV shower
Dennis W.✓ Verified Purchase•December 14, 2023
I used this to enlarge the shower area (at least at the top) in my small RV. After install, I bought a new shower curtain and trimmed at the bottom to fit. I then added magnetic weights to keep it inside the shallow pan. The result looks factory and works great. The curtain glides very easily around the track. My wife loves being able to finally use the shower in our camper instead of bath house at campgrounds.
You must follow directions and soak in warm water before unwinding track or it will break.
You must follow directions and soak in warm water before unwinding track or it will break.
Great product for the price
Travis M.✓ Verified Purchase•December 11, 2023
I am very happy with the results of this product. The only problems I had were very minor and of my own fault during installation. I received the product as described with all components and parts, I even received a few spare parts! I used this for a ceiling installation with a green screen to wrap around my wifes desk.
My trouble with installation and some tips:
As stated above, I did a ceiling installation, and after deciding the where and how of the installation, I had to cut the track to length, which turned out to be more difficult than I anticipated. I started with a large pair of bolt cutters, which was a mistake and only ended up making a mess of the end of the track and didn't cut through the thin metal backbone. I couldn't find my tin snips, so I used a small pair of wire cutters and slowly worked my way through it.
If you have to cut it, use tin snips or heavy shears.
A free floating ceiling installation on high ceilings is hard enough, but what really made this install tricky for me is that, after I figured out where to install it, I didn't put the track to the ceiling to figure out the appropriate curving for the corner.
Instead, I marked out where I thought I wanted the clips, punched/drilled/anchored the holes, installed the mounting clips, and then tried to install the track. But because it's a ceiling, so you can't use a level to check your work, I ended up with a few clips slightly off from the others, No big deal. But then then the corner curve... I made it far too tight and was not able to get the track to fit into the clips, and I also installed them with the adjustable part on the outside of the track while I was positioned on the inside part, so It was very difficult to reach, open, and be sure that I had it open. I realized this after 5 minutes of struggling with the corner.
So I uninstalled the entire corner, put the clips on the track at a reasonable interval, and lined the track up with the ceiling. This end up making the second half of the install a lot easier and I realized how far off I was with the original corner. I also put the adjustable part of the clips on the inside this time, making it a lot easier to put the track in and pull it out. I installed the first screw with the clip still installed on the track so that I knew all the parts were lining up right before drilling more holes this time too.
TIP: Install clips on track and line it up on the ceiling that way, it makes for a far easier time.
Bonus tip: I used a center punch to mark where the track clips where going and where to drill my holes. This had a big advantage when making sure I drilled in the correct spot because I could easily push the punch through the drywall making a guide hole for the drill bit.
Bonus tip: put a plastic bag around your drill with the closed end at the back of the drill and the open end at the front where the bit sticks out. Grip around the bag to keep it in place and spread the opening out as wide as you can around the chuck and drill bit. This will catch all the dust and particles from the drywall as you drill into the ceiling, significantly reducing the mess you have to clean up later.
A little hard but worth it
Yareli✓ Verified Purchase•December 4, 2023
Had trouble installing but worth it!!!!
Perfect solution
Joan D✓ Verified Purchase•November 5, 2023
I used it to screen off an opened storage space
Page 1 of 2