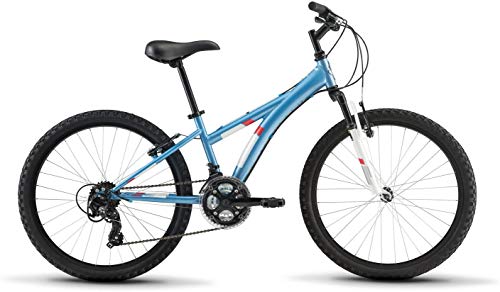
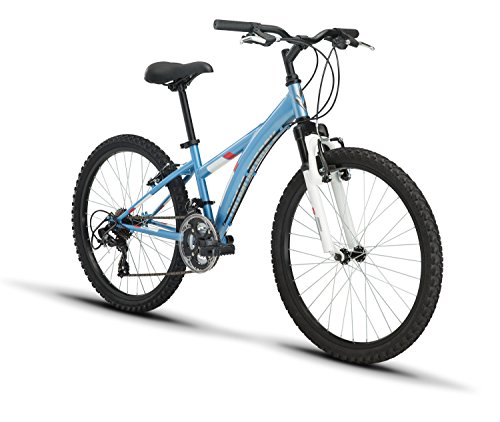
Diamondback Bicycles Tess 24 Youth Girls 24" Wheel Mountain Bike, Blue


Key features
- •Shimano Tourney 3x7 speed drivetrain has 21 speeds, allowing small riders to conquer dirt trails
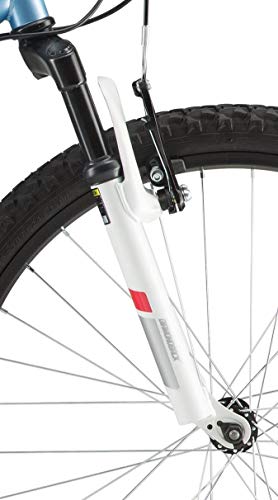
- •Hl Zoom 40mm travel fork soaks up rocks and roots just like on a bike for Big kids
- •Linear pull brakes have adjustable-reach levers to keep them safe and in control
Diamondback Bicycles Tess 24 Youth Girls 24" Wheel Mountain Bike, Blue
List Price: $407.40$366.66DEALYou Save: $40.74 (10%)
Free shippingFree Returns – 30 daysFree Order CancellationSecure Payment2–3 Days DeliveryGet It June 24, 2026In Stock (1)No marketing spamNo account requiredFulfilment by FedEx / Amazon / UPS / ShipwirePayPal / Card Buyer Protection
Customer Reviews
Reviews sourced from verified Amazon purchasers3.8
out of 5
Based on 10 reviews
5★
50%
4★
30%
3★
0%
2★
0%
1★
20%
Great bike for a 9 year old!
Dan Gillen✓ Verified Purchase•June 30, 2018
Beautiful bike! My 9 year old daughter loves it! It should last her a couple years. Took some time putting it together, but not bad. Nice color, too. Definitely recommend!
Great starter bike for young kids interested in jumping into ...
Kelli✓ Verified Purchase•June 29, 2018
Great starter bike for young kids interested in jumping into to soft flow trails. Some components are a little lower in quality (such a the break levers) but overall a good bike for the money.
As heavy as adult bikes
Dillon R Sapp✓ Verified Purchase•June 17, 2018
This bike is way too heavy. Very disappointed. Diamondback quality has fallen a lot from my experiences.
they were pretty close right out of the box
Nickle ✓ Verified Purchase•May 3, 2018
Bought this for my daughter a few weeks ago. She's been riding it constantly since and loves it. She's thirteen and quickly figured out how to shift, experimenting with different gears and challenging the hills around our yard. The only issue she's had is that she's thrown the chain twice. I haven't adjusted the derailers, they were pretty close right out of the box, but may tune them a bit. That said, it may have been her learning curve too on how to shift and pedal. The bike frame is well constructed but it is a bit heavy. Still, she handles it pretty well. She loves the color and the finish was good with no scratches or defects. Two things to note in unpacking and assembly; the bike is packed well, but they turn the fork backwards to package it. There's a card in the box to note this but it is very possible to assemble the bike with the fork backwards and that won't work too well. Use a bit of care when turning the fork around and unwinding the cables attached to the handlebars too. Another thing to note is the front wheel nut may hide in the packing nut cover. Don't unscrew it as I did. Just pull it off the nut to avoid dropping the washer. In summary seems like a we'll packaged, no defects, relatively easy to assemble kids bike and in my opinion a pretty good value.
Daughter loves it. Heavier than I would prefer, but good value for price. Instructions could be more clear.
BadKarma•April 30, 2018
Sturdy bike (if a bit heavy at >30lbs, but it's all steel), decent components for a kids bike. Easy to assemble.
It arrived mostly assembled and packaged in a large box that UPS left on our front porch. It includes the various hex wrenches you need as well as a cheap wrench for the pedal assembly. You will need to provide any other tools - I'd recommend an adjustable wrench, some sharp blade to cut the zip-ties, and a Phillips-head screwdriver. The instructions also recommend a pair of pliers with a wire cutter, but I did not need that.
Well packaged and held in place with zip-ties. All scratchable parts are covered in plastic and cardboard, and all pointy or fragile bits are covered with various plastic doodads.
First step is to insert and tighten the seat. Easy enough to do - maybe a little easier with a second set of hands to hold the seat at the right height.
Next step is to insert the handlebar stem - it's a little tricky to untangle to pre-attached brake and shifter cables. Make sure your fork is facing forward when you do this (one 1-star review mention the tire hits the pedals - if that happens to you, it's because your fork is backwards). Tighten the handlebars with the provided hex wrench (the stem has a clever "quill" that expands as you tighten it to lock it into the headtube). Next, you have to turn the handlebars into position - to save space, they come assembled but folded down. Loosen the bolt with the hex wrench, turn the bars forward until the brake and shifter calipers are in the correct position (you should be able to see the shifter numbers if you're seated on bike), then tighten again. It's all adjustable, so if your kids prefer a different wrist position, it's easy to loosen, adjust, retighten with the supplied hex wrenches.
Next, insert the front wheel and tighten. Unlike adult bikes, kids bikes come with a retaining washer to prevent front wheel from dropping out if the nuts are too loose. Make sure you put those on correctly - the pin on the washer must fit into the hole in the fork.
Next, put on the pedals and tighten. Note the left and right pedals are threaded in opposite directions, so that forward pedaling against resistance always applies tightening force.
Finally, it comes with a rear derailleur guard (nice touch, given how often kids lean their bikes against the ground). Two screws to hold them in place.
Pump up the tires and that's it! I had to do some minor adjustment to the brake cable tension at the calipers (both front and rear cables were very loose). Then (with an assistant) hold the rear wheel of the ground and check that the shifters are indexed correctly by running through the range. Mine worked mostly fine but I had to make minor adjustments to the rear derailleur at the barrel adjustment by the back wheel to get it to up/down shift smoothly. I did not have to mess with the low/high set screws or position of the derailleur, so indexing was mostly fine out of the box.
If you have done any minor bike maintenance, assembly will be easy. *If you haven't adjusted brakes or derailleurs before, consider watching some online videos to learn what the various adjustments do*. Troubleshooting is MUCH easier once you know how it works. The instruction manual is NOT very helpful. The manual has sections for any/all Diamondback bikes - it's not specific to this bike. So you have to hunt around for the section that applies to your bike - and it may not always be clear (ex: there are instructions for all kinds of brake types - caliper, V-brakes, disc brakes, etc). Minus one star for not providing bike-specific assembly instructions, as I think someone new to bike assembly will have to spend extra time reading through a cluttered manual.
It does not come with a kickstand but I reused one I had on my daughter's old 18" bike.
What I like about this is bike is that, other than the color and slightly lower / more angled top tube, it's identical to the boys version (the Cobra 24). I bought a Tess for my daughter and a Cobra for my son, and now I can be certain they won't fight over who has the "nicer" bike. I can't tell how durable it is, but the Shimano components are reassuring. This uses the Shimano M310 "Acera" 3x7 trigger shifters, the same shifters on my adult entry-level commuter bike which has lasted for years. My kids find these shifters much easier to use than the "Revo" rotary shifters found on many kids bikes. Simple flick of the thumb or forefinger does the trick.
This fits an average 9 year old girl on almost the lowest seat setting and lower stem position. I am confident that I can adjust the stem and seat enough to make this last until she's ready for a full-size bike.
If you do assemble it yourself, you'll save $50-$100 bucks - so worth learning!
Page 1 of 2