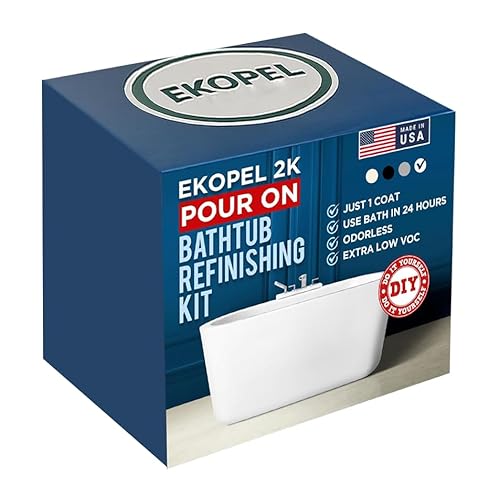
Ekopel 2K Bathtub Refinishing Kit - Pour On Bathtub Paint White Gloss Finish Kit, 1 Coat Odorless Sink and Bath Tub Paint – Long Lasting Never Peel DIY Glaze for Tub, Made in USA – Bright Gloss White


Key features
- •✔️Full Step By Step Demo Videos: https://youtube.com/channel/UCu52j7aN00AX_DEfnwA2dtw/playlists
- •✔️Eco Friendly - Extra Low VOC - No Odor Bathtub Refinishing Kit- With No Chemical Smells or Toxic Fumes You Can Refinish Your Tub Safely
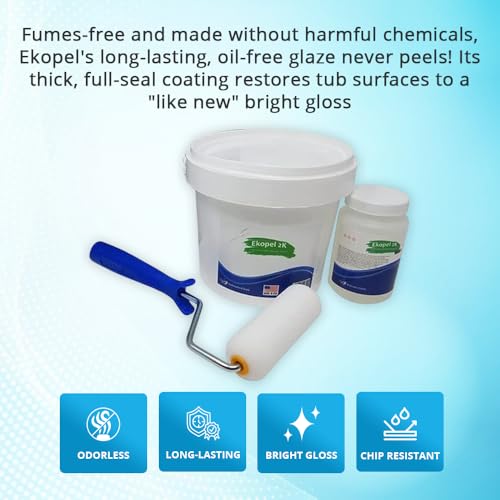
- •✔️ New Kit Includes Scooper And Foam Roller- Easy DIY Bathtub Refinishing Application - Check Out Our YouTube Application Videos That Explain Each Step Of the Process
- •✔️Trust The Original! - Avoid Toxic Or Copycat Knockoffs - Oil Based Paints Are Toxic And Band In Many States, Not To Mention Will Peel Quickly, Imposters Have Tried To Copy Our Formula Be Careful!
- •✔️With Proper Prep Tub Ekopel 2K Will Never Peel - Ekopel Is A Modified Epoxy Coating That With Proper Etch Cleaning Will Never Peel Off Of Any Bathtub Service
- •Eco Friendly
- •Odor less
- •Extra Thick Full Seal Coating
- •With Proper Prep Will Never Peel
- •Easy Pouring method With Youtube Video Instructions
Ekopel 2K Bathtub Refinishing Kit - Pour On Bathtub Paint White Gloss Finish Kit, 1 Coat Odorless Sink and Bath Tub Paint – Long Lasting Never Peel DIY Glaze for Tub, Made in USA – Bright Gloss White
List Price: $290.93$261.84DEALYou Save: $29.09 (10%)
Free shippingFree Returns – 30 daysFree Order CancellationSecure Payment2–3 Days DeliveryGet It June 25, 2026In Stock (30)No marketing spamNo account requiredFulfilment by FedEx / Amazon / UPS / ShipwirePayPal / Card Buyer Protection
Customer Reviews
Reviews sourced from verified Amazon purchasers4.2
out of 5
Based on 10 reviews
5★
50%
4★
50%
3★
0%
2★
0%
1★
0%
great for tub
Anonymous✓ Verified Purchase•July 18, 2023
This was easy to use. Our bathtub looked horrible before and looks so much better all white now. The only thing I wish is that there was more product. There is enough if you are only doing a tub but we needed to do the whole shower walls too. Was spread a little too thin in some areas. Some spots show drip lines down the wall.
If there is a big "pot hole" at the bottom of the tub, it will not be able to self leveling.
Amazon Customer✓ Verified Purchase•June 30, 2023
If there is a big "pot hole" at the bottom of the tub ater you scooping away the excessive coating, it will not be able to self leveling. I had to buy the nonskid 2k Ekopel to fill the pot holes. It's also necessary to have the no-skid coating. The coating is very nice and smooth. But can be slippery. To me, have a heat gun is important to burst the small bubbles.
Ekopel Bathtub Refinishing Kit - A High-Quality, Durable, and Odorless Solution!
Morgen Hatton✓ Verified Purchase•June 6, 2023
The Ekopel Bathtub Refinishing Kit has completely transformed my bathroom, and I am incredibly impressed with the outstanding results it delivered. As a homeowner looking to give my old bathtub a fresh and modern look without the hassle of a full replacement, this kit exceeded all my expectations.
First and foremost, the fact that this refinishing kit is made in the USA gives me confidence in its quality and safety. The manufacturer's commitment to producing an environmentally friendly and non-toxic product was a significant selling point for me. The odorless nature of the refinishing process was a welcome surprise, as I didn't have to deal with any noxious fumes during the application.
The use of pure resin instead of paint sets this refinishing kit apart from other alternatives in the market. The result is a tub and tile reglazing that truly looks and feels like a brand new surface. The bright gloss white finish has completely revitalized my bathtub, making it the centerpiece of my bathroom.
I was amazed by the thickness of the coating provided by the Ekopel Bathtub Refinishing Kit. It is 20X thicker than other knockoff kits, which ensures long-lasting durability and a surface that will never peel or chip. This durability gives me peace of mind, knowing that my investment will stand the test of time.
The application process was surprisingly straightforward. The kit includes all the necessary materials and clear instructions, making it a user-friendly DIY project. I had no prior experience with refinishing, but the step-by-step guide made it easy to achieve professional-looking results.
After completing the refinishing process, I was pleased to find that the newly reglazed surface was easy to clean and maintain. The bright gloss white finish has a smooth texture that repels dirt and grime, making it effortless to keep my bathtub looking pristine.
In conclusion, the Ekopel Bathtub Refinishing Kit is an exceptional product that delivers on its promises. Its Made-in-the-USA quality, odorless and non-toxic formulation, and use of pure resin set it apart from other refinishing options on the market. The durability and thickness of the coating ensure that my bathtub will maintain its bright gloss white finish for years to come. I am thrilled with the results, and I highly recommend this kit to anyone looking to give their bathtub a stunning makeover without the cost and inconvenience of a full replacement. This refinishing kit is a worthwhile investment that will rejuvenate your bathroom and add value to your home.
Bath Saver, amazing
Lizzie✓ Verified Purchase•May 19, 2023
Brilliant. First time user. I was nervous. It is much more forgiving than expected. The result is phenomenal.
I prepped the bath with Comet cleanser- I sprinkle and scrub with a scratch proof kitchen sponge. Comet removes soap scum better than any product I've used so it's a staple in my house.
Hot water rinse with shower head (I have a handheld handle so can rinse from sides down with steaming water).
Wipe with lint free polishing cloth.
Sand down any old glaze edges til loose patches come free and edge is smooth.
Vacuum up debris dust etc then wiped over with a lint free polishing cloth.
Removing silicone was the hardest part of the job. Used a razor and nail and time and patience over a few days a little at a time. Used a finger to rub off small bits left on the tub.
Final wipe with TSP around the edges.
Our tap is old and drips. I cut the end off a clear plastic paper bin bag pulled the bag over the tap and taped at the wall. Then i put the other end into the overflow drain. Make sure bag is fully open so water can flow.
I cleaned the whole bathroom of dust/debris. Shut off vents. Used a room heater left on while I was in the room. Kept the product tub in the room warming up (think this really helped unintentionally).
Taped the drain. Used a razor to very carefully trim the tape so I had a perfect circle. Made sure pressed down well on edges.
I USED PACKING TAPE. We had lots. It worked. Was easy to remove.
I watched the video. Lots of fast forwarding ... scooping up and putting back in the bucket looked like a nightmare. There was no scooper in my pack. I got a plastic party cup ready but also wondered why did he pour the whole lot in if there was so much excess? SO I DECIDED NOT TO DO THAT.
I did get another party cup to put over the drain but not sure worth it as I didn't over pour that much and drain was taped.
I mixed the product for the full 10 minutes, slowly to avoid bubbles, not mixing properly seems to cause most issues. Scraped all edges of tub and mixed in. Waited 5 minutes. Mixed for another 5 minutes. Product was smooth consistent warm and fluid.
I poured just enough on the top to drip slowly down the walls. Then I rolled that amount on top of the bath, not too carefully but got into corners. Excess rolled into the bath.
I worked top to bottom moving around the excess, down and across bath wall.
As needed I poured a little more down walls. All within 5-10 mins. Not in a hurry but I was aware the product has about an hour of workability.
THIS PRODUCT HAS AMAZING SELF LEVELLING.
I tried scooping towards the very end as i did still over pour. My plastic cup collapsed, product got on my hands and dripped everywhere... Definitely pour carefully to avoid excess if you can.
Whole process completed within 20 mins.
I then removed all the tape. Doing this while product was still wet meant i could touch up spots I accidentally hit removing the tape.
I used the roller to move around excess pooling in the bottom and scraped the roller back into the product tin. I did have bumps/slips/random things drop onto the bath during that first 30-60 mins. I rolled the area. Orange peeling appeared. Within 10 mins the product self levelled and peel effect disappeared.
Be patient. Don't be scared to touch up if necessary but don't be tempted to keep rolling indefinitely. I didn't overpour so didn't have lots of excess so didn't have to roll our lots of waves.
Plus i did want a thick base on the bath to avoid chipping/lifting of thin product which is wanted after a professional reglaze.
I removed the cup over the drain. Then I used a pencil paint brush to collect product pooling over drain.
Outstanding Results - Be Patient with the Process
Jdawg✓ Verified Purchase•May 17, 2023
This product worked exceptionally well, and the end result turned out great. Check out my before and after photos. I will not repeat what many of the other Amazon reviews say, but instead highlight a few process steps that I think are important, or that I may have done differently than others.
1) I did this in Ohio in January, so I made sure the room was heated to 76-degrees for a day before installation, during installation, and two days after installation. I also put the product in the room so it could heat up for a day prior to the install. I think this helped significantly. Having warm product seemed to make it flow nicely when poured.
2) As you'll see in the photos, my tub was in horrible condition. I did the acid wash with the Lysol power cleaner, I let it dry, I scraped anything I could get off with a razor blade, I power-sanded areas that needed to be smoothed out, and then I did another acid wash with the Lysol power cleaner. I used a hair-dryer to make sure everything was super dry. I used a can of compressed air to help blow old caulking out of the edges and corners. I did not strip the entire tub down to the base. If I could get the old stuff off with a razor blade, I did, but if the previous coating was in good shape, I left it alone. You'll see this in the photos.
3) I covered every plumbing fixture that could possibly drip with plastic bags. Glad I did, because things that I didn't think would be dripping, actually did drip a bit overnight. For example, the hot and cold handles dripped, which surprised me. Spend a few extra minutes and just wrap all plumbing components in bags.
4) When pouring the product, I did not pour in the entire container. When I watched the videos, the guy seemed to spend a ton of time removing excess product, so I poured about 2/3 of the product in. I still had a bit to remove near the end of the process, but not nearly so much.
5) I was too chicken to pour the front, being concerned it would ruin my nice marble tile floor. I just rolled the front really well and got the product on very thick, and it worked fine.
6) I used a clean putty knife and a small artist brush to help push the product into tight corners and difficult spaces where the roller was too big. This worked fine, and the product evened out nicely. I would consider the putty knife and small artist brush to be must-have tools for installation.
7) I used Frog Tape (a higher-end painters tape) to tape the front. It worked very well and was easy to remove the next day. Since I planned to roll the front, I was not quite as concerned with tons of dripping product down the front. Take your time removing the tape the next day, and have a razor blade handy in case you need to help coax the tape off.
8) I taped the drain, but didn't remove the tape until the next day after the product had hardened. I was concerned I would mess things up if I took it off while the product was drying, or that I would take it off too early and my drain would fill up with the product. Taking it off the next day took some time, but it turned out very well. I used a box cutter to very, very, very carefully cut around the drain and pull the tape off. If you do it this way, go slow and be careful not to slip with the knife and cut the bottom of your tub.
Overall, I can't imagine a better product to use for bathtub restoration than this one. It goes on so much thicker than everything else. It's more expensive, for sure, but the results are worth it. Also, it's a bit tricky to do the installation, so like everyone else says, watch several videos and prepare yourself.
Based on how this turned out, I think this will last for years. If for some reason I have issues in the future, I'll update my review.
Page 1 of 2