Handicap Grab Bars Rails 30-Inch Toilet Handrails Bathroom Safety Bar Hand Support Rail Handicapped Handrail Accessories for Seniors Elderly Disabled Bariatric Railing Wall to Floor Mounted Bath Grips


Key features
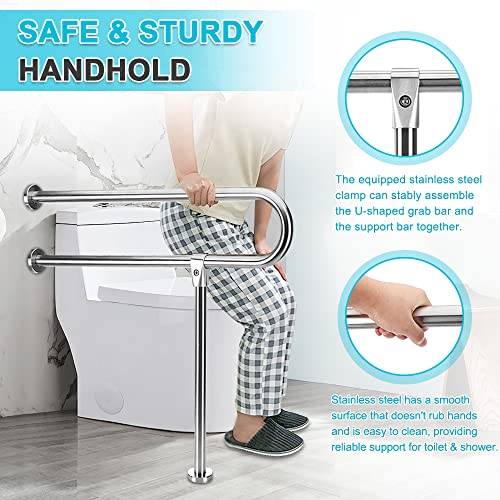
- •【30 Inch】HIGH QUALITY HANDICAP GRAB BARS: This handicap handrails made of 304 stainless steel, diameter is 32mm*1.1mm ,sturdy and durable, grab side bar supports up to 440lb weights.
- •GREAT BATHROOM TOILET SUPPORT:T-shaped handicap rails is mounts to wall and floor design, to help user keep balance in the bathroom.
- •PRACTICAL HOME CARE:The medical safety toilet hand bars designed for seniors,pregnant, elderly, disabled , post-surgery mobility-impaired people, prevent them slip or fall down.
- •EASY INSTALLATION-you can installed this toilet grab bar in short time according to the instructions.if you are looking for a bathroom safety grab bar with leg, We recommend you choose this this hand grip.
- •APPLICABLE SPACE: barrier-free facilities or family toilets in public places such as bathrooms, hospitals, nursing homes, welfare houses, disabled activities centers, and hotels.
Handicap Grab Bars Rails 30-Inch Toilet Handrails Bathroom Safety Bar Hand Support Rail Handicapped Handrail Accessories for Seniors Elderly Disabled Bariatric Railing Wall to Floor Mounted Bath Grips
List Price: $145.21$130.69DEALYou Save: $14.52 (10%)
Free shippingFree Returns – 30 daysFree Order CancellationSecure Payment2–3 Days DeliveryGet It June 25, 2026In Stock (1)No marketing spamNo account requiredFulfilment by FedEx / Amazon / UPS / ShipwirePayPal / Card Buyer Protection
Customer Reviews
Reviews sourced from verified Amazon purchasers4.4
out of 5
Based on 10 reviews
5★
70%
4★
30%
3★
0%
2★
0%
1★
0%
Good product
Eman✓ Verified Purchase•September 1, 2023
Works as described and solid install
extends from wall further from most grab bars
Lynne Phila✓ Verified Purchase•August 28, 2023
This bar is great because it extends 30 inches from the wall. Most bars extend only 23 or 24 inches, meaning you essentially need to reach behind your body to grab it. Having the bar alongside, or in front, is much more sensible.
Safety first.
Roy Fourr✓ Verified Purchase•August 14, 2023
Was installed by a professional. Solid and strong. Good safety measure for our needs.
Sturdy, good design, could use a couple of tweaks
Gadfly-in-Residence✓ Verified Purchase•July 29, 2023
I purchased these Zelen 30" handicap grab bars rails after returning Zelen's 24" version, which were too far back for the user and therefore not safe. We're much happier now with the 30". Here are a few observations:
Pros/Kudos
1. For use as toilet assist rails, the 30" version comes far enough forward to help guide mobility challenged users to get up and down. The 24" version was so far back while you're seated on the toilet that you risked hurting your shoulder or making yourself less stable getting up from the seat. This might not be the case, though, for smaller toilets with round bowls (instead of elongated ones).
2. Each rail or post on the 30" version is connected to the wall or floor by five screws. If you have dry wall, this means that three of the five screws are sure to go into a stud, making the installation more secure. The 24" version used only four screws per rail/post, so, unless you can find a way to shore up the stud, half of your screws go into wall anchors and empty space--not exactly up to ADA standards.
3. The brushed stainless steel looks pretty good with the rest of our brushed nickel finishes, which means the rail feels more like an intentional design choice, as opposed to most of those fugly free-standing grab rails. Granted, that's fine if you don't mind that "handicap accommodation" look, or you only need grab rails temporarily. Personally, though, I find them depressing to look at for the long term (and did look at, for a couple of years, before permanently installing these Zelen grab rails).
Cons/Suggestions
1. The 24" version concealed the screws with brushed stainless covers that were threaded and screwed into place, whereas our 30" version's concealers just push into place and can come loose.
2. Both versions, 30" and 24", could use some rubberized grips on the underside of the rails.
3. I know it's possible to unbolt the round screw plate from each rail and trace it onto the wall, but it would be helpful if an actual template, with both screw plates presented at the right distance from each other and from the floor, came with the installation instructions. That would make things go much faster. (I don't think there's any sort of template that would help set flush the post; that just takes trial and error measurements and a leveler.)
3. I wish there were some attachable accessories available (for purchase) to make these rails even more utilitarian"”maybe a toilet roll holder or a remote caddy, hand towel holder, LED lights, something like that. Other toilet grab rail manufacturers have these sorts of things already built into the design of their grab rails.
4. The screws provided are too short. I didn't use them and instead used 3-Inch 8 Coarse Thread Screws (that are rated for outdoor use and moisture).
Overall, though, I'm generally happy with this purchase. Would recommend.
Good product, but inadequate mounting hardware and directions
Steve Elston✓ Verified Purchase•July 18, 2023
Once assembled and properly installed this railing should add safety to toilet areas. Overall the design is good.
However, the mounting hardware is ridiculously light weight. The directions are a very generic one page sheet, which really tells you nothing if you have ever installed anything remotely like this before.
Be aware, you will need a 9 mm hex wrench to put this assembly together. Nowhere is this written that I see.
If you have a helper, installing this railing will be much easier. I did not, so I proceeded as follows, after a few failed test runs.
1. Go to a good hardware store and get some heavy duty screws and dry wall anchors (if you need the later). I used 12 by 2 1/2 screws for most of this job. Make sure you dry wall anchors are the kind that hold from the inside, not the plastic pound-in type.
2. Carefully fit the railing to the area you are installing in. I used a framing square and level to make sure I had everything reasonably plum.
3. Install the upright first. This gives you an stable point to do the rest.
4. Mark and drill for the upper wall plate. Then detach the upper wall plate.
5. Loosely attach the upper wall plate, and then mark the lower plate holes. If you try to do this all at once you will have alignment problems, unless you are much better at these things that I am:)
6. Finally, screw in both wall plates, and admire your work!
Page 1 of 2


