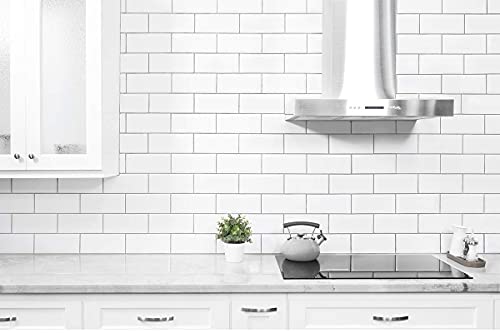
STICKGOO 10-Sheet Peel and Stick Subway Tile, Stick on Tiles Backsplash for Kitchen & Bathroom in White (Thicker Design)


Key features
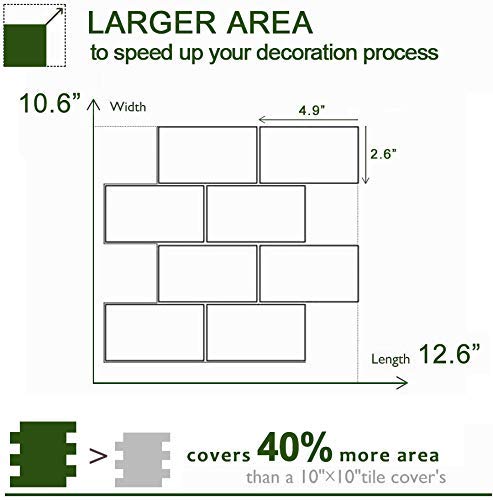
- •✿1.4 Times Coverage Area: 10 sheets thickened self-adhesive tiles, 12.6" X 10.6" each, which covers 40% more area than 10"x10" tile covers
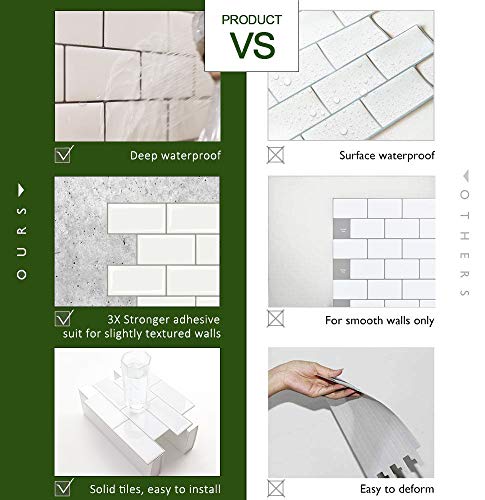
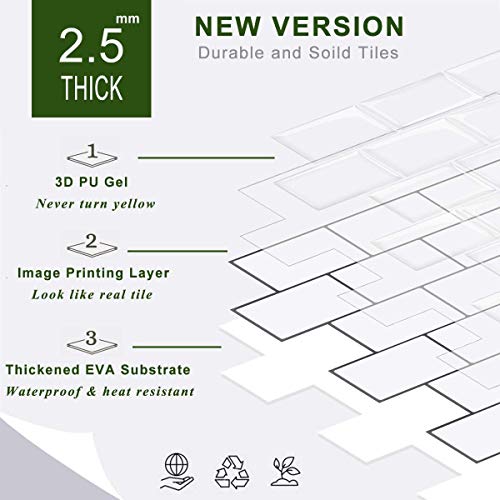
- •🌹2-3 Times Thickness: More thicker than ordinary peel & stick tile, 1.5mm-2.5mm each, not easy to bend and not tile stickers
- •❁Stronger Upgrade Adhesive: 3X Stronger backing glue than normal vinyl tiles, sticks to clean & sleek surfaces and lightly textured wall
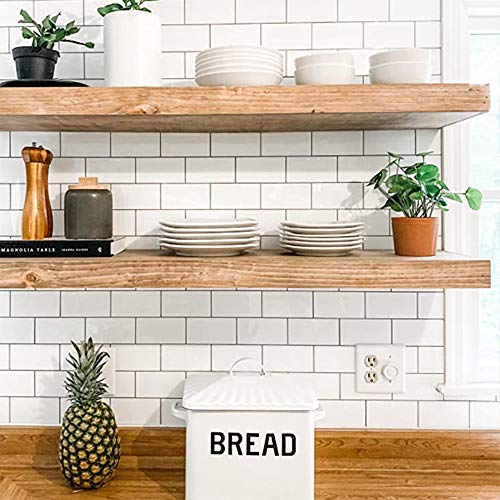
- •❃Widely used in kitchen island walls, bathroom & shower backsplash, fireplace decoration and installed behind the stove
- •❀Easy Do It Yourself: Just peel, align and stick, no overlap needed, no grout and no mess, easy to maintain and clean
STICKGOO 10-Sheet Peel and Stick Subway Tile, Stick on Tiles Backsplash for Kitchen & Bathroom in White (Thicker Design)
List Price: $69.82$62.84DEALYou Save: $6.98 (10%)
Free shippingFree Returns – 30 daysFree Order CancellationSecure Payment2–3 Days DeliveryGet It October 26, 2026In Stock (1)No marketing spamNo account requiredFulfilment by FedEx / Amazon / UPS / ShipwirePayPal / Card Buyer Protection
Customer Reviews
Reviews sourced from verified Amazon purchasers4.4
out of 5
Based on 10 reviews
5★
70%
4★
30%
3★
0%
2★
0%
1★
0%
Better than other brands
Shmevisity✓ Verified Purchase•October 19, 2023
I tried a different brand of subway tile "˜"stick and peel" a year ago, and it looked so fake and terrible. I ended up throwing it in the garbage and it peeled paint underneath. But THIS product is so much better!
I used this to give my children's Kidcraft Kitchen a makeover. It is far better than I had hoped. It has me considering getting it for my real kitchen. It's nice quality, really beautiful actually.
I used this to give my children's Kidcraft Kitchen a makeover. It is far better than I had hoped. It has me considering getting it for my real kitchen. It's nice quality, really beautiful actually.
Definitely heat resistant!
Amanda Adamson✓ Verified Purchase•October 13, 2023
This is the right product for behind a stove, I had to remove my previous backsplash because it melted. I installed this new tile easily, maybe a 15 minute install job tops! The next day I put it to the test using all my burners and oven at the same time preparing Thanksgiving dinner! It looks great, just like real tile too.
Don't be afraid to use this blue...
SE_Gardener✓ Verified Purchase•September 4, 2023
Finishing the kitchen remodel I've left the backsplash because I couldn't decide what to do with it. I knew I didn't want the tired overused white subway tile and didn't really want a patterned tile. I've ordered in samples of just about every backsplash tile from peel and stick to self-stick ceramic to actual tiles. I've seen white, black, patterns and everything thing in between. My challenge was a small galley kitchen that couldn't support either too subtle or dramatic treatment. I wanted a tile that would open up the space and bring energy into the room. Off and on over the months I'd start looking again, but nothing seemed to catch my eye. Still undecided I found this StickGoo peel and stick tile in realistic subway tile dimensions in the color blue. I've never had anything blue in any kitchen and thought on a lark this color might be what I was looking for. When received I opened the package and immediately thought "Oh no, not robins egg blue". But I propped up a few tiles around the kitchen anyway and wouldn't you know it grew on me. In the kitchen the blue took on a slight green undertone making it almost like a calypso blue, the color blue you sometimes see in the tropical oceans - not at all the blue I first saw when I opened the package. I've painted my entire home interiors warm white BM Cotton Balls and layer whites and let the colors of my accessories and furniture make up my pallet. So with the warm white cabinets and black stainless appliances, this blue fits right in. Now my next dilemma is to decide do I want to run the tile up the wall along the chimney exhaust to either the tops of my cabinets or to the ceiling. Across from the range with a window over my black granite sink. that blacksplash is in the blue as well. The blue energizes my kitchen, reflects the light and seems to bounce it to each side. It's cheerful in the morning. I'm glad I chose this tile. Hopefully the pics I've attached will help you decide if it's right for you.
UPDATE:
2/27/2021 After living with the new backsplash now for a week or so I made the decision to run the tile up the chimney hood wall to the height of the cabinet tops. The lower backsplash portion was a nightmare but the chimney wall was worse. Neither of the side cabinets are level, one is 1/4" higher than the other. I decided to run the grout lines level across the 10' space which meant every edge tile required custom cutting. The area around the chimney hood was just as tedious but with the hood not centered between the cabinets every - 5/8" on one side and nearly 1-1/2" on the other EVERY tile was custom cut. The sink side was equally challenging with uneven electrical sockets/switches. And when designing this tiny galley kitchen tried to center the sink under the window but the dishwasher forced a smaller sink base cabinet taking me nearly 2" off center. It took me several layouts before I was able to align the tile grout lines maintaining this center line. So visually although the cabinets, window and sink are slightly offcenter, I took advantage of the grout lines to appear that everything is centered - the eye is drawn to my "center" line when looking straight on at the sink/faucet/window. Smaller spaces make misalignments easily seen. It's surprising how misaligned cabinets, sinks, windows and tiles are in nearly every home. And once you see this misalignment you can never unsee it.
All the effort just to keep the grout lines level, square and perpendicular is worth it. I'm very happy I made the effort - the outcome looks fabulous. This is a very difficult color to photo. This last photo is most representative of the color. Also a note on adhesion - as I do with all self stick products I clean the surface with oven cleaner (Easy Off No Odor). usually one try works but on heavily soiled surfaces a second may need to be done. I then spray isopropyl alcohol on a cloth and dry wipe the area. I allow the surface to dry for approx an hour. You'll see the clean and be able to feel it. My self stick products never peel with this approach even with high humidity, temp changes warm or cold. The trade off however it's not easy remove and reposition tiles. I never use water to clean.
UPDATE:
2/27/2021 After living with the new backsplash now for a week or so I made the decision to run the tile up the chimney hood wall to the height of the cabinet tops. The lower backsplash portion was a nightmare but the chimney wall was worse. Neither of the side cabinets are level, one is 1/4" higher than the other. I decided to run the grout lines level across the 10' space which meant every edge tile required custom cutting. The area around the chimney hood was just as tedious but with the hood not centered between the cabinets every - 5/8" on one side and nearly 1-1/2" on the other EVERY tile was custom cut. The sink side was equally challenging with uneven electrical sockets/switches. And when designing this tiny galley kitchen tried to center the sink under the window but the dishwasher forced a smaller sink base cabinet taking me nearly 2" off center. It took me several layouts before I was able to align the tile grout lines maintaining this center line. So visually although the cabinets, window and sink are slightly offcenter, I took advantage of the grout lines to appear that everything is centered - the eye is drawn to my "center" line when looking straight on at the sink/faucet/window. Smaller spaces make misalignments easily seen. It's surprising how misaligned cabinets, sinks, windows and tiles are in nearly every home. And once you see this misalignment you can never unsee it.
All the effort just to keep the grout lines level, square and perpendicular is worth it. I'm very happy I made the effort - the outcome looks fabulous. This is a very difficult color to photo. This last photo is most representative of the color. Also a note on adhesion - as I do with all self stick products I clean the surface with oven cleaner (Easy Off No Odor). usually one try works but on heavily soiled surfaces a second may need to be done. I then spray isopropyl alcohol on a cloth and dry wipe the area. I allow the surface to dry for approx an hour. You'll see the clean and be able to feel it. My self stick products never peel with this approach even with high humidity, temp changes warm or cold. The trade off however it's not easy remove and reposition tiles. I never use water to clean.
Measure, measure, measure and you should be pleased!
Anna N.✓ Verified Purchase•August 1, 2023
After the Great Barbeque Sauce Incident of Easter 2020, I researched a lot of self-adhesive backsplash options before trying Stickgoo. I bought samples of a few other products and I bought one package of Stickgoo. In my opinion, Stickgoo was the only option that could pass as real tile. As a result, I bought 3 more packs.
I strongly suggest you obtain the following tools for your installation:
-Cork-backed metal ruler
-Box cutter or larger X-Acto style knife WITH A NEW BLADE(s)
-Level
-Cutting mat
-Sharpie marker
-Pencil
If you're applying these to more than one wall or a wall with recessed areas (and subsequently corners), you'll want to start in one of the corners. I suggest starting in the least visible corner you have because, honestly, your first few tiles will probably be the sloppiest of your application.
Regardless of where you start, before you do anything, you're going to want to draw a line to place the upper edge of the tiles against. DO NOT RELY ON YOUR COUNTERTOPS to provide a level surface against which you line up your tile sheets. We bought our house newly built and there hasn't been time for anything to "settle" and after putting up my Stickgoo tiles, I found neither my counters OR my cabinets are level. [Insert meanie face].
A few hints:
-I found that cutting the tiles from the back (with the tile facing down toward the cutting mat) created cleaner cut lines. Because the tiles have the tile "sticker" on the front, the knife tended to drag through this sticker and made for a ragged cut.
-When cutting out space for an outlet, measure at least 47 times. There is nothing more disheartening than painstakingly measuring and cutting an opening for an outlet in your beautiful Stickgoo panel to find that it's a quarter inch too long. If you're spatially challenged like I am and cutting the tiles from the back, it was a true magic act to measure for the opening on the front of the tile and then cut it from behind. At one point, I was honestly willing to just cook meals outside from now on.
-When needing to overlap the "grout", I would suggest trimming one or the other. The grout did not overlap for me very well so I found if I just cut the grout off completely for one or the other, it fit much more snugly.
-Measure twice (or 47 times) and cut once. When you're talking about a tile sheet that's ~$5+ each, you really don't want to waste them.
The cost is the main reason I gave Stickgoo only 4 stars. To put up the "backsplash" in my small kitchen, it cost nearly $200. While I realize this is a fraction of what tiling it would cost, these are ostensibly dimensional stickers.
I do wish Stickgoo had a "trim" available. A few of their comps do, but they're made specifically for their products to work with the specific thicknesses of their products.
Unfortunately, I did not take any "before" pictures, but the entire wall was painted red. We are very pleased with the "after" results, though!
I strongly suggest you obtain the following tools for your installation:
-Cork-backed metal ruler
-Box cutter or larger X-Acto style knife WITH A NEW BLADE(s)
-Level
-Cutting mat
-Sharpie marker
-Pencil
If you're applying these to more than one wall or a wall with recessed areas (and subsequently corners), you'll want to start in one of the corners. I suggest starting in the least visible corner you have because, honestly, your first few tiles will probably be the sloppiest of your application.
Regardless of where you start, before you do anything, you're going to want to draw a line to place the upper edge of the tiles against. DO NOT RELY ON YOUR COUNTERTOPS to provide a level surface against which you line up your tile sheets. We bought our house newly built and there hasn't been time for anything to "settle" and after putting up my Stickgoo tiles, I found neither my counters OR my cabinets are level. [Insert meanie face].
A few hints:
-I found that cutting the tiles from the back (with the tile facing down toward the cutting mat) created cleaner cut lines. Because the tiles have the tile "sticker" on the front, the knife tended to drag through this sticker and made for a ragged cut.
-When cutting out space for an outlet, measure at least 47 times. There is nothing more disheartening than painstakingly measuring and cutting an opening for an outlet in your beautiful Stickgoo panel to find that it's a quarter inch too long. If you're spatially challenged like I am and cutting the tiles from the back, it was a true magic act to measure for the opening on the front of the tile and then cut it from behind. At one point, I was honestly willing to just cook meals outside from now on.
-When needing to overlap the "grout", I would suggest trimming one or the other. The grout did not overlap for me very well so I found if I just cut the grout off completely for one or the other, it fit much more snugly.
-Measure twice (or 47 times) and cut once. When you're talking about a tile sheet that's ~$5+ each, you really don't want to waste them.
The cost is the main reason I gave Stickgoo only 4 stars. To put up the "backsplash" in my small kitchen, it cost nearly $200. While I realize this is a fraction of what tiling it would cost, these are ostensibly dimensional stickers.
I do wish Stickgoo had a "trim" available. A few of their comps do, but they're made specifically for their products to work with the specific thicknesses of their products.
Unfortunately, I did not take any "before" pictures, but the entire wall was painted red. We are very pleased with the "after" results, though!
Beautiful backsplash
Dan Rosolowski✓ Verified Purchase•July 31, 2023
This backsplash really classed up the room. Installing was a little tedious at times, but a DIY beginner can definitely do this. Our razor cutter did not work well so we used heavy duty scissors to cut. It definitely is not perfect, but I am very happy with overall result.
Page 1 of 2