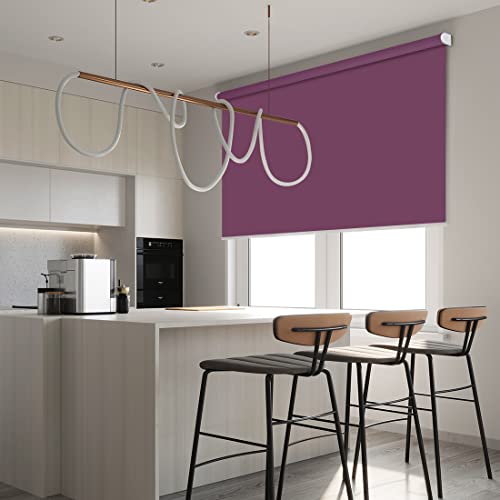
ZSHINE Motorized Blackout Window Blinds Customize Width (23-95 Inches) Remote Control Wireless and Rechargeable Roller Shades Blinds for Windows, Home, Office, Hotel, Club, Restaurant… (Rose Red)


Key features
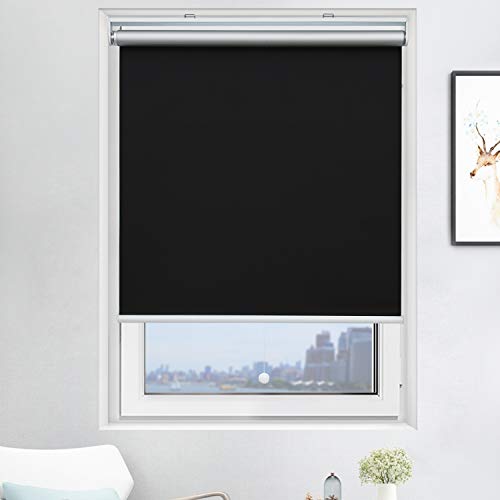
- •Material:Polyester, 100% full blackout, water-proof and easily washable, suitable for multiple applications like bedrooms, offices and toilets.
- •Remote control: We offer 2-channel/6-channel remote controller, It can control 2/6 blinds/shades independently or control 999 blinds/shades together.If you have Broadlink RM4 Pro or Smart TUYA key at home, you can control our shades and set timer through all models of Alexa and Google Home.
- •Made to order: Motorized Blackout Window Shades is customized, please find the "Customize Now" button on the top right of the page. Follow its guidance to customize your order.
- •Package: Customer self-installs, all the mounting kits, instructions are included in the package. The remote basic program is a factory set before ship. You can also ask for the video or PDF version instructions.
Brandzshine
CategoryRoller Shades
Size118"L x 95"W
ColorRose Red
WarrantyWe offer 2-year warranty on motors and controls.
ZSHINE Motorized Blackout Window Blinds Customize Width (23-95 Inches) Remote Control Wireless and Rechargeable Roller Shades Blinds for Windows, Home, Office, Hotel, Club, Restaurant… (Rose Red)
List Price: $181.88$163.69DEALYou Save: $18.19 (10%)
Free shippingFree Returns – 30 daysFree Order CancellationSecure Payment2–3 Days DeliveryGet It June 24, 2026In Stock (1)No marketing spamNo account requiredFulfilment by FedEx / Amazon / UPS / ShipwirePayPal / Card Buyer Protection
Customer Reviews
Reviews sourced from verified Amazon purchasers4.4
out of 5
Based on 10 reviews
5★
80%
4★
20%
3★
0%
2★
0%
1★
0%
Good blinds, poor instructions, you need a CR2032 battery for them to work
M. Baines✓ Verified Purchase•December 13, 2023
These blinds work well once installed. The instructions that are included with the custom length don't match the actual blinds. The instructions look to be for a non-motorized version. It's fairly easy to figure out though, the blinds came with two mounting brackets, one has a square end for the motor slot on the right end, and the other has a metal ring that the left roller end goes in. There is a spare roller attachment included but no info what that is for. I'm guessing it is in case you remove the motor and use it as a manual blind. But you can't do that as the mounting bracket for the motor side is different. One thing to note is that the remote control requires a CR2032 battery and the blinds only operate with the remote, so you will need to buy that battery before you can use them. The blinds I bought are the outside mount style and they aren't completely black out as they mount about 1/2" away from the wall, so you get some light around the edges. We just added some blackout curtains over the blind and that works great.
INSTRUCTIONS TO PROGRAM REMOTE CONTROL
CBaker✓ Verified Purchase•December 12, 2023
INSTRUCTIONS TO PROGRAM REMOTE CONTROL
The remote control will control several shades. The key is that the shades need to be programmed all on a single channel in order to work together.
I have 3 shades and programmed my remote so that channel 1 would control the first shade, channel 2 the second shade and channel 3 the third shade. Then I programmed channel 4 to operate all 3 shades at the same time. Here is how to do it:
(Before you do anything you have to put a 2032 button battery in the remote. It doesn't come with one.)
First pick a channel for your first blind. (Channel 1 would be the best option)
Poke the program button on the shade until the LED light comes on and the shade moves up and down
Poke the "Set" button in the battery compartment (the one to the left of the battery) one time to link the channel and the shade together
Hold the program button on the shade again until the shade moves up and down and the LED light goes off. Now this shade can operate by itself when you choose channel 1 on the remote.
Next choose channel two on the remote and follow the same instructions as above for the second shade. Then again for the third shade. Now when you choose that particular channel on your remote it will operate that individual shade.
To link all three shades so that they operate together do the following:
Choose channel 4 (or whatever channel is available) and then poke the program button on the first shade until it moves up and down.
Poke the "Set" button in the battery compartment once, then hold the program button on the window shade until it moves up and down a couple of times and the red LED light goes off.
Do the same thing for each shade still using only channel 4 (or whatever channel you chose to operate all the blinds simultaneously) Once you program all three shades to operate on channel 4 you need to go back to each shade's independent channel and get them all to the same level. Then go back to channel 4 and when you press the up and down button all three will operate together.
SETTING THE AUTO STOP POINTS:
Choose the channel for whichever shade you want to set the stop on. Hold the down button and the "Set" button at the same time until the LED on the shade blinks and then release the buttons. Next lower the shade using the down button until it is where you want the "Auto Stop" to be. While in this programming mode you can use the 25% button and the 75% buttons to micro move the shade up or down so it is in the exact position you want it to be. Now poke the "Set" button on the back of the remote.
Follow the same procedure to set the "Auto Stop" for the UP position.
Now when you go back to channel 4 (after you have positioned each shade to the same height) it should operate all three shades together.
Very nice product!
Brian✓ Verified Purchase•December 11, 2023
Bought these for our bedroom which has two windows that are hard to reach. Wanted complete room darkening to help me sleep on days when I work nights. I did get the side rails to completely block light. Nice looking, Easy Install. Nice to open the shades with a remote. Keeps the room nice and dark when needed. When ordering be exact with your measurements. They make them exactly to fit your opening.
Great product
Lamya Salim✓ Verified Purchase•November 19, 2023
Thank you for your quick response and delivery love my blinds
Elegant Design
RM✓ Verified Purchase•November 17, 2023
The blind is very elegantly designed, easy to install and works well.
There's no charging information in the instructions other than:
"The charging motor need to be charged every three months." There's a notation in the package that the motor battery needs to be fully charged for 6 hours before installation. A red LED lights up on the motor bezel while charging, then goes out when fully charged. After a full charge, if the charger is plugged into an outlet and the cable is plugged back into the motor, the LED light does not come back on to indicate charging has begun. I assumed the battery needs to be discharged to a certain level before the charge cycle is allowed to begin again. There's also no indication as to whether the charger and cable can be left plugged into the motor and powered during use, so I left the cable plugged into the motor for this installation, but chose not to plug in the charger block again until the battery needs charging.
The remote's programming instructions need to be re-written so they make better sense in English. The Mandarin-to-English translation is choppy, vague and has the typical typos and grammatical errors.
The mounting bracket receptacle on the motor end of the blind is a very tight fit in a few of the available indexed positions. Using a small amount of silicone grease on the male portion of the bracket before insertion will help to ensure that it inserts into the motor's receptacle completely.
Overall I was very impressed with the blind, and most importantly, the senior customer that I purchased and installed this blind for was happy as well.
Page 1 of 2