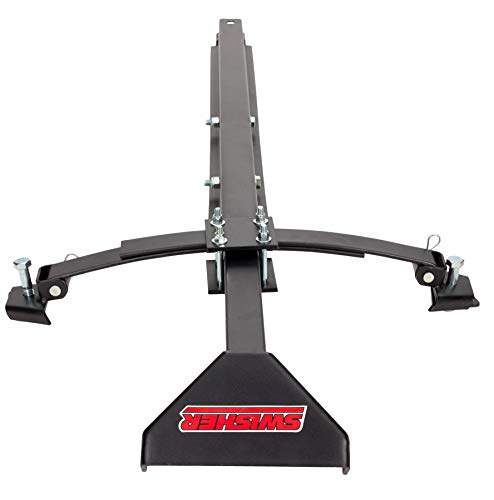
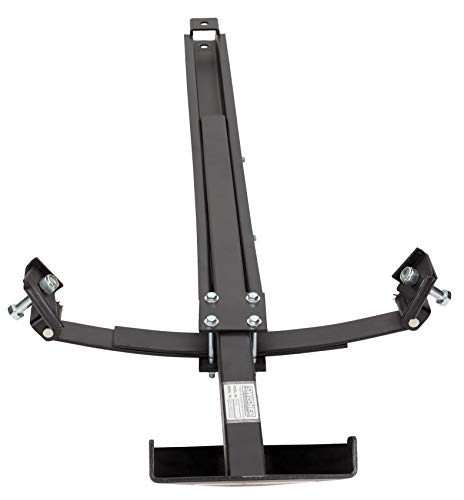
Swisher 2646 Universal ATV Mounting Kit


Key features
- •Fits most ATV's
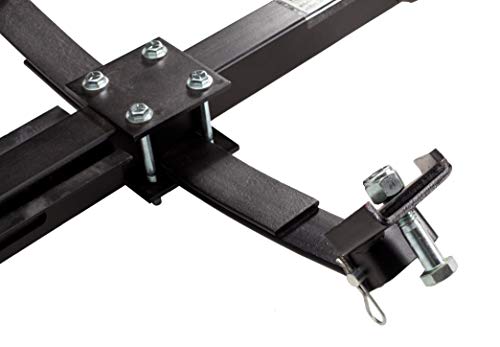
- •Attaches to rear hitch and front A-arms
- •Leaf spring design of steel tubes bolsters front suspension
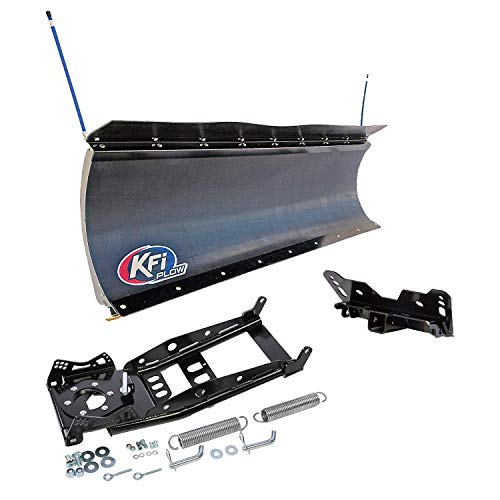
- •Used in conjunction with Swisher Plow Blades or Swisher Dump Bucket
Swisher 2646 Universal ATV Mounting Kit
List Price: $290.91$261.82DEALYou Save: $29.09 (10%)
Free shippingFree Returns – 30 daysFree Order CancellationSecure Payment2–3 Days DeliveryGet It June 23, 2026In Stock (3)No marketing spamNo account requiredFulfilment by FedEx / Amazon / UPS / ShipwirePayPal / Card Buyer Protection
Customer Reviews
Reviews sourced from verified Amazon purchasers4.4
out of 5
Based on 10 reviews
5★
50%
4★
50%
3★
0%
2★
0%
1★
0%
Swisher universal mount, 60" blade and dump bucket reviewed all together, because they go together
Tom Connor✓ Verified Purchase•July 27, 2023
Installed on a 2005 Kawasaki prairie 360. Pushing the 60" swisher plow or universal dump bucket. Also installed a Harbor Freight 3500 lb winch to raise and lower the blade/box with necessary snatchblocks to slow lift speed. The rear ATV tires are chained.
Mounting kit: Easy on and easy off. Two pins and a big bolt. I like the long bar that transfers thrust loads to the trailer hitch. Unfortunately, It takes up about 4" of ground clearance at the front so the ATV gets high-entered a lot in rutted dirt and snow. After the first pass with a blade all is well. I'm exploring ways to get better ground clearance, but whatever I do the kit takes up 3-4" of ground clearance.
60" blade: One pin holds it to the universal mount, plus the cable pulley, so it is easy to remove. I've used it to plow deep snow and to smooth freshly moved dirt. Since the winch doesn't apply a down-force the blade skims dirt, then suddenly digs in and stops the ATV. Finding the 'just right' height with the winch is a challenge, and going over uneven ground adds to the challenge. In snow the attached skids are about right and the blade does a wonderful job after the first pass.
Dump bucket: One pin holds it to the universal mount, plus multiple cable pulleys, so it is easy to remove. The box just skims over settled dirt. I haven't tried it on loose dirt, but on gravel roads it does a wonderful job once the bucket gets a few hundred pounds of gravel in it to weight the blade. I use it to pile gravel in potholes, then smooth the gravel. Lifting the bucket full of gravel causes the ATV suspension to squat and the universal mount kit drags the ground, so uneven road, roots and rock would probably stop it cold.
Dumping: Loaded with gravel, releasing the dump lever is a bear. it needs to be longer, and a piece of pipe slipped over the handle should do that just fine. Or, set the bucket on the ground, release the lever and lift the bucket does about the same thing.
I need to excavate under a cabin. The plan is to use a small trencher to drag dirt onto a sheet of plywood, then scoop the dirt up off the plywood with the dump bucket.
I installed three snatchblocks on the winch cable for the bucket - two on the atv cargo carrier and one on the bucket plus the cable end anchored to the bucket to get enough lift to raise a loaded bucket and to slow cable speed down a lot. It was overkill. Two pulleys would probably be adequate.
I got the scarifier blade for the bucket but have not installed it, partly because the bottom of the bucket sits flat on the ground, so adding teeth does nothing useful. I need to see if there is a way to tilt the bucket so the teeth can dig into the soil. I haven't looked at it very carefully with torch in hand yet.
I need to excavate under a cabin. The plan is to use a small trencher to drag dirt onto a sheet of plywood, then scoop the dirt up off the plywood with the dump bucket.
I have a warn electromechanical lift on order for two reasons: 1. It frees up the winch to tow the ATV when it gets high-centered, and 2. it can apply a down force for leveling dirt. http://www.amazon.com/gp/product/B004AGGX56/ref=oh_aui_search_detailpage?ie=UTF8&psc=1
The ATV front suspension is too soft for the dump bucket and doesn't help the push blade. The plan is to get it to stand taller and squat less under load so I set tire pressure to the max ordered a set of heavy duty springs for the front struts. Some suggested uplocks on the struts to eliminate squat completely. I haven't looked into that yet.
Swisher is awesome!!!
Bonnie Williams✓ Verified Purchase•July 17, 2023
Swisher was awesome to work with, we had a CanAm and needed extra connections. They were knowledgeable and we dealt directly with them to get what we needed. Awesome company.
Packaging is a joke, once you have all the parts it works well.
Michael Campbell✓ Verified Purchase•June 7, 2023
Mount is not packaged securely at all, several bolts were missing as well as one of the leaf springs. The Installation instructions consist of a parts diagram and a step by step list that seem like they were translated from Chinese. Basically you need to figure it out for yourself. I was skeptical of the durability of the A-Arm mounting brackets sliding off, but so far it works pretty well.
An ATV multi-tool
DSmith✓ Verified Purchase•June 3, 2023
This mount can be used to attach everything from a dump bucket to a forklift on the front, and with an accessory kit you can attach garden plows and other implements on the back. I've got this mounted on my 2009 Yamaha Grizzly 350 IRS with a snow plow and so far it is working great. Take my advice and at least get your ATV up on ramps so that it is easier to work under. You'll also need a few large-diameter deep sockets. Installation is fairly straightforward, and the instructions were detailed enough to get the job done.
Pay attention to your ATV's clearance and Swisher's recommended specs!!
my2cents✓ Verified Purchase•June 2, 2023
This is cool! The kit ties into the lower swing arms and uses leaf springs to support the implement's load (in my case Swisher's dump bucket), so that the atv's suspension and winch doesn't bear all the burden. It really is a clever design.
After ordering but before arrival, I started fretting over some of Swisher's requirements and recommendations and am writing this review to hopefully help others decide whether or not to purchase.
Disclaimer: I literally just finished installing and though I tested raising and lowering, loading, dumping and conveying, I have zero real world usage.
What I have:
- 2003 Honda trx350tm Rancher (not a 4x4). Swisher's recommendation is for 350cc or greater if using w/bucket
- 8.5" clearance to skid plate (9" is recommended)
- Badlands 2500 lb. winch.
Per Swisher the winch must have a mechanical brake. Not sure mine does, but it lifts and lowers the bucket nicely and holds the bucket in place when raised and when under a load. The wind speed of this winch is slower, which in other applications would be undesirable, but in this use case, makes implement elevation easy to manage.
Setup: I used car ramps to raise the front end up and sat on a thrift store boogie board for a bit of cushioning.
Installation: The main decision point here is which bracket assembly to use and the directions are fairly general, and only show two examples. Each option involves spanning and clamping between split swing arms.
Options:
- a V-shaped clamp bracket which is what I would recommend using if possible and clearance isn't a concern because it's the beefiest option of the bunch. They are low mounting.
- short plate bracket
-long plate bracket
- long plate bracket with U shaped fitting (extends long plate)
The instructions say to attach as close as possible to the wheel (which is the lowest point on the swing arm), but knowing my clearance wasn't quite within the recommended specs, I used the long plates so I could mount the brackets higher on the arms. I initially tried using the U fittings to raise the brackets even more, but the leaf springs were too long to allow for this and bottomed out on the opposing spring's clevis pin cylinder bore before stacking flat together. After experimenting a bit, I settled on the standard long plate bracket which raised the leaf spring a bit more than the short plate.
Other than that installation was pretty straight forward, though I improvised a few techniques that follow to ease installation.
1. Check that the opposing brackets are evenly spaced on the control arm and directly face each other. If slightly off, the leaf springs will not be parallel. Clamping the sides of the springs together before tightening the brackets would help with this. I used bolts as spacers inserted between the bracket plate and swing arm cross member on each side.
2. Make sure the plates press against the swing arms before final tightening. I had to redo this as I didn't initially notice. The problem was the plate angle was wrong and needed to be pressed into position. I positioned a bottlejack
under the square support plates and jacked until the plate angles matched the swing arm angle and made direct contact.
3. Raise the kits long beam by wrapping a tie down around it and hooking onto the atv's rack or other higher structure . The bottle jack can also be used for this purpose.
4. Use a tie down to hold up the rear of the long beam around the atv's receiver if you don't already have a suitable hitch (I am still waiting for an ATV 3 way hitch to arrive). Note:
I believe my aftermarket 2" receiver is offset from the centerline as it is mounted to the right of the rear differential but will have to measure to confirm.
I'll know for sure once the hitch arrives and truly complete the kit installation, but if you have this same setup, I don't think it will pose a problem.
5. To avoid bolt damage in the event the square plate scrapes against the ground, I inserted the bolt heads through the bottom instead of the top as shown in the instructions and temporarily used duct tape to keep them from falling out while getting into position for fastening.
6. Mentioned in the installation, but check that the bracket bolts don't interfere with hard turns to the the right or left.
7. Pay attention to the distance between the hitch hole and the front of the front tires. The beam length has 10" of adjustability. If your hitch sticks way out, you may run into difficulties and may need the extender accessory or a hitch with a shorter shaft. I'm cutting it close, but I believe the hitch I ordered will squeak inside the max length.
End Result: I have 3 and 5/8" clearance from the ground to the lowest point of the assembly (square plates in center). This isn't exactly the Grand Canyon, but is perfectly fine for traversing relatively docile,
non-convex terrain including hills and valleys. I have yet to remove the assembly, but doing so appears easy. Simply remove the bolt and nut from the hitch and the cotter pins from the front brackets. In the rear, I plan to substitute a draw pin hitch in the back if possible so I don't need a wrench to mount or dismount. When dismounted, all that remains attached are the swing arm brackets which are high enough and somewhat shielded so I don't have any concerns over trail riding clearance as the bottom of the bracket only extends down about an inch from up on the swing arm and is positioned well above the rim/axle attachment point. I suppose it could catch on something jutting up from the ground, but I think it's unlikely.
Conclusion: I recommend this product and think it will generally come in handy. This winter I plan to use the bucket for snow removal and to relocate a pile of large rocks. To demonstrate it's capabilities, lol, I sat in the bucket and raised and lowered myself!
Page 1 of 2