Fluidmaster 400AKRP10 Universal, All In One, Complete Toilet Tank Repair Kit For 2-Inch Flush Valve Toilets


Key features
- •Everything needed to make your toilet run like new!
- •Easy-to-install, simple instructions included
- •Universal design fits most toilet models
- •Fits 2" flush valve toilets
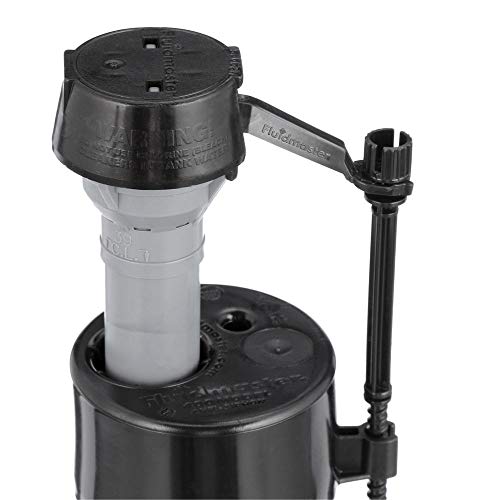
- •400A toilet fill valve adjusts easily from 9" - 14"
- •PerforMAX 2" Adjustable water-saving toilet flapper included
Fluidmaster 400AKRP10 Universal, All In One, Complete Toilet Tank Repair Kit For 2-Inch Flush Valve Toilets
List Price: $37.79$34.01DEALYou Save: $3.78 (10%)
Free shippingFree Returns – 30 daysFree Order CancellationSecure Payment2–3 Days DeliveryGet It June 25, 2026In Stock (30)No marketing spamNo account requiredFulfilment by FedEx / Amazon / UPS / ShipwirePayPal / Card Buyer Protection
Customer Reviews
Reviews sourced from verified Amazon purchasers4.5
out of 5
Based on 10 reviews
5★
50%
4★
50%
3★
0%
2★
0%
1★
0%
It's all you need, almost
David Liang✓ Verified Purchase•September 25, 2023
It took me almost 2 hours to finish the installation so I think I should write down what I think about this kit.
Background:
My house is 16 years old now and there are 3 Mansfield toilets, model #160. All of their rubber gaskets fall off and sometimes it will block the flush valve opening so water keeps leaking to the toilet bowl. I was just going to replace the flush valve but I saw this kit and I think why not.
The good:
1. Good quality
This kit comes in a great packaging, and is easy to open. It comes with detailed instruction and all the parts you need. Most importantly, they are well built.
2. Great engineering design
I am pretty impressed by some of its designs. For example, you can adjust the height of fill valve by simply twisting the lower shank. You can also adjust the tank water level by simply turning the adjustment screw. Oh you can even adjust the flush performance by turning the rubber on the flapper!
The "bad":
Don't get me wrong. I rated 5 stars for this product. I think it's well worth the price. But I do think there are some rooms for improvement.
1. Instruction too detailed
I just found the instruction contains everything you need to know to install the kit, but it's a little bit too much and it could be overwhelming for beginners. There is just so much you need to carefully read through, to ensure you don't install things wrong.
2. Parts not well labeled
The instruction does list all parts in the kit, but I think it would be better if there are some numbers or letters on the parts so that you can easily identify which part is which. For example, the flush valve comes with a thick red rubber gasket. On part 3 of the instruction, the picture shows the rubber gasket needs to be installed as the last layer in the tank. But then it also shows you need to put "tank to bowl gasket" on the bottom of flush valve. It actually took me half an hour to figure out that the red rubber gasket is actually the "tank to bowl gasket". The rubber gasket mentioned earlier was actually already installed on the flush valve pipe.
3. Cut overflow pipe
The overflow pipe that comes with the kit is 9.75" long. You will most likely need to cut it because the instruction said the top of overflow pipe must be 1" below bottom of the tank level hole. I couldn't find my hand saw so I had to use something else to cut it short. It would be cool if they design the overflow pipe just like the fill valve, where you can just turn to make it longer or shorter.
4. Bend tank level
The new lever is straight. The instruction said you would need to bend it. Why not just design it as a bended lever? I had to bend and hold it for at least 5 minutes to see the result.
5. Only comes with 2 tank bolts
The kit only comes with 2 tank bolts, but my Mansfield toilet has 3 bolt holes. The kit actually includes extra rubber washers for 3 bolt toilets. The instruction said you would have to reuse one of your existing bolt sets along with the new rubber. I actually bought "Mansfield 630-0204 2" SmartFasten Tank to Bowl Kit" and used that instead.
The bottom line:
This is a great kit and could be everything you need to completely replace your old fill and flush valve. It's well worth the money.
Easy to assemble
Jason✓ Verified Purchase•September 19, 2023
I liked the ease to assemble. Would be nice if it were easier to cut below the fill line, but luckily I had a saw.
Overall good. But include only 2 long screw nut for the tank install
Tim Bao✓ Verified Purchase•August 23, 2023
It only included 2 screws for the tank install.
Easy to install, superb instructions, quality components
Bob P.✓ Verified Purchase•August 21, 2023
My toilet began to run almost constantly, the tank refilling every 3-4 minutes. I had tried installing individual components which I suspected was the cause with little luck. Instead of buying a new toilet, I decided to rebuilt my existing one since new good-quality toilets are expensive and mine was in excellent condition.
I did a lot of research before buying this set and learned that quite a few new toilet manufacturers use all Fluidmaster components; this is quite a compliment.
The instructions are very thorough, clear and written in easy-to-understand language (in Spanish too). That isn't true of some other brands. Note that it is important to thoroughly clean off scale, rust, and gunk from all areas of the tank and toilet which are going to have rubber gaskets seated on them, otherwise you will have leaks or poor functioning of your new "guts". After installation, my toilet worked perfectly, even better than a new toilet since it is an older model which uses more water than the new models.
NOTE: you MUST determine either the tank capacity or the year of manufacture in order to choose the correct Fluidmaster model. This one is for older model toilets, specifically for 1.6 and larger gallons per flush toilets, and with a 2"³ flush valve as mine does: it dates to 1999. The flush valve hole determines this size. The newer models use much smaller amounts of water and will not flush completely.
I highly recommend replacing ALL components inside the tank, as the gaskets, rubber, plastic and vinyl parts become brittle or gummy due to the corrosive effect of the chlorine which is added to municipal water supplies. In my tank, I discovered that the plastic tube on my flush valve had become brittle and cracked and was leaking, and the flush valve gasket (between the tank and toilet) had turned to a gooey mush and was another source of leaks. ALL of the other gaskets were suspect which is why it is best to replace the whole shebang at once. Check the Fluidmaster website for particulars of each model repair kit before you choose one.
BTW, Fluidmaster suggests changing the guts of your toilet every 5 years due to deterioration of the components. While I personally think most folks will get > 5 years out of the tank guts, it is smart to keep a sharp eye on it.
brass screws are small but great price BEST BANG FOR THE BUCK. PERIOD.
George Martin✓ Verified Purchase•August 8, 2023
well the brass screws that hold the tank to the top of the bowl are really too small.. only about 3/8 of a screw head versus almost 3/4 of and inch screw head on my old brass screws which completely COVERED the rubber gasket almost beneath it . the brass screws in these kits almost fall through my old american standard tolilet . IF there was not a rubber gasket they would fall through ........... that being said this kit GETS the JOB done. MAKE SURE you buy yourself a 12 inch lead in pipe lead with it .......... 3/8 to whatever the bottom of the tank filler thing is . The instructions on this kit are pretty much NOT TELLING you all of what you need to do . YOU have to figure out the most of it on your OWN . ie wing it . try to find something on you tubie or the video which I saw after I had installed my units . I just did TWO OLD RUSTY TEN YEAR OLD TOILETS I HAD TO ALMOST HACKSAW OFF THE SCREWS ON AND THE BUST APART THE GASKET FLANGE HOLDER MEGA BOLT ON THE BOTTOM AND SO ON . NOW TO INSTALL
THE HEAD OF THE FILLER IS SUPPOSED TO BE three inches above the overlow/filll pipe . now this is NOT possible in my tank and still have any space to have water fill . cut about an inch off the overlow fill pipe . now this is what is filling up your bowl underneath . you need to adjust your float to get al much water as possible and still leave a bit of room to adjust it . about six screws up ( fings on the fioating thing ) bring that to about even to the notch on the back or about two inches below the tank top. the floater head is supposed to be at least an inch above the overflow fill pipe with the flapper valve . leave as much of that pipe as possible so your water level in the tank is full and you still have that flapper valve pipe an inch above the water so you do not the headache of water flowing into your toilet all the time which used to take bending the old stopcock ball downward a bit so the water level did not rise as much . now on that flapper valve thing when you install it . TIGHTEN IT THREE TIMES AS HARD AS YOU CAN AT THREE DIFFERENT INTERVALS TO REALLY SEAT IT GOOD. you see it is curved more or less and after the gasket on it seats a bit you find ten minutes later using all fingers on both hands to push it around some more YOU CAN. . put it in first then do one of the tank screws. then tighten again . do the other tank screw then tighten again . etc. on the tank screws . thank them for giving you a gasket below the tank. it is screw , gasket, tank, under tank gasket , washer and nut and then the unit is all in one piece . tighten those gaskets to the MOST TENSION you think they can take , then do again ten minutes later. you would be surprised. the gaskets flatten out and become loose until you do them each about three times as far as you can go . there is a nut above the tank and bowl but not to worry if you seat it right it fits PERFECT. now when you put the whole thing on the bowl . move it around , square it up and PUSH DOWN ON IT . MOVE IT AROUND AND PUSH IT DOWN SO YOU CAN FILL THE TANK HIT THE BOWL . THIS IS THE WAY IT WORKS. . TIGHTEN THE BRASS SCREWS HOLDING THE TANK TO THE BOWL . AS YOU DO IT PUSH DOWN ON THE TANK SO YOU KNOW IT IS HITTING THE TANK TO THE BOWL. PLENTY OF ROOM FOR THAT BOLT BETWEEN . THIS SEALS THE FLANGE GASKET REALLY GOOD AND PROPER. THEN TIGHTEN THE BRASS SCREWS DOWN. THEY WILL MAKE THE TANK HIT THE BOWL AND BE SOLID AS A ROCK. WHEN GET TO THIS NO WOBBLE OF THE TANK SOLID AS A ROCK YOU HAVE MANAGED TO REALLY SEAT THE TANK THE WAY IT IS SUPPOSED TO FIT OR AT LESS A WAY THAT REALLY REALLY WORKS GOOD. THE BRASS SCREWS ARE SMALL BUT AT LEAST THEY HAVE AN EXTRA GASKET UNDER THE TANK TO DOUBLE GASKET THAT SCREW ABOVE AND BELOW THE TANK. ONCE YOU MAKE IT SOLID . THIS UNIT WORKS FINE AND DANDY . IT APPEARS NOT TO BE A UNIT THAT WILL LAST MORE THAN ONE TO THREE YEARS BUT THAT IS UP TO WHAT THE OLD VALVES WERE DOING . YOU COULD PLAY WITH THE BALL AND MOVE THEM WHILE THEY WERE LEAKING TO MAKE THEM LAST LONGER BUT EVERYONE KNEW THE TOILET WAS DRIPPING AND FILLING THE BOWL ETC. NOW I HAVE FORTY AND FIFTY BUCK VALVE GREAT BEST VALVE YOU CAN BUY THING AND WELL THEY DO NOT LAST MORE THAN A YEAR OR TWO EITHER . IE IF YOU DO NOT HAVE A WATER SOFT UNIT ON YOUR HOUSE AND YOU HAVE HARD WATER . IE CALCIUM AND JUNK WHICH REALLY KILLS THOSE FANCY VALVES IN VERY LITTLE TIME . SIX MONTHS MAYBE . FOR MY USE . SELLING MY HOUSE AND NOT PUTTING IN A WATER SOFT UNIT . THESE WORK GREAT . MAKE THE BOWL HIT THE TANK AND YOU HAVE A ROCK SOLID UNIT . ALSO BUY THE FEEDER LINE THAT BRINGS THE WATER TO THE BOTTOM OF THE TANK. TRUST ME YOU NEED THEM. DO NOT TAKE ANYTHING IN PLUMBING FOR GRANTED. BETTER TO HAVE IT ALL AND TAKE BACK WHAT YOU DO NOT NEED ........... THAN TO FIND OUT THE LINE IS LEAKING SINCE THE RUBBER IN IT HAS BEEN MASHED DOWN AGAIN AND AGAIN OVER YEARS. SO AFTER TENS YEARS OF TWO LEAKING TOILETS I JUST FIXED MINE FOR A REALLY REALLY LOW PRICE ON THESE THINGS AND THEY REALLY DO THE JOB. A NEW LING AND PUT ALL OF THIS IN AND GET YOURSELF NO MORE THAN A TWENTY BUCK SEAT THAT IS WOOD AND NOT PLASTIC ( AT WAL MARTIE THEY HAVE EM BUT SELL OUT THEM QUICKLY THE GOOD HARD ONES ) NOT PLASTIC . GOT ONE MORE TOILET TO GO BUT WILL HAVE THEM ALL FIXED AND THEN WILL REPLACE FOUR FAUCETS IN THE THREE BATHROOMS AND FOR VERY VERY LITTLE I GOT MY TOILETS FIXED . THESE KITS REALLY PACK IT IN . THE TWO INCH GASKET UNDER IT , THE FLAPPER VALVE AND ALL . DID NOT MESS WITH DOING THE HANDLES THE OLD HANDLES WERE FINE . BUT BOY . THESE KITS DO THE JOB A BARGAIN . NO NEED TO BUY A FIFTY BUCK VALVE AND THEN BUY ALL THE OTHER PARTS ......... JUST BUY THIS KIT AND MAKE IT TIGHT . AND SOLID AND YOU GOT AS GOOD AS YOU ARE GOING TO GET. NO IT WILL NOT LAST TEN YEARS . LUCKY IF IT WILL LAST TWO YEARS . BUT THAT IS ALL ANYTHING OUT THERE IS GOING TO LAST THESE DAYS. AND OH YES BELIEVE ME THAT FLANGE GASKET BELOW THE FLAPPER VALVE . YEAH IT WAS TOAST . BLEEDING BLACK RUBBER. SO WAS THE GASKET UNDER THE OLD VALVE I HAD . YOU SEE THE RUBBER GASKETS JUST DO NOT LAST. AND EH HARD WATER MESSES UP ANY VALVE SO GO WITH THIS KIT . I GIVE A GREAT REVIEW OVERALL EXCEPT FOR HAVING SMALL BRASS SCREW HEADS THAT HOLD THE TANK TO THE BOWL . BUT BOY THIS KIT FOR THE BUCK IS A STEAL. SEEN THE SAME KIT PRICED AT THIRTY BUCKS EVEN IN HARDWARE STORES , ETC. . CHEAPER ON AMAZON AS ARE A LOT OF THINGS BUT NOT ALL THINGS . YOU HAVE TO WATCH THE MARKET ON ANYTHING YOU BUY THESE DAYS AND CHECK OUT AT LEAST FIVE DIFFERENT PLACES ETC. THIS TIME AMAZON AND THIS KIT IS A BARGAIN AND DOES THE JOB ............. EH FOR MAYBE TWO YEARS ANYWAY . BUT I HAVE HAD FANCY VALVES GO OUT IN SIX MONTHS SO YOU JUST ROLL THE DICE AND HOPE THINGS HOLD . SO FAR I AM BACKING THESE KITS AS THE BEST BANG FOR THE BUCK GOING.
THE HEAD OF THE FILLER IS SUPPOSED TO BE three inches above the overlow/filll pipe . now this is NOT possible in my tank and still have any space to have water fill . cut about an inch off the overlow fill pipe . now this is what is filling up your bowl underneath . you need to adjust your float to get al much water as possible and still leave a bit of room to adjust it . about six screws up ( fings on the fioating thing ) bring that to about even to the notch on the back or about two inches below the tank top. the floater head is supposed to be at least an inch above the overflow fill pipe with the flapper valve . leave as much of that pipe as possible so your water level in the tank is full and you still have that flapper valve pipe an inch above the water so you do not the headache of water flowing into your toilet all the time which used to take bending the old stopcock ball downward a bit so the water level did not rise as much . now on that flapper valve thing when you install it . TIGHTEN IT THREE TIMES AS HARD AS YOU CAN AT THREE DIFFERENT INTERVALS TO REALLY SEAT IT GOOD. you see it is curved more or less and after the gasket on it seats a bit you find ten minutes later using all fingers on both hands to push it around some more YOU CAN. . put it in first then do one of the tank screws. then tighten again . do the other tank screw then tighten again . etc. on the tank screws . thank them for giving you a gasket below the tank. it is screw , gasket, tank, under tank gasket , washer and nut and then the unit is all in one piece . tighten those gaskets to the MOST TENSION you think they can take , then do again ten minutes later. you would be surprised. the gaskets flatten out and become loose until you do them each about three times as far as you can go . there is a nut above the tank and bowl but not to worry if you seat it right it fits PERFECT. now when you put the whole thing on the bowl . move it around , square it up and PUSH DOWN ON IT . MOVE IT AROUND AND PUSH IT DOWN SO YOU CAN FILL THE TANK HIT THE BOWL . THIS IS THE WAY IT WORKS. . TIGHTEN THE BRASS SCREWS HOLDING THE TANK TO THE BOWL . AS YOU DO IT PUSH DOWN ON THE TANK SO YOU KNOW IT IS HITTING THE TANK TO THE BOWL. PLENTY OF ROOM FOR THAT BOLT BETWEEN . THIS SEALS THE FLANGE GASKET REALLY GOOD AND PROPER. THEN TIGHTEN THE BRASS SCREWS DOWN. THEY WILL MAKE THE TANK HIT THE BOWL AND BE SOLID AS A ROCK. WHEN GET TO THIS NO WOBBLE OF THE TANK SOLID AS A ROCK YOU HAVE MANAGED TO REALLY SEAT THE TANK THE WAY IT IS SUPPOSED TO FIT OR AT LESS A WAY THAT REALLY REALLY WORKS GOOD. THE BRASS SCREWS ARE SMALL BUT AT LEAST THEY HAVE AN EXTRA GASKET UNDER THE TANK TO DOUBLE GASKET THAT SCREW ABOVE AND BELOW THE TANK. ONCE YOU MAKE IT SOLID . THIS UNIT WORKS FINE AND DANDY . IT APPEARS NOT TO BE A UNIT THAT WILL LAST MORE THAN ONE TO THREE YEARS BUT THAT IS UP TO WHAT THE OLD VALVES WERE DOING . YOU COULD PLAY WITH THE BALL AND MOVE THEM WHILE THEY WERE LEAKING TO MAKE THEM LAST LONGER BUT EVERYONE KNEW THE TOILET WAS DRIPPING AND FILLING THE BOWL ETC. NOW I HAVE FORTY AND FIFTY BUCK VALVE GREAT BEST VALVE YOU CAN BUY THING AND WELL THEY DO NOT LAST MORE THAN A YEAR OR TWO EITHER . IE IF YOU DO NOT HAVE A WATER SOFT UNIT ON YOUR HOUSE AND YOU HAVE HARD WATER . IE CALCIUM AND JUNK WHICH REALLY KILLS THOSE FANCY VALVES IN VERY LITTLE TIME . SIX MONTHS MAYBE . FOR MY USE . SELLING MY HOUSE AND NOT PUTTING IN A WATER SOFT UNIT . THESE WORK GREAT . MAKE THE BOWL HIT THE TANK AND YOU HAVE A ROCK SOLID UNIT . ALSO BUY THE FEEDER LINE THAT BRINGS THE WATER TO THE BOTTOM OF THE TANK. TRUST ME YOU NEED THEM. DO NOT TAKE ANYTHING IN PLUMBING FOR GRANTED. BETTER TO HAVE IT ALL AND TAKE BACK WHAT YOU DO NOT NEED ........... THAN TO FIND OUT THE LINE IS LEAKING SINCE THE RUBBER IN IT HAS BEEN MASHED DOWN AGAIN AND AGAIN OVER YEARS. SO AFTER TENS YEARS OF TWO LEAKING TOILETS I JUST FIXED MINE FOR A REALLY REALLY LOW PRICE ON THESE THINGS AND THEY REALLY DO THE JOB. A NEW LING AND PUT ALL OF THIS IN AND GET YOURSELF NO MORE THAN A TWENTY BUCK SEAT THAT IS WOOD AND NOT PLASTIC ( AT WAL MARTIE THEY HAVE EM BUT SELL OUT THEM QUICKLY THE GOOD HARD ONES ) NOT PLASTIC . GOT ONE MORE TOILET TO GO BUT WILL HAVE THEM ALL FIXED AND THEN WILL REPLACE FOUR FAUCETS IN THE THREE BATHROOMS AND FOR VERY VERY LITTLE I GOT MY TOILETS FIXED . THESE KITS REALLY PACK IT IN . THE TWO INCH GASKET UNDER IT , THE FLAPPER VALVE AND ALL . DID NOT MESS WITH DOING THE HANDLES THE OLD HANDLES WERE FINE . BUT BOY . THESE KITS DO THE JOB A BARGAIN . NO NEED TO BUY A FIFTY BUCK VALVE AND THEN BUY ALL THE OTHER PARTS ......... JUST BUY THIS KIT AND MAKE IT TIGHT . AND SOLID AND YOU GOT AS GOOD AS YOU ARE GOING TO GET. NO IT WILL NOT LAST TEN YEARS . LUCKY IF IT WILL LAST TWO YEARS . BUT THAT IS ALL ANYTHING OUT THERE IS GOING TO LAST THESE DAYS. AND OH YES BELIEVE ME THAT FLANGE GASKET BELOW THE FLAPPER VALVE . YEAH IT WAS TOAST . BLEEDING BLACK RUBBER. SO WAS THE GASKET UNDER THE OLD VALVE I HAD . YOU SEE THE RUBBER GASKETS JUST DO NOT LAST. AND EH HARD WATER MESSES UP ANY VALVE SO GO WITH THIS KIT . I GIVE A GREAT REVIEW OVERALL EXCEPT FOR HAVING SMALL BRASS SCREW HEADS THAT HOLD THE TANK TO THE BOWL . BUT BOY THIS KIT FOR THE BUCK IS A STEAL. SEEN THE SAME KIT PRICED AT THIRTY BUCKS EVEN IN HARDWARE STORES , ETC. . CHEAPER ON AMAZON AS ARE A LOT OF THINGS BUT NOT ALL THINGS . YOU HAVE TO WATCH THE MARKET ON ANYTHING YOU BUY THESE DAYS AND CHECK OUT AT LEAST FIVE DIFFERENT PLACES ETC. THIS TIME AMAZON AND THIS KIT IS A BARGAIN AND DOES THE JOB ............. EH FOR MAYBE TWO YEARS ANYWAY . BUT I HAVE HAD FANCY VALVES GO OUT IN SIX MONTHS SO YOU JUST ROLL THE DICE AND HOPE THINGS HOLD . SO FAR I AM BACKING THESE KITS AS THE BEST BANG FOR THE BUCK GOING.
Page 1 of 2


