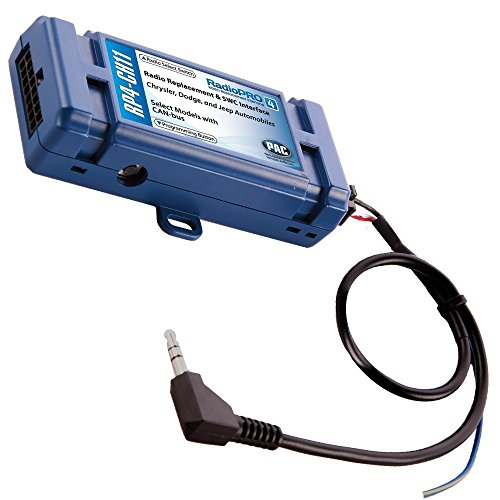
PAC C2R-CHY4 Radio Replacement Interface for Chrysler,Blue,8.75in. x 9.00in. x 2.00in.


Key features
- •Replacement interface harness for select Chrysler vehicles with CAN Bus
- •Compatible with amplified or non-amplified systems
- •No longer requires the use SWI-CAN Module to retain steering wheel controls
- •Retain Accessory Power (RAP) 12V Output
- •VSS, illumination, parking brake and reverse trigger output
- •Radio replacement interface for Chrysler vehicles retains all warning chimes including back-up chimes, memory seats, low fuel, door/hatch ajar & other functions.
PAC C2R-CHY4 Radio Replacement Interface for Chrysler,Blue,8.75in. x 9.00in. x 2.00in.
List Price: $123.68$111.31DEALYou Save: $12.37 (10%)
Free shippingFree Returns – 30 daysFree Order CancellationSecure Payment2–3 Days DeliveryGet It June 22, 2026In Stock (28)No marketing spamNo account requiredFulfilment by FedEx / Amazon / UPS / ShipwirePayPal / Card Buyer Protection
Customer Reviews
Reviews sourced from verified Amazon purchasers4.4
out of 5
Based on 10 reviews
5★
80%
4★
20%
3★
0%
2★
0%
1★
0%
Works as described. I installed this in my Dodge ...
Paul Malave✓ Verified Purchase•May 16, 2024
Works as described. I installed this in my Dodge Caliber that has the upgraded Boston sound system with a built in factory amplifier, and it did the trick. I found out I needed this after I installed my new head, but there was no sound coming from my speakers. Be aware that if you are purchasing this item, and you have a factory amplified sound system with CAN Bus, you may not be able to use the speaker wire connections coming from your new radio because it will give you a loud hiss. If you make all the connections and are experiencing a loud hiss, you must use the RCA speaker outputs on your new radio. If you try to use the speaker wires coming from your radio harness, you are trying to send an amplified signal from your new radio to your car amplifier which creates the hiss. If you have a built in factory amp, use the RCA outputs on your new radio wired directly to this module to eliminate the hiss. I just wish this info was included in the instructions. Hope this little bit of info saves you days of headaches. :-)
Quality product
JT✓ Verified Purchase•May 6, 2024
Purchased this unit for a 2007 Dodge Ram and everything worked well after installation. Provided the backup camera power.
Installation instructions could use a little updating but if you have installed radios before, you will figure it out.
Quality product!
Installation instructions could use a little updating but if you have installed radios before, you will figure it out.
Quality product!
Well Worth the $$$
Matt Purwin✓ Verified Purchase•April 17, 2024
Bought for my 2009 Ram 1500 and it fits perfectly. No complaints, wired up to my new Kenwood with ease. Install was a simple plug and play application. Comes with 2 harnesses so make sure you test fit before wiring to an aftermarket stereo. Kept all of the functionality I had in the stock stereo, and I especially enjoyed the feature of keeping the radio powered on up until I open the door after removing the key. Screen on the instrument cluster displays "RadioOn" and "RadioOff", even the dimmer on the truck works with the new radio. Do not try to save a couple bucks and go the cheap route on the harness, this is well worth the money.
pulling the factory radio is pretty easy, you just use the trim removal tool ...
qinz✓ Verified Purchase•April 12, 2024
I fitted into my 2013 Dodge GrandCaravan and also added a rear view camera! Everything works exceptionally well including the factory steering wheel control
I am now Wazing and enjoying my music in my car!!
here are my parts used (sorry, being a new user means I can't post any links)
0: Atoto A6 2GB/32GB Unit --
1. Steering wheel control --
2. Rear View Camera --
3. Dodge Installation Trim Kit including Antenna adapter
4. Soldering iron and solder
5. PAC Radio Replacement Interface --
6. Trim Panel removal tool --
7. Dremel tool set (You need some cutting) --
8. Wire stripper --
9. Multi meter --
10. Electrical tape --
11. 3.5MM jack to three pin connector, (look for it in Radio Shack)
Now, get to installation,
1. pulling the factory radio is pretty easy, you just use the trim removal tool to get the radio panel off and then unscrew the four screws holding the radio in place. Once remove the screws, gently pull the radio out and disconnect the factory harness and radio connector, the radio connector is pretty fragile, be careful not to break it...
2. Connect the harnesses, open the PAC harness package, you need to determine which harness to use, for my car, it was the one with slightly bigger connector, try it on the factor harness first. Then lay down the color/wire mapping on your desk and start connecting the wires, PAC did not actually strip the wires so you need to do it, after strip the wires, gently twist so they connect better, then chris cross on with the ATOTO wires and solder the wires on, I like to put my soldering gun under the wire to heat them up and let them soak the solder rather than melt the solder using the iron, better conenction.. After solder, use tape to mask up the bare wires, you will connect all wires except three, the thin Ground wire, KEY 1, and KEY, go ahead and cover up KEY 1, you dont need that . Like picture 1
3. Wrap the harness, go ahead and wrap the harness so the wires dont go crazy
4. Install Steering wheel control (optional), open the PAC SWI unit package, and turn the dial to 7 before you do anything else, TURN THE DIAL TO 7 first. Then connect the 7pin connector (white) comes out from your PAC interface to your SWI unit, go to your vehicle, connect to factory harness and follow instructions from PAC (every car is different, you need to follow the factory instructions) and program it, then use the multiulmeter to find the pins output the resistive differences (this is a bit tricky, my suggestion is to solder wires to each pins on the 3.5mm connector (see pic 2) and then use your multi meter find which two wires output resistive values when you press a button) after you find the two wires, connect them to thin black ground wire and KEY wire (NOT KEY1), and then fire up the ATOTO unit and go to DEFAULT SETTINGS -- STEERING WHEEL CONTROL and see if it registers the presses, if not, swap the wires (because there is no clear way to tell which one is ground...) after you confirm its working, solder the KEY and ground wire
5. Placing the antennas, place them anywhere you like, even including inside the radio hole, but I went ahead and place the antennas across the trim and near the wind shield on the driver side so they get better reception.
6. Actually installation, because ATOTO is slightly higher than stock unit you need to do a bit cutting, first cut the TRIM Kit side panel about 2mm from both sides, then use Dremel to trim down the top and bottom notch of the stock Trim piece or until it fits
7. Back up camera is also fairly easy, hook it up with the reverse light and tuck the cable under the trim and you are good to go
Hope it is helpful, please leave me a message if you need any help!
Worked perfectly for my Jeep JK
Luv2troll4fish✓ Verified Purchase•April 6, 2024
This is a must have for an older Jeep JK. Everything wires up nicely and aftermarket radio works perfectly.
Page 1 of 2


![American International Fmk526 09 And Up for [Ford] F150 Single Din Kit](https://m.media-amazon.com/images/I/41MQpYFVdfL._SL500_.jpg)


