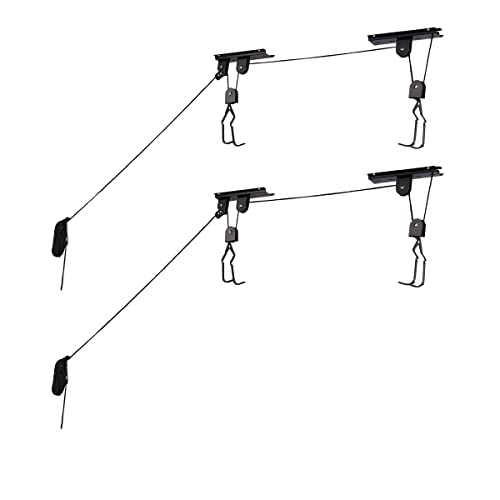
RAD Sportz Bicycle Hoist 2-Pack Quality Garage Storage Bike Lift with 100 lb Capacity Even Works as Ladder Lift Premium Quality


Key features
- •Hooks are designed with a rubber coating to protect your bicycle from scratches
- •Robust engineering allows you to lift heavy bikes-100lbs capacity
- •For Ceilings up to 12ft
- •Safe locking mechanism prevents accidental release
- •Not the same as our competition; we use thicker rope and offer a lifetime warranty
RAD Sportz Bicycle Hoist 2-Pack Quality Garage Storage Bike Lift with 100 lb Capacity Even Works as Ladder Lift Premium Quality
List Price: $39.02$35.12DEALYou Save: $3.90 (10%)
Free shippingFree Returns – 30 daysFree Order CancellationSecure Payment2–3 Days DeliveryGet It June 25, 2026In Stock (1)No marketing spamNo account requiredFulfilment by FedEx / Amazon / UPS / ShipwirePayPal / Card Buyer Protection
Customer Reviews
Reviews sourced from verified Amazon purchasers4.3
out of 5
Based on 10 reviews
5★
20%
4★
30%
3★
20%
2★
10%
1★
20%
This product is completely unusable with a seat like that - and super dangerous
Matthew Knapp•May 12, 2017
The hooks have no bend to them - they are completely flat. The rear hooks slipped off my bike seat twice and the bike fell to the ground twice. The product is dangerous to use as is. I have two other hook and pulley systems that hold my other bikes and they have never once been a problem because they have curved hooks. Stay away from this product for your own safety.
I believe the only reason people have not complained about this a lot is because it does mostly work on "leisure" bikes that have a large bike seat which has a large surface area underneath. On a racing bike or high quality mountain bike, you are going to have a very narrow seat that might also be "slick". This product is completely unusable with a seat like that - and super dangerous!
I believe the only reason people have not complained about this a lot is because it does mostly work on "leisure" bikes that have a large bike seat which has a large surface area underneath. On a racing bike or high quality mountain bike, you are going to have a very narrow seat that might also be "slick". This product is completely unusable with a seat like that - and super dangerous!
Works well!
Chris•March 1, 2017
My wife and I are storing our bikes in her mother's garage and she requested a mount system to get them off the floor. This one was reasonably priced and easy to install. I mounted these close to each other on purpose, so the bikes have to be raised and lowered together. I like that they take up less air space this way, but I'm going to separate them because they're a bit heavy to raise and lower together as they are each cruisers.
Installation notes: you'll need a full 3 1/2 inch wide 2x4 if mounting perpendicular to the ceiling joists. I used a scrap 2x4 I had previously milled down to about 3 1/8 inches and it turned out to be too narrow so I had to swap out another board. Also, I would recommend mounting the hoist BEFORE mounting the 2x4. Doubt that work in the ground would be much easier than doing it over your head, on a ladder. I got my shoulder workout that day!
Installation notes: you'll need a full 3 1/2 inch wide 2x4 if mounting perpendicular to the ceiling joists. I used a scrap 2x4 I had previously milled down to about 3 1/8 inches and it turned out to be too narrow so I had to swap out another board. Also, I would recommend mounting the hoist BEFORE mounting the 2x4. Doubt that work in the ground would be much easier than doing it over your head, on a ladder. I got my shoulder workout that day!
A Real Bargain with Dicey Hooks
Highway•December 7, 2016
This device seems to work well, and the price at $22 for two lifts is a great bargain. I especially like the brake mechanism and how it works. To lower the bike, you have to hold the cord vertical to release the brake and pull down on the bike itself to overcome rope friction. Lifting is fairly easy and could be done by almost anyone. The only obvious deficiency is the apparent insecurity of the connection between the bike and the hoist hooks. Making a good installation and a plan to secure the hooks to the bike will take more time and thought than you might expect. If you are not a skilled handyman, buy something that is already on a track.
More details:
I wonder how well the cord will hold up in the long term. I inadvertently missed one pulley with the lift cord, and one or two lift cycles revealed serious fraying due to the pinching between frame and pulley. I was able to pull out the frayed section through the back end of the lift.
The hooks cannot be trusted to maintain a secure connection to the seats on my particular bikes. I used rope loops, made from the excess provided, to connect the bike frame to the hooks, and this is satisfactory. Ends of the cord provided can be fused with heat.
At the handlebar end, the hooks seem reasonably trustworthy, if not disturbed, but they can be pushed free with moderate pressure. This is unacceptable in terms of child safety. I have added a carabiner through the hole in the wishbone bracket that the hooks hang from. I loop a rope sling around the handlebar post and fasten it to the carabiner as extra security. The sling by itself could support the bike, if necessary.
The installation sheet suggests optionally mounting the brackets on a 2 X 4 or wider board. In my opinion, the mounting board is not optional. The brackets are the same width as a 2 X 4, which suggests that a 2 X 6 is a better bet. If you are going to span 4 feet of joists, you need 51 inches of length, so you may as well use two 5 footers.
The installation sheet suggests using 3 1/2 inch X 1/4 inch lag screws. I did so, but by the time you get through two-plus inches of the mounting board plus drywall plus washer, there is something less than 1 1/2 inches of penetration into the joist. A little longer bolt might be better. Also, they show an installation having only two lag bolts (Figure 3), which is not enough margin for error. This is because it is easy to miss the center of one of the joists or to encounter a flaw in the wood.
The installation sheet suggests drilling a 5/16" hole, but doesn't say through what. For a pilot hole into the joist, 5/32" seems about right, so I think this may be a misprint. To get the shank of the bolt through the mounting board, 5/16" could work but 3/8" will provide a little more wiggle room for aligning bolts with pilot holes.
Caution with this product!!! - It's okay, but you need to modify a couple things or it's dangerous
pfinbrooklyn•July 8, 2016
Check the other negative reviews first about this product. As has been noted, the hooks are actually L shaped and the bike can slip off. Also, the rubber that fits on the 'hook' isn't glued on and can easily slip off, which almost guarantees the bike will come crashing down at some point. Happened to me a couple times, luckily from not too high up so no injuries to me or bike.
I'm giving it 3 stars rather than 1 because I was able to fix these problems and now it works much better. The locking mechanism works very well. But you need to fix these problems! Or be VERY careful each time you pull it up to make sure bike doesn't slip off 'hooks'. Why manufacturer couldn't just make them hooks and glue the rubber on is beyond me... Dangerous without doing so. Wondering how there are so many positive reviews that don't catch this? Perhaps they changed the design over time to save money, but it's dangerous as it's shipping today without making the mods...
The 'hooks' are attached by a bolt and can be removed, which I did on one side and replaced with a climbing carabiner. This guarantees it can't come crashing down.
Also, the rope is pretty cheap and it twists over time. I'm going to replace with braided synthetic rope, which supposedly resists twisting.
Again, it works well in the end but not without these mods...
An absolute MUST, with a couple changes...
brian s.•April 19, 2016
Overall this is a functional product. With 11ft ceilings and no where to put kids bikes, it was a must for my situation. In the end I am glad I used this type of product, especially with my added straps.
Pro: brake works well, my kids can easily raise & lower bike. Does what it should.
Con: the rope will turn your hands black, not a 30 minute job with drywall & painted ceilings.
Note: Bikes can raise & lower with one end up (see photo) if attached to tire. Since the seat & bars are solid & don't move it will go up level with those attachment points. However, I found it's not a big deal as the bikes will level out at the ceiling. I wasn't comfortable with the rear of the seat attachment so I opted for the rear tire instead, plus it allows the bike to raise all the way to the ceiling. This was a big help while parking under the bikes. I also didn't want the bikes falling by accident so I bought some Velcro straps to attach & secure the bike.
Since I needed to mount the bikes next to each other I ended up 16" apart (on center) and moved one bike back about 12" so handle bars wouldn't collide if lifted with bikes pointing in the same direction. I have one more to install between the old mountain bikes if needed.
One change to come: I'm looking for a utility hook or small bike wheel style hook to mount on the wall above the point the rope is tied off. This way the rope will be up & out of the way of any one/thing. I should be able to just whip the rope up on the hook before tying it off and whip it off when lowering.
Page 1 of 2


