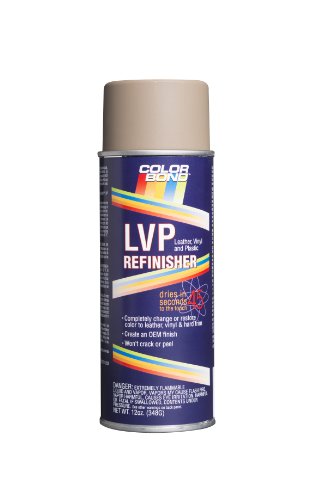
ColorBond (649) Chrysler Beige LVP Leather, Vinyl & Hard Plastic Refinisher Spray Paint - 12 oz.


Key features
- •Leather, Vinyl and Plastic paint for auto interiors
- •Preserves the supple feel you want when you paint vinyl
- •Creates a molecular bond to seal in color
- •Won't flake, crack or peel
- •Bonds in 10 minutes; OEM specified
ColorBond (649) Chrysler Beige LVP Leather, Vinyl & Hard Plastic Refinisher Spray Paint - 12 oz.
List Price: $40.77$36.69DEALYou Save: $4.08 (10%)
Free shippingFree Returns – 30 daysFree Order CancellationSecure Payment2–3 Days DeliveryGet It June 24, 2026In Stock (1)No marketing spamNo account requiredFulfilment by FedEx / Amazon / UPS / ShipwirePayPal / Card Buyer Protection
Customer Reviews
Reviews sourced from verified Amazon purchasers4.3
out of 5
Based on 10 reviews
5★
90%
4★
10%
3★
0%
2★
0%
1★
0%
Great quality
robert hogan✓ Verified Purchase•April 19, 2024
It was incredibly easy and covered wear on front seat as if it were new leather.
Worked fir me
RadTech✓ Verified Purchase•April 11, 2024
I have a 20-year-old van, which had various stains on the tan leather seats and I could not find seat covers which covered the whole seat and which looked decent so I elected to simply spray paint them using this paint. After following the recommended procedure, I applied three coats on each of the seats, ( 2 x cans for two rows) & waited for them to dry before using van. Fast-forward three months later, the paint looks good decent, having covered all the stains and minor cracks, and there's no evidence of flaking or peeling. Works for me
Perfect Color Match - Toyota Avalon leather seat
Steve G.✓ Verified Purchase•March 31, 2024
I didn't realize that leaving a can of spray containing DEET on the seat would plasticize the existing coating on my Toyota Avalon leather car seat... well, that was a one time, never to repeat mistake. I wiped off what I could and waited until the edges of the area were again adhered and were no longer sticky. I was left with essentially a 1" x 7" area where the seat coating was gone and left with uncoated leather.
Then the search for a solution. I found this product on Amazon, but wasn't sure whether this product would work well. Some reviews said the color wasn't quite a match, while others approved. I decided to try, found the interior code from the doorjamb from the line labeled C / TR, which was TRim code LE17 (which corresponds to light grey). And bought this product.
I tested it on a piece of cardboard, and wasn't sure about the color match, even after multiple sprays. I hestitantly decided to try nonetheless... I figured if it were close, that would be better than the existing small section of untreated leather. BTW, the final result was an excellent color match - I don't know what the proper match test is, but it is NOT using a scrap of cardboard. If doing it again, I probably would have used a piece of plastic instead that would not be so absorbent. I think the absorbency had some effect on the color presentation.
I used 220 grit to smooth the edges, then 400 grit, then used a magic eraser to clean the seat. Masked off, since any overspray would be essentially stuck to whatever it found. A couple of minutes of can shaking, four very light sprays later with 10 minutes between drying of coats, and I am (shockingly) very happy with the result - the color is spot on, and the look and feel is the same. If I look really carefully, I can see a very minor small ridge where my prep was not sufficient. This may be easily fixable by additional slight sanding and additional coats. But just looking at the seat, it is really very good, does not appear (without REALLY close inspection) to have been subject to a repair, and is much better than I would have expected. The coating has the same feel, good finish (the repair has slightly more shine, but after I let it cure for a few weeks I know that can be toned down using a very fine grit (400+) sandpaper - much better than working from too flat a finish), the coating is flexible and adheres well, and probably most importantly, the color is really an excellent match.
I noticed that there is very slight tackiness remaining in the seams a day after the work, which tells me that for seams 10 minutes between coats is probably not quite enough time, and that anyone sitting on this seat will be sitting on a towel for the first week or so until the volatiles are completely gone...
Speaking of volatiles... there was not much odor at all, but as with any spray, do this outside and let the car air out. There was little overspray but I would say masking is mandatory, especially if like me you have contrasting colors in the interior. I don't want light grey overspray anywhere, especially on a different color.
Overall, I would say this repair project has been a 9 out of 10, with 50% of that missing single point being either due to insufficient prep or fixable with additional sanding/spraying work, and not due to a deficiency in the product. And the best advice I can give is that the spray containing DEET should stay in the trunk.
Incredible! 2 months after doing it, and my interior leather still looks a million times better!
Liz Bennet✓ Verified Purchase•March 5, 2024
I used this to refinish the leather on my 2003 Land Rover discovery. They didn't have an exact match for my interior color, so I just looked for the closest thing, and luckily it was so close.
Condition of my leather:
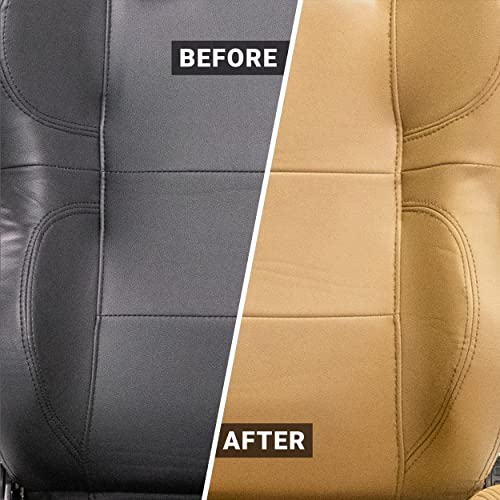
My leather seats were not peeling or torn, but had some light wrinkling cracks from just being squished and sat on constantly. The biggest problem was the original leather paint was just faded away in high-traffic areas, so it just looked like a brownish tan. The before pictures in this review are with cleaned leather seats (that's not dirt, just worn away paint revealing the natural leather base)!
Prep:
1. I covered the interior of my car with plastic and trash bags, to keep overspray from getting on black dash and such.
2. Make sure to test the paint to be sure it matches first. I tested it on a cheap piece of vinyl I had that wasn't in my car, waited for it to dry, compared the colors, and confirmed it looked good before proceeding.
3. It goes on really nice as long as you take your time in thin sweeping motions, slowly layering so as not to get drips
Results:
My car feels like new now. While it's not 100% a professional job, it looks so so much better for the ease and affordability. And since mine is a 2003, anything looked better than the dingy seats before.
It took about 2 cans to do my 2 front seats, steering wheel, and center console lid.
I waited for 2 months after doing it to write the review to be sure it wore well. Still looks so good, The spots on the seat where the leather crinkles naturally from me sitting on it have reshown up as small wrinkles, but that is expected because of the age of the leather. The paint looks incredible still, tho.
Tips:
1. If you accidentally get overspray anywhere, just put paint thinner on a towel (or Qtip for small areas) and rub it off. This stuff dried so fast, but it's not impossible to remove. I got it off my black dash with elbow grease and paint thinner.
2. It dries really quick, but wipe it down before actually sitting on it. It leaves behind a thin dusty residue that will get on your clothes. It rinses off, but it might scare you if you're not expecting it.
Condition of my leather:
My leather seats were not peeling or torn, but had some light wrinkling cracks from just being squished and sat on constantly. The biggest problem was the original leather paint was just faded away in high-traffic areas, so it just looked like a brownish tan. The before pictures in this review are with cleaned leather seats (that's not dirt, just worn away paint revealing the natural leather base)!
Prep:
1. I covered the interior of my car with plastic and trash bags, to keep overspray from getting on black dash and such.
2. Make sure to test the paint to be sure it matches first. I tested it on a cheap piece of vinyl I had that wasn't in my car, waited for it to dry, compared the colors, and confirmed it looked good before proceeding.
3. It goes on really nice as long as you take your time in thin sweeping motions, slowly layering so as not to get drips
Results:
My car feels like new now. While it's not 100% a professional job, it looks so so much better for the ease and affordability. And since mine is a 2003, anything looked better than the dingy seats before.
It took about 2 cans to do my 2 front seats, steering wheel, and center console lid.
I waited for 2 months after doing it to write the review to be sure it wore well. Still looks so good, The spots on the seat where the leather crinkles naturally from me sitting on it have reshown up as small wrinkles, but that is expected because of the age of the leather. The paint looks incredible still, tho.
Tips:
1. If you accidentally get overspray anywhere, just put paint thinner on a towel (or Qtip for small areas) and rub it off. This stuff dried so fast, but it's not impossible to remove. I got it off my black dash with elbow grease and paint thinner.
2. It dries really quick, but wipe it down before actually sitting on it. It leaves behind a thin dusty residue that will get on your clothes. It rinses off, but it might scare you if you're not expecting it.
Ford Camel #326
Amazon Customer✓ Verified Purchase•February 7, 2024
Color-Bond Ford Camel #326 matches a 2008 Ford Expedition interior camel color perfectly. I sprayed my wife steering wheel and it turned out very nice, looks brand new again. Also sprayed some interior trim pieces and the color match is spot on. Sprays very well and dries fast, seems to be durable, time will tell
Page 1 of 2
Related products


Rust-Oleum 340561-6PK Automotive Custom Chrome Spray Paint, 10 oz, Red, 6 Pack
List: $61.09$54.98DEAL