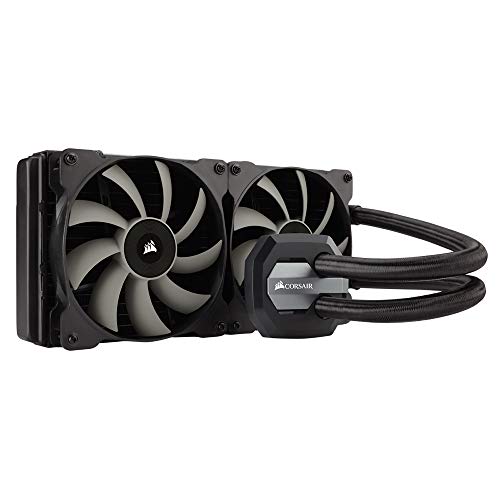
CORSAIR Hydro Series H105 AIO Liquid CPU Cooler, 240mm Thick Radiator, Dual 120mm PWM Fans


Key features
- •Extreme CPU cooling performance with extra-thick 240mm radiator
- •Take advantage of your case's 240mm radiator mount
- •Protect your hardware and increase your CPU's overclocking potential
- •Dual SP120L fans with PWM control for customized cooling performance
- •Includes three color accent rings to match your H105 to your motherboard.Compatibility Intel LGA 1150, 1151, 1155, 1156, 1366, 2011 and 2011-3.AMD sockets FM1, FM2, AM2, and AM3
CORSAIR Hydro Series H105 AIO Liquid CPU Cooler, 240mm Thick Radiator, Dual 120mm PWM Fans
List Price: $234.81$211.33DEALYou Save: $23.48 (10%)
Free shippingFree Returns – 30 daysFree Order CancellationSecure Payment2–3 Days DeliveryGet It June 24, 2026In Stock (2)No marketing spamNo account requiredFulfilment by FedEx / Amazon / UPS / ShipwirePayPal / Card Buyer Protection
Customer Reviews
Reviews sourced from verified Amazon purchasers4.6
out of 5
Based on 10 reviews
5★
50%
4★
50%
3★
0%
2★
0%
1★
0%
Works great now
George Gavaghan✓ Verified Purchase•October 29, 2023
UPDATE - 2017-01-04 : Removed and reinstalled the cooler and now its seems to be working great.
Based on the heat-compound that stuck to the CPU when I removed it, it looks like it wasn't making contact with the entire surface - only the top and bottom of the chip had paste on it, the middle was bare. I obviously didn't have it seated correctly the first time.
Temps are now running ~10 cooler under full load, even after I over-clocked my CPU from 3.5 to 4.2GHz.
Still only 4-stars because I had to completely disassemble my PC to install this 'no tools requires' solution.
-----------------------------------------------------------------------------------------------------------------------------------------------
CPU now running 5 ~ 10°C Hotter then with the stock heat-sink and fan.
Well I just got the H60 (https://www.amazon.com/dp/B00A0HZMGA/ref=cm_cr_ryp_prd_ttl_sol_0) installed on my P8Z77 Motherboard with an i7 3770K CPU, and I am not impressed.
My average Idle-Temp has gone from ~35°C up to ~40°C.
Under 'full-load' (100% load 90% of the time), my average temps have gone from ~75 up to ~84.
The Installation:
The instructions state that 'most cases' these days provide a cut-out allowing access to the back of the MB, so the back-plate can be installed without needing to remove the MB. Of my 8 cases, only 1 has this cutout. I do not think that qualifies as 'most' (but to be fair, most of these cases are > 1 yr old). The case I was installing this into did not have the cut-out, so I did have to remove the MB in order to install the back-plate for the cooler.
I had read other reviews that mentioned the need to remove the MB, so this was not entirely a surprise, but this means their claim of 'no tools required' only applies to some users - a fact the manufacturer's description conveniently leaves out.
The rest of the installation process was fairly uneventful, but please note the 'Quick Start Guide' provides conflicting instructions for installing the fan. The text says the fan should be mounted as "an air intake to your PC", but the illustration shows it installed as an exhaust. I opted to follow the illustration since the idea is to REMOVE heat from the case, not blow it back inside (but considering the results I have obtained so far I will probably try flipping it to see if things improve).
The only other thing I feel is worth mentioning is that the screws provided to install the Fan and Radiator are just a tiny bit longer then they need to be, so when tightened just enough to prevent any rattle or play, they touched and slightly bent the radiator-fins directly under the mounting holes. I can detect no actual damage, and the screws do not appear to touch or effect the 'pipes' carrying the coolant (i.e.: the screws did not cause any leakage), so I am not too concerned about it.
The Test:
With everything installed, I allowed the PC to sit running at idle (
..................Idle../..Full-Load.............
..................5m.../.15s.....1m.....5m...
1st Cycle: ~36 / ~74 ~79 ~84
2nd Cycle: ~40 / ~76 ~80 ~84
3rd Cycle: ~38 / ~74 ~79 ~84
The Pump ran at > 4000 rpm the entire time, but the Fan on the Radiator ran at ~1300 rpm while idle, and ~2000 rpm under full-load. [Q-Control was turned OFF for the CPU Fan (the pump), but turned ON for Radiator Fan (CaseFan-1)].
It may also be worth mentioning that when allowed to run under full-load for longer periods of time, the temp continued to increase, albeit at a very slow pace. After 10 or 15 minutes for example, the avg. temp was ~86.5°C, and while that is still a relatively safe-temp, that was about as high as I was going to let it get. Since installing the H60, my peak temps of each core have now reached new highs of 85, 88, 87, and 86. In the last 2 years (running full-load literally 24/7) I have NEVER hit 80°C, and that was using the stock fan and heatsink that came with the CPU.
The Bottom-Line:
I was hoping to be able to reduce my peak-temps by 5~10 degrees, to help increase the life of my CPU (and maybe run BOINC at 100/100), but the H60 did the exact opposite and increased my average temps by 5~10°C.
I am going to try replacing the heat-compound that came pre-applied on the cooler with some Quick-Silver to see if that helps, but if I do not see a drastic improvement, this unit will be getting returned for a refund. At the moment, I have no reason to believe the unit is defective (fan runs, no leaks, and it does in fact cool the CPU - just not very well), so I must assume this unit is simply inadequate, and is not capable of performing as advertised. (Though I must confess that all of the 5-star reviews have me wondering if this particular unit is only partially defective, or dare I say improperly installed. I will update this review after further testing).
9years 10months
MTB LYF 2✓ Verified Purchase•October 22, 2023
For what its worth, the H60 lasted 9 years and 10 months on a PC that was ON 24/7 365 for 98% of the time.
Not too bad.
Not too bad.
It Definitely Does The Job
OldnAchy✓ Verified Purchase•October 13, 2023
I purchased this to replace a Cooler Master ML240 AIO cooler that was disappointing in performance -- 35-36 C idle, 70-73 C load, after re-seating it several times. I will write a 2-3 star reveiw for that one.
My build:
Corsair 780T Case
MSI 370-A Pro motherboard,
I7-8700K CPU,
32GB (4x8) ADATA DDR4-2400 DIM (because I already had the 4 sticks, probably will upgrade these to DDR4-3000 DIM)
AMD RADEON RX 580 ARMOR 4G OC GPU (probably going to upgrade this).
Installation was fairly simple (I've done this before).
There were only 2 installation issues (and why this is 4 vs. 5 star):
-- I had to move my internal dvd burner from the top 5.25 slot to the bottom slot to fit the radiator and fans assembly to the top of the case. You would think that a Corsair case and Corsair AIO, even a 280 would fit without having to do this. Minor irritation,
-- The screw holes on both sides of the radiator -- for fans on underside and case attachment on the top side were "tight." It definitely took some elbow grease to screw both the fan long screws and case short screws in. I was a bit worried that I would strip the screw heads, but using major downward force, along with a phillips head screw driver that fit the screw heads snugly, I got the job done. Definitely a work out.
I installed the fans in a pull configuration, pulling air in from the top thru the radiator as recommended by Corsair.
I used the pre-applied thermal paste, knowing that I could always go back, clean up the cpu and H110 cooling plate, and reapply thermal paste if this didn't work out -- it did.
The system consistently idles at 28-30 C per cell with packet temperature at 30-31 C. I ran the Intel Extreme Tuning application cpu test for 5 mnutes and at 100% load (at 4.3 ghz) max packet temperature never exceeded 62 C. After the test, at idle the temperatures dropped back initially to 34 C then back to 28-30 C. Besides normal internet browsing, including viewing videos, I intend to use the system to do voice over for game play videos, render the result and upload to YT. Using CyberLink Power Director 16 to do this generally has the system running at 50% to 60% load and the cpu temperatures are well within tolerance.
One thing that was disturbing at first was the fan speed and fan noise. Even at the silent setting in Corsair Link, the fans were spinning at 1000 to 1200 RPM and making a bit of a racket. To solve this issue I set up a custom profile for each to drop their speed back to 650 to 700 RPM with a gradual increase as the temperature increased. That is, the cooler liquid temperature. The fans are running much quieter and the cooler temperature stays at a reasonable level. Problem solved. Why the default speed was so high was beyond me. It is possible that this was because I already had installed Corsair Link to monitor my system with the other cooler. I just don't know. Properly connected though if fan speed is an issue, it can be fixed.
Bottom line:
For me this AIO is doing the job. I can't speak for those who plan to overclock their cpus to the max.
With a little elbow grease, the install is pretty simple. The pre-applied paste works.
The cable connections are typical Corsair. SATA for power, 4 pin for cpu fan header (to be recognized by the system) 2 4 pin connections for the fans, and a usb to usb header cable so that Corsair Link can monitor the system and manage the pump and the fans.
Other thoughts:
I opted for the H110i vs. the H115i RGB Pro because I was not that interested in flashing color from the fans and pump cover -- my case has plenty of nice red/orange light thanks to the case fans. The price was also $27 (plus tax) lower. The H110i also had the lowest number of negative reviews. That could be because fewer of these have been reviewed thru Amazon. Lumping all the models in the same review "pool" makes it a bit difficult utilize Amazon reviews but outside reviews have been positive. I believe most negative reviews for Corsair hydro series AIO coolers in general concern pump failure and frustration with customer service. I will definitely update this review if that happens to me.
Barring that I recommend this AIO.
Stylish, great temps!
Amazon Customer✓ Verified Purchase•September 21, 2023
Before I get to the review of the h115i, let me start with what brought me here. I previously had a phantec tc14pe or something like that, I don't remember the exact model, however it was a top of the line air cooler, comparable to noctuas latest air cooler. I purchased the phantec from amazon and it was great excellent temps even at full load, however when I started going for an sli build on top of my sound and wireless card I was crammed for space. So I looked into liquid coolers as I had enough space for radiators, but was pressed for room on the motherboard. Now there is no doubt that a custom loop is the best choice for those who are doing overclocking, but it is more expensive and quite a hassle to put together. Seeing as I was not overclocking I researched into aio coolers, seeing as both my gpus were aio liquid coolers I began research. The top two I saw were the corsair and swiftech brands, now the difference in temps is highly debatable, and negligible for someone like me not overclocking, so I went with the corsair. And without further ado if you made it through my long winded preface, here is my review of the corsair.
Installation:
The package was very nice and everything you would expect from high end PC hardware, safe, sleek etc.
There was the radiator, with the heatsink tightly packaged and had a very sturdy construction the tubing was quite thick and reassured me in my fear of leaks. Now being a 280mm radiator be sure to measure your case and be sure you have the space. There were cords and manuals which I will get into later and of course the two 140mm fans and screws/brackets required for mounting.
Installation itself was surprisingly easy and not as stressful as I anticipated, and compared to the phantec much easier.
Simply mount the radiator and screw it into the case
Attach the fans and connect the required cords.
Simply pick your mobo mount, mine being the socket 1150, follow the instructions and mount through the back of the mobo, attracts the front screws that secure the back bracket and allow for the heatsink to be screwed on, and attach and screw in the heatsink, thermal paste is preapplied so no worries there. After that attach the supplied usb header to the motherboard and then connect to the heatsink to allow the use of corsair link.
After that your done.
For me I had to strategically place zip ties on radiator because the radiator was so long that the last couple screws wouldn't line up but confident that it is secured, so again measure your case.
Performance:
Now this is where most should take into account the difference between a custom loop an aio and phantec.
The corsair h115i performed nearly identical to the phantec. I idle at about 23-27"¢C, and at a full load (keep in mind I'm using 4K resolution) 55-60"¢C temps that were very similar if not exact to the phantec. This is the reality of aio coolers compared to the highest end air coolers. For me it was a trade off between a very very large air cooler (seriously look at the size of a noctua and phantec) which are superb air coolers, and the h115i which freed up a great amount of space on my mobo, and in conjunction with my aio gpus look nice and sleek, whereas before all my cords were stretched to the limit to go over and around the phantec. Overall it was a trade off, I saw no increase in temps compared to the phantec, it freed up tons of space, looks nice and "cool" especially the rgb led lights.
Overall:
Installation: Easy, no real difficulty here for anyone experienced in installing coolers. 5/5
Performance: Excellent, great temps and seeing as I don't overclocking my rig runs nice and cool, and seeing as I gave the phantec cooler a 5/5 on performance, and both coolers run nearly identical performance is an easy 5/5
Sound: Now I didn't go into detail on this one because quite frankly it has never been a concern of mine, my game is either too loud or I have headphones so I never notice, but I know this is a concern of most pc enthusiasts. Sound is almost unnoticeable, if I pay attention I can hear an audible whirling sound but nothing that would at least Imo distract from any gaming whatsoever. Compared to the phantec which was completely and absolutely quiet I have no choice but to say the corsair is a little louder, again imo almost unnoticeable. 5/5
Cons:
The only con I can really speak to is the price, on Amazon with free shipping the cooler is much cheaper compared to $150 retail. However I got the phantec for $85 with shipping, so one must keep that in mind. Seeing as both are comprable coolers.
In conclusion to this essay the corsair h115i is a great aio. Easy installation, excellent performance, cool, and quiet with customizable rgb lighting. The h115i is great cooler for anyone looking into the liquid cooling spectrum, a great middle ground between bulky air coolers, and expensive custom loops.
5/5
P.s if you made it this far bravo.
Overall the H110i is a good choice for an inexpensive, effective liquid cooling solution with a (5) year warranty.
Jeff✓ Verified Purchase•September 3, 2023
I was in the market for an AIO because I recently purchased a known to run hot FX-9590 and I wanted something better than a heat sink tower to cool it down. After weighing the choices between a handful AIO's I chose the H110i mostly because Corsair is the most widely used AIO, and the H110i has the second longest warranty at (5) years.
Installation is actually easier than a big air cooler because you don't have install a custom back plate on your motherboard - unfortunately for me I had take an aftermarket back plate off and install the original back plate to use the H110i. Then find a place to hang the radiator which fit perfectly in the top of the Stryker case by just removing the 200mm top exhaust fan. Note: The Screws provided with the H110i are round heads which interfere with the top screen movement (for cleaning) on a Stryker/Trooper case , but I'm using it as exhaust, otherwise I'd have to find replacement flat head screws.
There are 3 ribbon cables coming out of the water block pump head, one SATA power to energize the pump and fans, the next two flat ribbons are for the two 140mm PMW 2100rpm Corsair SP fans. Note: These fans are 5-700 rpm faster than any of the 140mm fans Corsair distributes to retailers, but they are for sale at Corsair's site as H110GT replacement fans - the only 2100rpm 140mm Corsair sells at this time.
A fourth cable with a single wire plugs into the 3-4 pin CPU fan header for the pump rpm signal.
There's a fifth unattached cable that plugs into a USB receptacle in the pump head and the other end to one of your motherboard's USB headers for using the LINK software. It is not attached permanently like the other cables I assume because the Link software is optional since the H110i will work without it, but if you want a fan configuration other than the default you need to connect it and use the Corsair Link at least until your configuration is complete. Optionally of course you can connect your fans to a fan controller or control using available motherboard headers.
The first thing I noticed when I powered the unit on the first time was a revving up and down of the fans every few seconds which became annoying since the fan rpm's kept going up and down like a kid twisting then dropping throttle on his new 2 stroke motor bike outside your window. So, without panic I decided to familiarize myself with the Corsair Link Software to see if I could fix this revving up and down problem.
I found that the Profile my H110i was configured in out of the box was based upon CPU Package Temperatures. If you were to put the CPU package on a graph it almost looks like a EKG graph (heart monitor) with an AMD FX CPU such as the 9590 because it can vary widely ( amplitudes and intervals) since the package data cycles through the 8 cores every few tics of the clock and some core temps can differ by 10 degrees or more which if the difference temps between cores are on two different sides of the fan curve that means the firmware is constantly telling the fans to speed up and then slow down with every other tic of the clock.
To resolve the revving issue I immediately set my fans to spin at a fixed RPM temporarily and it worked. Then I setup profiles of each speed and tested the speeds at different cpu loads to see how each speed effected the cooling and how much noise they made while doing so in preparation to mapping a fan curve configuration for my needs. I've had it a month and I'm still tweaking it a bit.
I will say that these high rpm fans definitely make this AIO better in performance as at high loads the higher speeds make a difference. With all cores at high load my 9590 stays in the 50's if I allow the fans to ramp up to 1400-2100rpm as needed - otherwise If they are run quiet which is
It took some time to find a fan speed to keep my 9590 idle temperatures stable - BTW I have the 9590 locked at 4.91 GHz, slightly below its 5GHz Turbo rate. I found that a moderately quiet fan rpm setting of about 1000 rpm's keeps my 9590 CPU in the mid to upper 30's depending on ambient start up air temperatures and the H110's coolant temperature (2 hours into its startup today it's sitting at 35C while both surfing and editing this review). After a full load of an hour or more then back to light use the CPU idle temperature tends to settle at about 39-40C since the coolant temps are higher. I expect the temps will go up a bit during the summer heat, but for now I'm more than satisfied with the temperatures while using the H110i. I also tested the H110i with my FX-6300 and it idles at much cooler temperatures that ranged about 26-27 and stayed the 40's when at full load with an occasional rare bump to 50-51C.
As much as I've read complaints about the Link Software, I can tell you that it isn't perfect especially if you're looking for an all in one monitoring solution , but it's certainly effective and once you set your Profile (named configuration) it is locked into the 110i's firmware - so you can unplug the USB and never start the Link software again once you're satisfied with your configuration. While the Link is stable, there are issues such as 2 of my 5 motherboard fan headers ghosting, and their fan speeds not being reported, which otherwise would of been a nice feature, but that is really not why I bought the H110i for a cooling solution.
Setting up Profiles - there are two (2) pump speeds and either speed can be attached to any of your named Profiles. The pump speed can be set to adjust at a specified temperature, but I made it simple and left them on high for all configurations since there is no discernible noise at either speed. There are 8 modes Default, Quiet, Balanced, Performance, custom, fixed %, fixed rpm and Max. In each Profile the modes can be set to each individual fan lead (2), you can copy them over to the other for identical settings or you can alter them if that fits your needs. For example if you had a push pull setup, you could put the top pull fans on one channel and the bottom two on another in case you needed to make the pull side slightly faster to make them more efficient.
There are 5 speed/temperature mapping points on the graph you can base fan curve upon attached to one of the following (7) groups. MB Socket, MB Motherboard, MB Temp#3, CPU Package, HD/SDD Temp, GPU Temp & H10i coolant temp. I created and named at least a dozen custom configurations with the link software some at fixed speeds for specific tasks and some custom curves for most everyday use.
Lastly each device being monitored has a Notification tab available by clicking the item that allows an optional action to be performed should a monitored temperature or fan speed fall outside the range specified. Those actions can be shutting the system down at a specified time interval, energizing RGB features, running an executable file, or ramping up fans 100%.
Did I mention the Corsair logo is and illuminated RGB LED and can be configured in the Link? Well I did now and yeah that's nice and might compel one to consider H110i over an identical AIO that has no LED.
Even though there's room for improvement with the vibrations of the fans while ramping up >1300 rpm and the lack of a complete monitoring solution (ghosting of other system components) with the link software, the bottom line after a month into using the H110i I'd say it was a good choice and I'd recommend it to anyone looking for a inexpensive, simple, yet effective liquid cooling solution.
Page 1 of 2