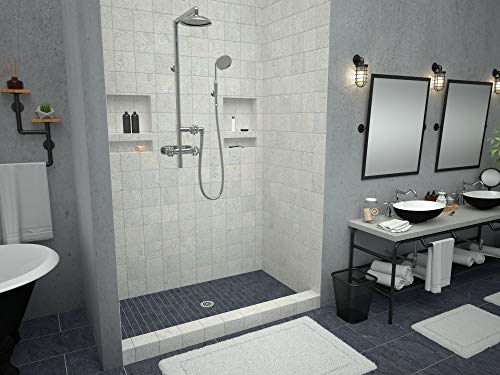
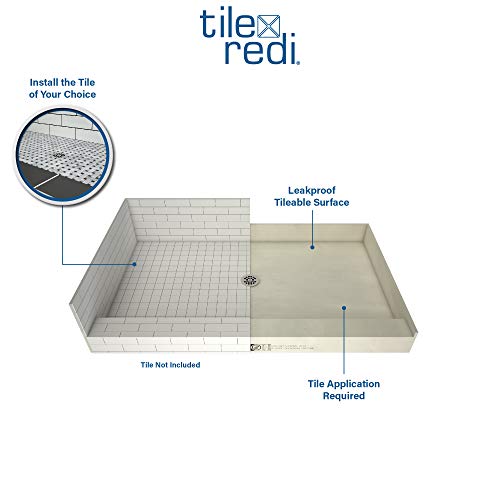
Tile Redi P3648C-PVC Shower Pan with Center Drain- Single Curb Shower Base, 2\" PVC Drain, and Plate Included, 48\" Width x 36\" Depth


Key features
- •Primary material - polyurethane
- •Upc - 813195014802
- •Brought to you by Tile Redi USA, llc
BrandTile Redi USA
CategoryShower Bases & Pans
Size48" W x 36" D
ColorPolished Chrome
Warranty3 Year Limited
Tile Redi P3648C-PVC Shower Pan with Center Drain- Single Curb Shower Base, 2\" PVC Drain, and Plate Included, 48\" Width x 36\" Depth
List Price: $971.01$873.91DEALYou Save: $97.10 (10%)
Free shippingFree Returns – 30 daysFree Order CancellationSecure Payment2–3 Days DeliveryGet It June 23, 2026In Stock (3)No marketing spamNo account requiredFulfilment by FedEx / Amazon / UPS / ShipwirePayPal / Card Buyer Protection
Customer Reviews
Reviews sourced from verified Amazon purchasers3.5
out of 5
Based on 6 reviews
5★
67%
4★
0%
3★
0%
2★
17%
1★
17%
Worked like a charm with very little effort
Bishop RNC•February 23, 2018
Just got finished with installation. Worked like a charm with very little effort. Keeps things waterproof. Great for novice home renovations as instructions are easy to understand. Tile looks great and the corners are square!
Great tile base for shower.
DP Swart•December 3, 2016
Good tile ready base. Installation was difficult with the size and corner placement but successful. Good slope after tiling for drainage. Easy to use and tile. Solid once it was installed, no flex when embedded into the mortar.
I purchased the product through Build. com, The ...
PSefid•November 5, 2016
I purchased the product through Build.com, The product is made of soft plastic. I would not use this product again.
Wish I had framed a normal pan with a membrane
D. Dollahite•October 25, 2016
I did a major master bath remodel, doing the tile myself and contractors for the plumbing, electric, and major carpentry. I have flipped both my first two houses, and this is the 3rd and final bathroom in my current house that I've remodeled, so I'm no stranger to all this. I had used the Redi Niche's in my last shower, and loved them. So easy to install and worth it. Originally, this shower pan (I got the 48 x 48 center drain) seemed like a better idea than having them frame a normal stall with a membrane. It wasn't. First off, my plumber installed it, and admittedly it was his first time installing it, but he's a seasoned plumber and I've used him on a bathroom before, water filtration, gas stove, etc. in the past. Smart guy, never had any issues.
Problem #1: I don't know if the plumber didn't calculate the right amount of mortar for it to push all the way to the edge, or if some went through the subfloor near the drain, but one corner near the front dam was floating about 1/8-1/4 of an inch above the floor. When you stepped on it, it would wiggle. We didn't know this until after the mortar had all set. But if you turn this thing over, I'm not sure what the mortar would set to anyway near the front lip (where you step over the dam to get into the shower). It was all hollow and about 4 inches tall, as opposed to the center which was less than a half inch thick with ribs. What we did was butt the backer board up to the edge lips to press it down to make contact with the floor. This worked, but caused problem #4 below.
Problem #2: The plumber inadvertently brought the pan out 1/2 inch from the studs in the back. The mortar had set by the time the carpenter saw this. I don't know if this was a brain fart on my plumber's part, but it would have been impossible to have this problem with a framed base and membrane. We ended up shimming the ENTIRE WALL of the bathroom half and inch between the studs and sheetrock, and I had to do a special frame for the door in that wall to deepen it. Real P.I.T.A.! Again, plumber's goof, but couldn't have happened going the normal route of framing a pan with a membrane.
Problem #3: When the plumber went to test the drain, my ceiling downstairs got soaked. The drain fitting is very tight with very little leeway and even though he had glued it, we think that it had come loose likely when the contractors were putting the shower stall backer board in and walking on the pan. But also he said the drain was the black type of plastic and the pipes were PVC, so its possible the seal wasn't good due to the different types (I'm not a plumber). So, the wet ceiling downstairs came out, he fixed the drain from there, and I patched the ceiling back up after it dried out.
Problem #4: After everything (including the shower glass) was in, that spot I referred to in problem #1 wasn't draining. Pushing it down to make contact with the floor was enough to mess up the slope. I ended up carving out the grout and removing the stones (the floor was river rock) one by one. After tearing a chunk of the shower pan out with one of the stones, I learned to do it EVER SO GENTLY. Others have commented how strong the epoxy you tile with is ... they aren't kidding. Luckily, it is so strong that I could just epoxy over the cracks and missing chunks I ended up creating in the pan while removing the tile. I don't worry about the water integrity --- that epoxy really is solid. But I ended up removing the whole corner and building up the epoxy base so that it would drain.
Some of all of these issues was inexperience, but if a seasoned plumber had these issues I'd hate to think of what a DIY'er would go through. I thought it would save money and time, and ended up costing more and taking more time. It seems like a good idea, but really isn't. Both the plumber and the contractor said it would have been much easier just framing the pan and doing a membrane.
I give it two stars (versus one) only because it is functional and everything works. Never again.
Highly Recommend
tpwoofs•April 13, 2015
Excellent product. Easy to install and tile. The pan at first appears very light and unstable. Don't worry, after install, it is VERY stable.
Make sure to follow the instructions regarding setting into mortar and tiling.
Enough epoxy was provided to tile the entire pan and curb - make sure to read the instructions for epoxy and use the correct sized trowel. The epoxy dries quickly, so only mix enough for the section you are tiling. I poured the liquid parts of the epoxy (come in plastic bags) into empty water bottles. This allowed me to mix the epoxy in smaller amounts and there was no spillage. We broke a tile drill bit (when installing the shower door) when it hit the epoxy; it dries very hard and provides much of the stability. So, this is an important part.
Page 1 of 2


