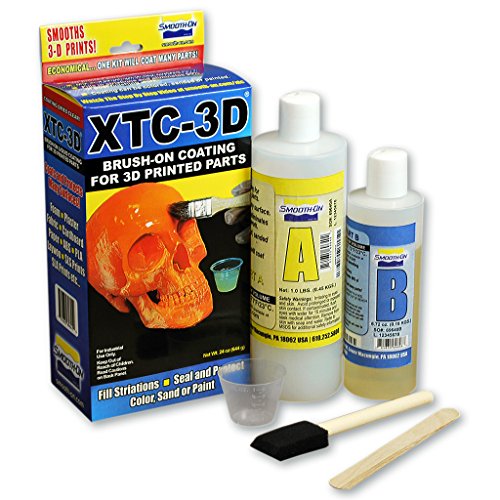
Smooth-On XTC-3D™ 20 Mold Making & Special Effects Silicone Rubber, 3D Print Coating - 24 oz


Key features
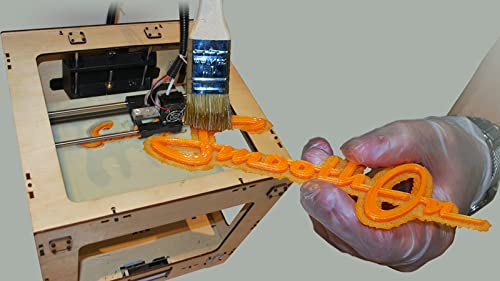
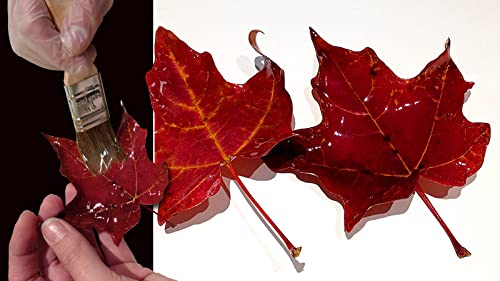
- •Epoxy Coating for 3D Printed Objects
- •Smooths 3D Printed Objects
- •Compatible with SLA and SLS prints.
- •It works with PLA, ABS, Laywoo, Powder Printed Parts and other rigid media. It also can be used to coat EPS, EPDM and urethane foam as well as wood, plaster, fabric, cardboard and paper.
Smooth-On XTC-3D™ 20 Mold Making & Special Effects Silicone Rubber, 3D Print Coating - 24 oz
List Price: $69.82$62.84DEALYou Save: $6.98 (10%)
Free shippingFree Returns – 30 daysFree Order CancellationSecure Payment2–3 Days DeliveryGet It June 23, 2026In Stock (3)No marketing spamNo account requiredFulfilment by FedEx / Amazon / UPS / ShipwirePayPal / Card Buyer Protection
Customer Reviews
Reviews sourced from verified Amazon purchasers4.1
out of 5
Based on 10 reviews
5★
50%
4★
50%
3★
0%
2★
0%
1★
0%
Mix small quantities - takes getting used to
Amazon Customer•March 12, 2018
When it arrived, I was concerned that it would be too thick to spread easily. Once mixed, it loosened up nicely and was painted on without a problem. I needed a lot less than I thought, so I had a decent amount left in the cup. When it got to about the 20 minute mark after mixing at 70 degrees, it set up very fast, going from spreadable thin to a giant chunk in what seemed like seconds. The leftover amount (about half of a mixing cup) also got pretty hot. I guess epoxy sets up in an exothermic reaction, huh? The fumes coming out of the cup were also pretty noxious, so the MSDS sheet that it came with is appropriate. My recommendations:
* Mix less than you think you will need
* Set a timer so you know when it will harden
* Spread with a disposable brush like an acid brush - don't expect a second use of the brush
* If you have any leftover epoxy, put it outside to harden
* Mix less than you think you will need
* Set a timer so you know when it will harden
* Spread with a disposable brush like an acid brush - don't expect a second use of the brush
* If you have any leftover epoxy, put it outside to harden
Great Stuff when used as instructed.
KRGraphics•July 31, 2017
I have been researching this epoxy for quite some time, after watching YouTube videos on how it is used and what it is used for. With that said, This epoxy works extremely well, if you follow the directions carefully and use the correct brush for it. I have coated a few of my printed models and let me tell you that this works... PERFECTLY. Almost TOO PERFECTLY. When Smooth-On says you need a very thin coat of this, they MEAN EXACTLY THAT. You only need very little. I was coating one of my makercoins with this, and I layered the epoxy on a little too thick and it ended up in the details of my logo (ruined the part but, hey, I printed another one). Also, make sure you wear gloves with this and keep the printed part free of grease. The mix ratio is 2:1, but at times you need VERY LITTLE, so I just carefully eyeballed it, and also pour the mixture into a tin foil and DON'T ALLOW IT to stick close, spread it out a bit
One thing to note that once you use the medicine cup and the chip brush, say goodbye. I stocked up on dixie cups and popsicle sticks since I will be using this very often. I print my models at 50 microns, but that doesn't stop me from coating my models with this, before sealing it with primer. Also the cure time is shortened if you put it in the sun on a 90 degree day (I let it cure for 5 hours). And to get the model ready, I used 220 grit sandpaper to get the surface buffed up for a final pass of paint. I must say, all of my research paid off. I can't wait to use this on bigger models.
One thing to note that once you use the medicine cup and the chip brush, say goodbye. I stocked up on dixie cups and popsicle sticks since I will be using this very often. I print my models at 50 microns, but that doesn't stop me from coating my models with this, before sealing it with primer. Also the cure time is shortened if you put it in the sun on a 90 degree day (I let it cure for 5 hours). And to get the model ready, I used 220 grit sandpaper to get the surface buffed up for a final pass of paint. I must say, all of my research paid off. I can't wait to use this on bigger models.
Problems, maybe this will help
Steve T•May 30, 2017
My first 2 applications did not harden. Read up, tempature is a big factor, and mass is a big factor. Observation, stirring time important. They recommend at least one minute stir time. I stir about 3 minutes. The stir time gets the chemical reaction going faster, in my opinion. Around 70 to 80 degrees Fahrenheit, setting time is 3 hours to overnight. The epoxy in the mixing cup setting time is 30 minutes ( roughly). The setting time for epoxy is mass related. Lager mass is quicker setting time (epoxy in mixing cup), less mass ( layer of epoxy on printed object ) longer setting time. Tempatures below 70 degrees Fahrenheit really slow down setting to days. Used a hot air gun on my project, and the plastic started to deform- bad idea. I believe epoxy has a minimum mass to be mixed. Use below the minimum mass and the epoxy will not set. I use no less than 15 ml (10ml and 5ml) as the minimum mass. Using nylon ( white strong and flexible- Shape...) My object is a box. Applying epoxy to horizontal surfaces works. Applying epoxy to vertical surfaces cause the exoxy to run down to the bottom of the box leaving bulges. Applying very thin coat of epoxy leaves streaks. Medium coat of epoxy allows it to flow and self level. 2 coats can leave a nice shinning coat. Recommend sanding, wet sanding definitely. Buy extra mixing cups, brushs, and gloves. Keep the temperature up 70 degrees plus, incandescent light over object? Four stars because of the price. Depending on your object this can be time consuming.
Perfect for cosplay!
dream factory•March 30, 2017
I was searching the market for something to use when painting my chestplate for a cosplay I was making, and this did the job perfectly! It's very easy to apply and makes the surface premier and professional-looking. I highly recommend it for anyone looking to polish up a theater or cosplay costume.
Get it, learn it.
Felix Garcia•October 5, 2016
Hello folks.... Lets start by saying that you really want this! Its a product that is tricky to work with, but when you get the hang of it, its great.
Pros
- makes print shine!!!
- makes print smooth
- makes print stronger
- it goes a long way!
- sandable
- paintable
Cons (ish)
- strong odor, work on ventilated area, prefer outside
- very very sticky, pleaseeeeeeee wear latex gloves! everytime
- short usage window (just spread the mix flat into a piece of aluminum foil to extend the work window)
- can be easy to apply thick, use dollar store painting brushes to apply thin (small art 1/4" brushes)
Tips....
use small amounts at a time.... apply very thinly.... work quick.... dry it inside on low humidity area... use good lighting to see any areas you may miss.... watch for runs of coating touching area where the print sits, or it will bond and stick ( i tend to prop it up and reduce surface contact)
When you done, let it sit for 8+ hrs before you touch it! DONT TOUCH IT. or you will put your fingerprints on it and it wont come off without sanding.
Otherwise, enjoy!
Page 1 of 2