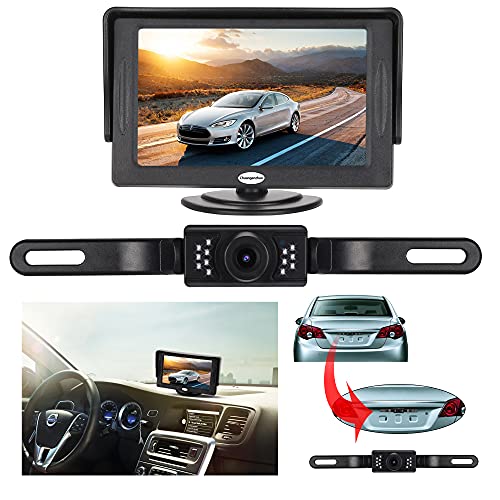
Backup Camera and Monitor Kit for Car,Universal Wired Waterproof Rear-View License Plate Car Rear Backup Camera + 4.3 inch LCD Rear View Monitor (Camera and Monitor)


Key features
- •Backup Camera and Monitor Kit For Car,Universal Waterproof Rear-view License Plate Car Rear Backup Camera + 4.3" TFT LCD Rear View Monitor,Support 12V power system only
- •The monitor will start up automatically, and synchronously display the video from rearview camera when you're backing your car, the screen will change back to the original scenes in standby after backup
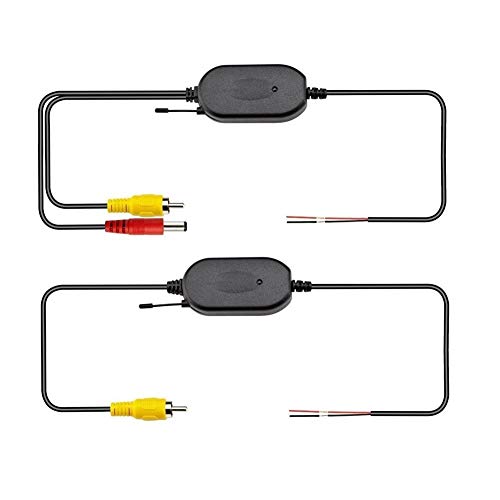
- •Supports Car DVD, VCD, camera, STB, satellite receiver, and other video equipment
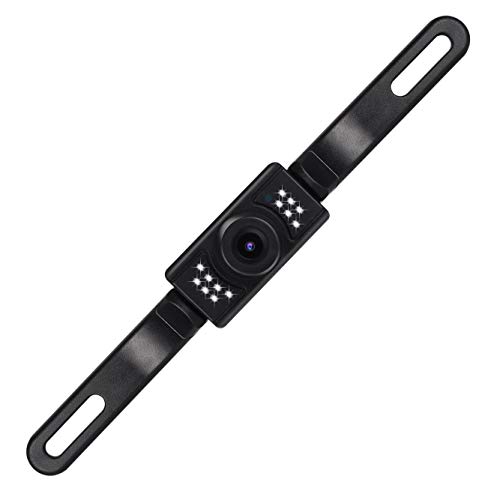
- •Waterproof license mount backup camera with HD color CMOS (648X488 pixels/NTSC) imager, wide viewing angle macro lens,with distance scale line
- •Reliable and friendly customer service,ready to respond within a 24 hour time frame. 1 Year Warranty,30-Day Money Back Guarantee
Backup Camera and Monitor Kit for Car,Universal Wired Waterproof Rear-View License Plate Car Rear Backup Camera + 4.3 inch LCD Rear View Monitor (Camera and Monitor)
List Price: $69.82$62.84DEALYou Save: $6.98 (10%)
Free shippingFree Returns – 30 daysFree Order CancellationSecure Payment2–3 Days DeliveryGet It June 25, 2026In Stock (1)No marketing spamNo account requiredFulfilment by FedEx / Amazon / UPS / ShipwirePayPal / Card Buyer Protection
Customer Reviews
Reviews sourced from verified Amazon purchasers3.9
out of 5
Based on 10 reviews
5★
60%
4★
20%
3★
0%
2★
0%
1★
20%
Not waterproof.
Clayton Olson•April 4, 2017
As others have mentioned in previous reviews, these are not waterproof despite the need to install them outside the vehicle. Even after protecting the camera unit with a rubber sealant as others suggested, this backup camera filled with water as soon as it rained. You can't see anything behind the RV any more. Two weeks after the rain, it is still filled with moisture (see picture). Very disappointing. Will update if replacement arrives and is better.
Easy installation into 2010 F150, great product at a great price
DAN C.•January 26, 2017
Straightforward installation in a 2010 F-150 Supercrew Cab truck into my sunglasses holder. I have some experience with vehicle electronics but am by no means an expert. Probably took around 3 hours but that was including a lot of looking and figuring things out as I went. If you are installing in a similar vehicle, here is a step by step:
1. Mount camera. As a side note, I'm concerned that I"ll step out of the back of the truck and onto it. Right now it covers the top of the license plate (the state name, which is surely illegal). I'm probably going to modify later with a couple of strips of metal bent to place it above the plate and between the tailgate and bumper, tucked out of the way.
2. Connect red wire to backup lamp (search online to figure out which one is hot or use a tester).
*when using the blue snap/splice wire connectors, go ahead and strip the red wires so that there is an immediate connection. I ran into a problem with one of them because it didn't slice through the small wire's insulation and didn't make a connection.
3. Drill a hole into the metal taillight housing out of the way to attach the black ground wire.
4. Run the feed wire through the frame to the back corner of the cab.
5. On the F-150, there is a small grommet (about 1") that leads right up to the plastic door sill from the bottom. I poked a hole through the center of it and pushed it through. I'll go back later and put a little bit of caulk on it but I don't know that it matters.
6. Pop both door sills loose on the driver's side. Run the wire along the channel with the factory wires.
7. Run the feed wire up the front of the door frame on the inside behind the plastic kick panel up to the front left windshield pillar. It pops off easily and you can quickly run it to the top of the windshield.
8. Take the visor off to release the headliner.
9. Take out the sunglasses holder.
10. Find the hot wire that feeds the overhead lights and tap into it with a blue wire snap/splice connector (again, strip the small hot wire so that it makes a good connection).
11. I hooked everything up to be sure it worked, and mine worked without a ground on the monitor. However, I went ahead and grounded it to one of the screws that holds in the black plastic bracket that holds in the sunglasses holder.
12. Tuck the excess wiring up into the headliner.
13. Once you get it wired, check to make sure everything works.
To mount the screen into the sunglasses holder:
1. Peel back the adhesive on the stand base and remove the screw from the stem.
2. Carefully remove the 4 small screws in the back of the LCD in order to take the stem out of the back. This will leave a hole but I didn't cover it because it will be in a clean, dry location.
3. I flipped the "u-shaped" plastic piece onto the bottom and used some 1/2" thick x 1" wide weatherstripping and stuck it to the bottom. This lifts it up toward the top of the holder so that it's not hidden behind the tall bottom part (I saw on a blog where someone took a Dremel tool and trimmed it, but this seemed like an easier option IMO).
4. Drill about a 1/2" hole in the rear sunglasses holder in a spot that does not interfere with it closing and feed all of the wires through it (I did this on the drivers side near the top).
5. I found a round black plastic plug laying around the garage, notched it, and put a couple of dabs of hot glue on it to hold in place for a more finished look.
6. Hook up the wires, tuck them all out of the way, and pop the sunglasses holder back into place.
I took it out for a drive after dark and the screen really lights up and produces a bright picture. Comes on within about 1 second of shifting into reverse. I was able to back up looking only at the screen and it was easier than trying to look over my shoulder or through tinted windows to the side mirror.
I didn't add any fuses, but of course the lights I wired into are fused. I guess I'll add an update to this if my truck bursts into flames.
Very good, but not a superb-quality picture. Considering the price and ease of installation, this is a no brainer great deal.
Third time is a charm!
KristinaKay•January 7, 2017
I've bought two other backup camera packages before and neither one of them was as good as I had hoped or lasted very long. I've only had this package a very short time, since Christmas, but so far I love it! As one of the reviewers said here (which encouraged me to buy this), the camera can actually be connected to other circuits besides the backup camera. He connected mine to the parking lights so the camera can stay on as long as the lights are on. It's nice to see the traffic behind me, especially in bad situations. The camera itself is adjustable so I can point it down toward the hitch and use it when backing up to a trailer. It is a manual change but one I welcome. Since this is put on at the license plate, the camera can still be used if the tailgate of a truck is down. The video on the monitor is very clear and the size of the monitor is not too large to take up a lot of viewable space on the dash. It is not much larger than my Garmin (yeah, I have a vehicle with no bells or whistles so I have my own device for everything)! My husband said the ease of installation, on a scale of 1 to 10 where 1 is easy and 10 is difficult, he gives it a 4. Now, it can put anything together and build fix anything so it might be a little more difficult for someone else. But it took him about 2 hours and he just had a full knee replacement a few days before! I hope my good opinion lasts and I don't have to update with anything negative but, so far, the Third time is a charm!
JUNK
Carroll L.•December 31, 2016
Hate is a strong word, but after wasting 8 Hours installing this junk It had not a glimmer of life. After completely uninstalling it I had the camera tested and the videophiles could get no response to indicate the camera would ever work. I tried multiple alternatives to get the monitor to respond to any alter video sources to get it to respond. I did not believe you could buy something this bad from Amazon. I do not care if I get a refund on my purchase I hope you pass on this. I would say from reading the reviews there is a chance you could get one that works.
AWESOME PURCHASE!!!
mobuckdown•December 10, 2016
my buddy bought one and told me about it...i bought 2/one for me and 1 for a xmas gift....read the reviews/watched the videos and went to work...all went as intended....hardest part for me was getting access into the cab of my 2013 Ram 2500 and finding the correct wire in the 7 pin plug at the back...NONE OF WHICH ARE PROBLEMS WITH THE CAMERA SYSTEM!!!....wired up as instructed...plugged it up...BOOM!!! WORKED LIKE A CHAMP!!!....I COULDN'T BE MORE PLEASED!!!...the ONLY "small" issue is, the wire that connects the camera to the monitor IS JUST BARELY, AND I MEAN BARELY, LONG ENOUGH TO REACH!!!...this was the case with my buddy's AND WITH MINE!!!....it worked BUT NO SPARE SLACK AT ALL!!!....keep this in mind when routing your wire and USE THE SHORTEST ROUTE POSSIBLE!!!...VERY HAPPY WITH THIS UNIT AND THE THE PRICE!!!
Page 1 of 2