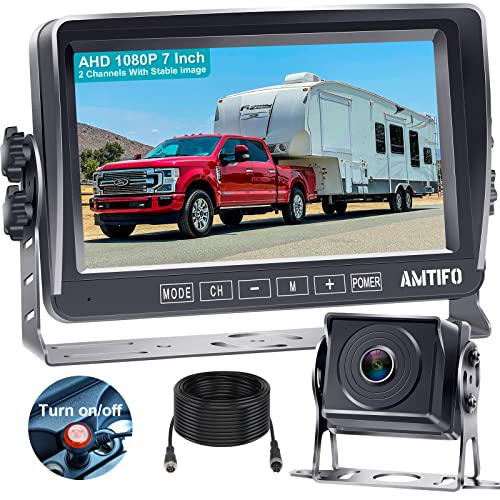
HD 1080P Backup Camera Plug & Play: Easy to Install in 15 Minutes Starlight Night Vision for Backing Up Safely in the Dark - Real-time Image Zero lag Rear View Camera with Monitor for Cars Trucks SUVs


Key features
- •Very easy install, the system can be powered with a single power from reverse lights for rear view only or fuse box / running lights / Radio / Cigarette lighter for full time view
- •IP67 Waterproof license plate Color HD backup camera 135° viewing angle with 7 LED IR light Night Vision see clearly at night.
- •Monitor have V1/V2 two video inputs,V2 has priority, so normally the rear view camera wire to V2, you can wire another front/side camera to V1, when you driving, you can view front by V1,when you turn on reverse and off, the V2 will working automatically on and off too.
- •4.3 LCD display monitor easy to install on Car dash by a Double-sided adhesive stickers
- •We provided a professional instruction in package, Warranty 2 year provide tech support and replacement service : [email protected]
HD 1080P Backup Camera Plug & Play: Easy to Install in 15 Minutes Starlight Night Vision for Backing Up Safely in the Dark - Real-time Image Zero lag Rear View Camera with Monitor for Cars Trucks SUVs
List Price: $62.84$56.56DEALYou Save: $6.28 (10%)
Free shippingFree Returns – 30 daysFree Order CancellationSecure Payment2–3 Days DeliveryGet It June 25, 2026In Stock (30)No marketing spamNo account requiredFulfilment by FedEx / Amazon / UPS / ShipwirePayPal / Card Buyer Protection
Customer Reviews
Reviews sourced from verified Amazon purchasers4.3
out of 5
Based on 10 reviews
5★
40%
4★
20%
3★
20%
2★
10%
1★
10%
Not bad... but the mount is terrible.
Mersault•February 5, 2018
For the price, it's not bad. I struggled with the instructions and had to resort to watching a few videos on YouTube to figure-it-out. I was able to install this in a Ford F150. My biggest complaint is that the mount is complete garbage. It failed last night... and I won't have time to return the unit (today's the last day). The adhesive stuck to my dash... but not to the mount. So, now I have to figure-out how to deal with this.
The adhesive to the mount failed without any trauma/force. Simple gravity was enough to break that bond. This is disappointing.
The video could be a quite a bit better (it's "washed-out" at night -- despite attempting adjustments). However, for the price, I suspect that it's fine.
The adhesive to the mount failed without any trauma/force. Simple gravity was enough to break that bond. This is disappointing.
The video could be a quite a bit better (it's "washed-out" at night -- despite attempting adjustments). However, for the price, I suspect that it's fine.
Cheap nice backup camera and monitor set !!!
Rajiv S.•December 9, 2017
Cheap nice backup camera and monitor set. There are few things I would like to mention from my experience while installing it on my Honda Accord 2012 model.
1) It takes a whole lot of time to just remove the panels and pass the cable from back to front. It took me 3 hours to finish.
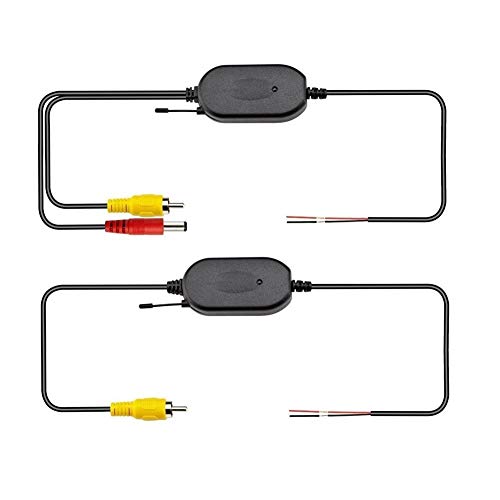
2) The wire diagram provided with the product is a little confusing. There is a small red wire attached to the video cable on both ends. This wire is actually useful to make both camera and monitor work from single source of power. But diagram confuses as it shows that they need to be connected to power source separately. All you have to do is connect the red wire(of the video cable) at the camera end to the provided power cord's red wire( splice a little) and then the power cord to reverse light [red(+) and black(-)]. Then pass the other end of the video cable to the front of your car and then attach that little red wire(of the video cable) to the red wire of the other provided power cord which connects to your monitor. The black(ground) end of the power cord is not required at all at the monitor end. You may even cut the extra length of the power cord on the monitor end as it is to be connected to that little red wire of the video cable which are side by side.
3) The angle of the camera view is upwards because when the boot of Accord is closed, the number plate is slightly slanted upwards.. I tried turning the camera downwards but it did not. I would add something to turn it down while tightening the screws.
Update:
I was able to fix the angle of the camera by inserting a plate at the back of the camera in a downwards slanting position before tightening the screws. And this also somehow allowed the camera to be adjusted by hand which it seems stiff earlier. Only thing I do not see yet is LEDs lights glowing, will check at night. Anyhow, this camera is still helpful while backing up, especially for my wife, and also during parallel curbside parking.
1) It takes a whole lot of time to just remove the panels and pass the cable from back to front. It took me 3 hours to finish.
2) The wire diagram provided with the product is a little confusing. There is a small red wire attached to the video cable on both ends. This wire is actually useful to make both camera and monitor work from single source of power. But diagram confuses as it shows that they need to be connected to power source separately. All you have to do is connect the red wire(of the video cable) at the camera end to the provided power cord's red wire( splice a little) and then the power cord to reverse light [red(+) and black(-)]. Then pass the other end of the video cable to the front of your car and then attach that little red wire(of the video cable) to the red wire of the other provided power cord which connects to your monitor. The black(ground) end of the power cord is not required at all at the monitor end. You may even cut the extra length of the power cord on the monitor end as it is to be connected to that little red wire of the video cable which are side by side.
3) The angle of the camera view is upwards because when the boot of Accord is closed, the number plate is slightly slanted upwards.. I tried turning the camera downwards but it did not. I would add something to turn it down while tightening the screws.
Update:
I was able to fix the angle of the camera by inserting a plate at the back of the camera in a downwards slanting position before tightening the screws. And this also somehow allowed the camera to be adjusted by hand which it seems stiff earlier. Only thing I do not see yet is LEDs lights glowing, will check at night. Anyhow, this camera is still helpful while backing up, especially for my wife, and also during parallel curbside parking.
Very Suprisingly Good and have planned an additional purchase.
David•November 21, 2017
Have been thinking of getting one for the wife's van to help make it easier for her to back out of the various parking spaces as well as seeing what or who might behind her when backing out of the driveway.
The camera has a wide view. I haven't measured it yet but the view is definitely much wider than the van.
The monitor is a big surprise. It is very clear. My initial thoughts before purchase was it would be like some of the small action camera that have a LCD on the back and it being a bit fuzzy. Nope. This one is very clear and I would say close to the output of my GoPro camera video back attachment.
Of course with the monitor being clear, the camera sure didn't let it down and supplied very clear video. The colored distance markings (green, yellow and red) help you understand how close you may be to an object when backing plus being wide enough to see something come into view when backing.
With the default setup, the camera only comes on when in reverse but can easily be changed to be on full time but I don't know how long of continuous use the camera and monitor could take. However, not being real expensive, you could easily replace it if you wanted to try.
Installation was very simple. Looking at what path you need to take is best to plan in advance to make it easier. When thinking about getting the wiring in beforehand without looking I was thinking I would have to remove interior panels to run the wiring but when actually looking at it I was able to hide the long run of the wiring by slightly prying up the edge and slipping the wiring in place along the side of the van. Saved a lot of time here.
A few wire splices in the back and two in the front just leaves you with the decision of where to place the monitor.
Be sure to clean the area where you want to put the monitor because some of the cleaning products leave a film behind and adhesive really doesn't want to stick.
This may not be expensive but for the family van or car or even truck (good idea to use if you connect a trailer) it's great to have as a safety device.
I can only wish these devices had been available years ago when a friend accidentally backed of his grand daughter who saw him leaving and wanted to ride in the back.it definitely would have prevented a tragedy.
Ordered a second one, installing it in daughters Outlook this weekend if it warms up enough to suit me.
Also ordered the wireless for it since she may be trading it off this summer.
Misordered the one for the rear view mirror but turns out it will work fine for the truck.
Great price for a camera and LCD screen combo kit.
MediaBaron•October 2, 2017
Mounted the license plate camera on the back of a Grand Caravan, ran the cable outside the body to the inside since this would just be a temporary set-up (will drill later). Ran the lines to the front to the LCD screen and I have power running through a switch pulling power from the cigarette lighter socket. It's great that I could switch it on or off at will. Clear image from the camera to the screen and the LED IR lights are bright at night lighting the way to back-up. I pointed the camera as far down as possible, wish I could have adjusted it a tad more but it was good enough to see the ground and things behind to back-up closely to things.
The camera wasn't quite pointed at the center-back of the vehicle so I put some washers between one side's camera mount and the license plate frame but I took the washers out as I need a longer bolt as the washers really maxed out the thickness for the bolt to hold on properly. I think it's probably that it was the angle of the plate mounting surface itself. The screen has pretty good visibility even with the sun hitting it, see photo.
Overall a great price on a backup camera and screen kit. I am getting used to trusting the image since it's so much better than looking out the back of the minivan.
The only fault I can see at this point is that I wish the field of view for the camera was slightly wider.
The monitor worked well with a clear picture. The ...
Anthony•September 18, 2017
The monitor worked well with a clear picture. The camera was not really usable. When pointed straight at an object, in the monitor the object was not in the center. The grid lines were also off center. it is as if the internals of the camera are skewed about 7 degrees relative to the axis.There was no practical way to adjust the camera.
Page 1 of 2