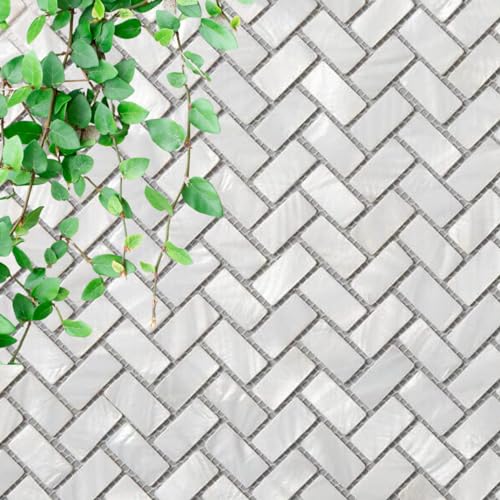
Backsplash Peel and Stick PVC Tile, Stickon Tile for Kitchen Backsplash, Bathroom Vanities, Fireplace Décor, Laundry Table, Stair Decals in Persia Grey (12" X 12", 5 Sheets)


Key features
- •SIZE OF TILE - The size of the tile is 12"x12"x0.2", 5 sheets a package, about 5 square feet covering, cutting is needed, please consider the loss of 3%-5%.
- •REAL TEXTURED - Yipscazo PVC peel and stick stone tile have natural stone textured but light-weight and easy to cut.
- •STRONG RESISTANT - The tiles feature heat, moisture and impact resistance, specially designed for kitchen around the hot stove, steamy bathrooms and interior floors.
- •EASY MAINTAIN - You don't need to worry about potential oil spatter contamination, it's easy wipe to remove the stains.
- •JUST PEEL AND STICK - Peel and stick installation, easy do it by yourself. No grouting and contractor required.
Backsplash Peel and Stick PVC Tile, Stickon Tile for Kitchen Backsplash, Bathroom Vanities, Fireplace Décor, Laundry Table, Stair Decals in Persia Grey (12" X 12", 5 Sheets)
List Price: $61.09$54.98DEALYou Save: $6.11 (10%)
Free shippingFree Returns – 30 daysFree Order CancellationSecure Payment2–3 Days DeliveryGet It June 23, 2026In Stock (1)No marketing spamNo account requiredFulfilment by FedEx / Amazon / UPS / ShipwirePayPal / Card Buyer Protection
Customer Reviews
Reviews sourced from verified Amazon purchasers4.5
out of 5
Based on 10 reviews
5★
80%
4★
20%
3★
0%
2★
0%
1★
0%
Love the product and my "new" bathroom
MomCat Hopkins✓ Verified Purchase•January 28, 2024
My small bath ceiling has been a wreck for years; ceiling paint peeling, mold in upper corners, just ugly. I couldn't get a look to "come together." I started by fixing the ceiling with patching, anti-peel primer, anti-mold paint, then a sand-texture finish. I couldn't stop there, because the ceiling looked great and the drywall over the tub enclosure looked horrible.
I research SO MANY products, including just putting the sand texture on the walls. I also priced new drywall and a new tub enclosure, $10K! Absolutely did not have that kind of money! Finally decided on the PVC 12" x 12" tiles, as I was not up to cutting the real-stone tiles that come in the same size sheet.
I am crazy in love with the new look, and included some before, during and after photos.
I watched a lot of You-Tube videos on applying peel-and-stick tiles first, then decided to start with the center of the large back wall and work out from there. Here are some tips for application, cutting, and keeping your project on track:
-Do a test layout, and hold the tiles up with good quality painters tape until you are ready to start application. Decide in advance where your tiles will stop on the short walls; I stopped mine before the shower-rod holders so I didn't have to pull them out, reinstall, and patch the paint.
-Set up a big cutting board over your sink/vanity. An adult-height vanity is the right height for all the cutting you will do.
-Make a jig to hold the tiles, and tiny pieces of tile you will need at the end of the project for corners and tops. I used the boxes the tiles came in to make a corner jig. Free and quick.
-This product is actually small mosaic tiles, not solid sheets. It's MUCH easier to apply if you break it down into single rows, or rows of 3. If you try to apply a full sheet on top of a full sheet, you will get gaps between the full sheets.
-Peel off the backing from the bottom row, place the bottom row, then pull upward from behind the tiles. Again, press down on the rows to eliminate horizontal gaps, and you may need to press inward to eliminate vertical gaps.
-You will need a lot of spare razor blades! I did not want to try an Exacto knife as I did not have spare blades.
-I bought an Amazon- recommended product - the silver pvc edging strips. Really cleaned up the wonky final edges. See my "tools needed" photo - scissors were good for cutting thin slivers for perfect fits, and the hack saw was definitely needed for the silver edge strips. I also had a variety of straight edge tools for cutting, ranging from 6" to a full sized T-square.
-You will feel like you are in a step class if you are doing this solo. Up and down the ladder and tub edges dozens of times for the corner and top and outer edge fittings.
-Buy extra! You will get mad at a few cuts.
-Put a towel in the bottom of the tub before you start, and some old socks on the legs of your ladder.
-You will have red strips of the peel-off-backing everywhere; take breaks to clean up your debris.
-These tiles are addictive.
-The back wall took me about 2 hours to get right. The side walls took about 1 hour each, due to the inside corner cuts.
- I am debating some customer-color caulk for the few edges that just don't line up, the interior corners, and the bottom where the tiles meet the fiberglass insert.
-Have fun!
Need more!
Karla Young✓ Verified Purchase•January 27, 2024
I need more of this tile color! I just ordered two weeks ago, and now it is "unavailable" This job has been a bear from the beginning. I unpeeled and sprayed with adhesive, and it still fell off. So, I applied a floor adhesive and it seems to be working. I can't believe I am almost finished with my project and I can't get any more of this tile! If anyone has any left overs, please help!
Surprisingly easy and attractive
Paul Watson✓ Verified Purchase•January 19, 2024
We bought this product because installing ceramic tile was too expensive, so we thought this might be a less costly alternative. Since Amazon sells a lot of this type of tile, we studied the customer reviews carefully before we picked one. And that turned out to be an important factor. We made sure the wall was properly prepped by lightly sanding down the texture and making sure the wall was dust-free and dry. The tile is easy to cut to fit into the space we wanted to cover. But you have to be very careful in your placement... once it makes contact with the wall, it sticks hard and you can't move it. So take it slow and easy. Once the wall was covered, there were some very visible seams, so we went back to customer reviews to see what the best solution was. We got some sand-free grout and carefully thinned it down with water until it had a spreadable consistency (a little thicker than soft serve ice cream). Then we spread it liberally all over the tiles, focusing on the seams, and then wiped it off with what turned out to be almost a whole roll of paper towels. When the grout dried three hours later, we had a beautiful wall. The next day we wiped down the tile again and caulked around the edges. It is a very nice finished wall and we highly recommend this product.
Great product. Easy to install.
Bethany Clyne✓ Verified Purchase•January 15, 2024
Backsplash tile. Easy cutting. Good middle of the road adhesive. Not super stuck, but just enough to adhere. Make sure your walls are clean and dry. Sam the edges a bit when you cut them so they fit together perfectly.
Great stick on tile
Dave Mariani✓ Verified Purchase•January 7, 2024
After spending lots of $$$ on
samples of different manufactures of stick on tiles, we liked Yipscazo Ecru Slate Backsplash Stone Tile the best. All of the other stick on tiles samples we ordered, were mostly cheap looking and not durable. We use our kitchen allot, and wanted a tile that would hold up to a bit of abuse, and clean up well. Another plus is I wanted a tile I could take down if I wanted, without having to replace the wall in back of it. To test the product I stuck the sample on a scrap of wall board, and with a heat gun I was able to remove the tile. Then I took the sample and scrubbed it with 00 steel wool to see how much abuse it could take, and it held up fine, no apparent damage done.
Now for the installation part. The tools I used were a cutting board, square, ruler, level, utility knife with lots of extra blades, tin snips straight and curved and wire nippers.
I hung 55 SQ feet of tile and it took me right around 12 hours. I started off in the far corner and worked my way out. Seeing each of the tiles on the sheet are individual, the hardest part was trying to push the tiles together in two direction while sticking them to the wall. No matter how hard I tried I did get some gaps. I will say once you stick these in place your not going to move them! In the pictures that I uploaded, I took a pictures of the gaps, before and after. I went to my local "Home Desperate" store and found a beige calk and fill in any of the bigger gaps, see second picture.
The only negatives I had are...
(1) I did find some of the tiles on the sheet were loose, turned out when making them they put wax paper between the sticky stuff and the tiles and some of it was not removed.
(2) One of my cases of tile were glossy and the rest of them were a dull finish, the lot number was the same, and yes I did start to install them before I notice the difference!
Bottom line, we love the looks of the tile, but they are not easy to install. My suggestion is,
(1) Sand and scrub you installation surface, and fill and major flaws. If you do-not have a flat level surface you tiles will not lay flat.
(2) I painter the wall with Zinsser Bulls eye 1 2 3 primer, and let dry for 3 days before installation. I you think your going to have a problem with gaps, some primers you can have them add color so you won't see white in back of them.
(3) Remove the sheeting in back of the tile while you stick them in place.
(4) Take your time! Sometimes I took tile and put them in place with masking tape if I was not sure how it was going to work before applying.
GOOD LUCK!
Page 1 of 2