ESP8266 development board Lipo for Arduino NodeMcu LUA /WIFI smart home with 0.91inch OLED display

Key features
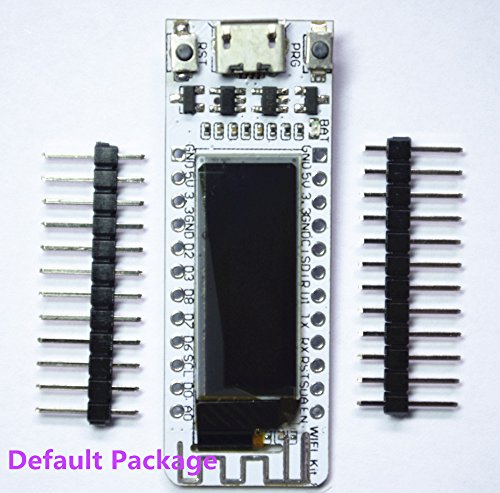
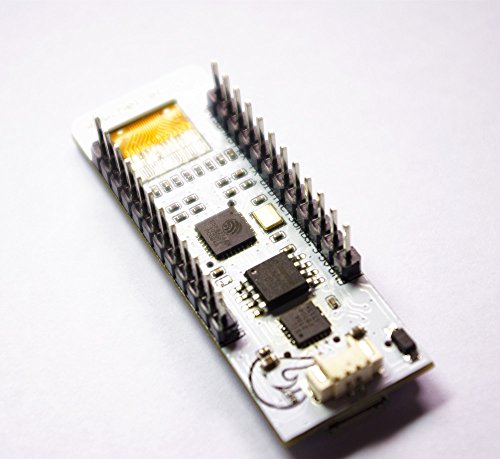
- •Leads all pins of ESP8266
- •12 digital pins can be configured to read, write, IIC, SPI, the middle, PWM and other functions
- •1 AD input
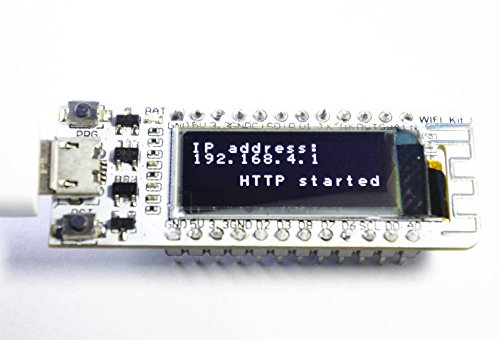
- •Integrated 0.91-inch 128 * 32 OLED
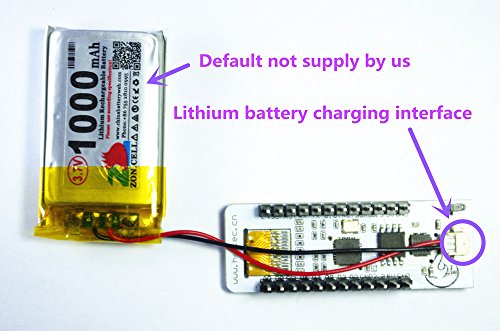
- •Working voltage: 3.3V ~ 7V
BrandHeltec Automation
CategoryAudio & Video Accessories
ESP8266 development board Lipo for Arduino NodeMcu LUA /WIFI smart home with 0.91inch OLED display
List Price: $19.38$17.44DEALYou Save: $1.94 (10%)
Free shippingFree Returns – 30 daysFree Order CancellationSecure Payment2–3 Days DeliveryGet It June 23, 2026In Stock (1)No marketing spamNo account requiredFulfilment by FedEx / Amazon / UPS / ShipwirePayPal / Card Buyer Protection
Customer Reviews
Reviews sourced from verified Amazon purchasers3.7
out of 5
Based on 7 reviews
5★
43%
4★
29%
3★
14%
2★
0%
1★
14%
Careful when soldering header pins, display can't handle much heat.
Amazon Customer•January 31, 2018
Worked out of the box. I do wish the headers came pre-soldered. I soldered myself and have down so before. Made sure they were clean before plugging in, after power on screen doesn't work. Appears the display can't handle much heat.
Great Little High-Speed MCU!!!
Jay D. Anderson•January 7, 2018
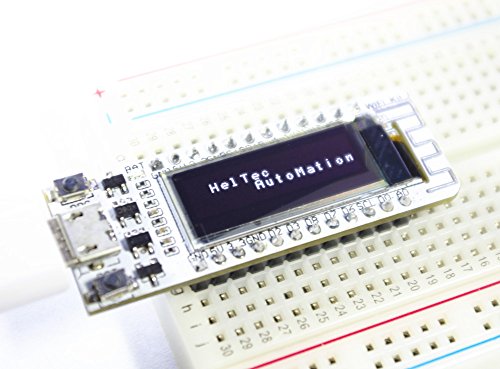
Nice board and with OLED built on. Came with loaded "Hello World!" so you can plug it in to a micro-USB immediately and see it is working. Can run up to 160MHz and 32bit processor -- incredibly fast when you need it. Separate CPU for processing and for OLED that do not detract from each other too (a change from older designs). Datasheets and manuals available on-line and user groups support and BLOGs out on the net are very helpful. .
Powered by your imagination: Create the future of IOT today.
BraveNewCurrency•December 15, 2017
What you can do with this product is limited only by your imagination. (Some programming required.) It can turn on a light when it sees your Phone connect to your WiFi network. It can monitor the stock market and turn a light green when the market is up, or red when the market is down. It can be controlled by smart home devices like Alexa. It can monitor temperatures and send the data to a central server for graphing. It can control a LED strip, making the lights respond to the music.
It is a tiny little computer that has WiFi. It can connect to the Internet (or just your local network) and talk many different protocols (HTTP, WebSockets, MTTQ, Email, Slack, etc.) You can also connect it to any electronic hardware (NeoPixels, OneWire Temperature sensors, Passive Infrared sensors, Switches, etc). This category of product is called "Internet Of Things" (IOT). Unlike many IOT devices, this is just hardware. No need to rely on someone else for a subscription service.
Pro:
- It's tiny: It's even smaller than a typical USB flash drive. You could hide several in a pack of gum.
- About 10x more powerful than an Arduino Uno, but half the price!
- If you need more power, there are bigger and better versions: ESP32 Version and LoRa Version
- Can run FreeRTOS, which just got a huge boost with deep AWS Cloud integration.
- Can reflash over USB (no need to push a button for programming mode) or WiFi (if you include the right library.)
- can run off a LiPo battery, or any USB wall wart or most any USB battery pack.
Con:
- Not a lot of documentation in English. That's fine, because it's supported by Arduino IDE and PlatformIO (in next release). I highly recommend the latter.
- More complex than a typical Arduino, so may not be the best starter device.
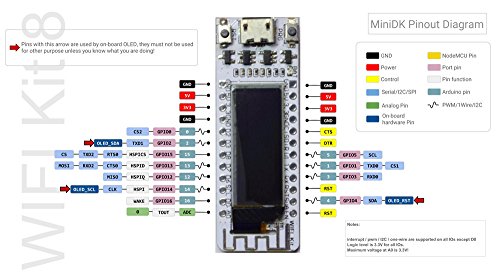
(Another review said there was no Pinout documentation, but I saw it was now posted to the Heltec website. It even included clear instructions in English on which pins were reserved by the OLED display.)
It is a tiny little computer that has WiFi. It can connect to the Internet (or just your local network) and talk many different protocols (HTTP, WebSockets, MTTQ, Email, Slack, etc.) You can also connect it to any electronic hardware (NeoPixels, OneWire Temperature sensors, Passive Infrared sensors, Switches, etc). This category of product is called "Internet Of Things" (IOT). Unlike many IOT devices, this is just hardware. No need to rely on someone else for a subscription service.
Pro:
- It's tiny: It's even smaller than a typical USB flash drive. You could hide several in a pack of gum.
- About 10x more powerful than an Arduino Uno, but half the price!
- If you need more power, there are bigger and better versions: ESP32 Version and LoRa Version
- Can run FreeRTOS, which just got a huge boost with deep AWS Cloud integration.
- Can reflash over USB (no need to push a button for programming mode) or WiFi (if you include the right library.)
- can run off a LiPo battery, or any USB wall wart or most any USB battery pack.
Con:
- Not a lot of documentation in English. That's fine, because it's supported by Arduino IDE and PlatformIO (in next release). I highly recommend the latter.
- More complex than a typical Arduino, so may not be the best starter device.
(Another review said there was no Pinout documentation, but I saw it was now posted to the Heltec website. It even included clear instructions in English on which pins were reserved by the OLED display.)
As others have stated, it's a little tricky to ...
Kevin F•December 14, 2017
As others have stated, it's a little tricky to get going considering there's no documentation. Uploading a sketch follows the typical "NodeMCU/ESP-23E" guides. The OLED:
- Used Adafruit SSD1306 Library
- Loaded 128x32_i2c example sketch
- Set OLED_RESET = 16
- Used Adafruit SSD1306 Library
- Loaded 128x32_i2c example sketch
- Set OLED_RESET = 16
Works like a charm - I just wish there was an easy link to the board support package and some easy examples
mxm23•November 30, 2017
After a bit of Googling it did come to life - I never did get the board manager to find the WIFI_Kit_8 so as the previous post said, use the generic ESP8266 and it works fine.
Page 1 of 2


