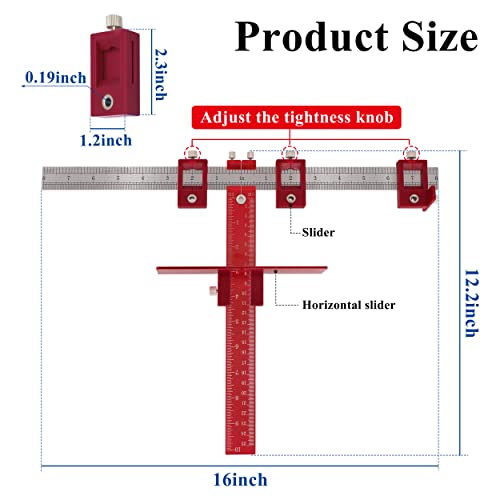
Cabinet Hardware Jig Tool Both Inch and Metric,for Handles and Knobs Drawer Guide Jig on Doors and Drawer Fronts-Red


Key features
- •Reversible fast drilling and reduced hardware installation time by 80%
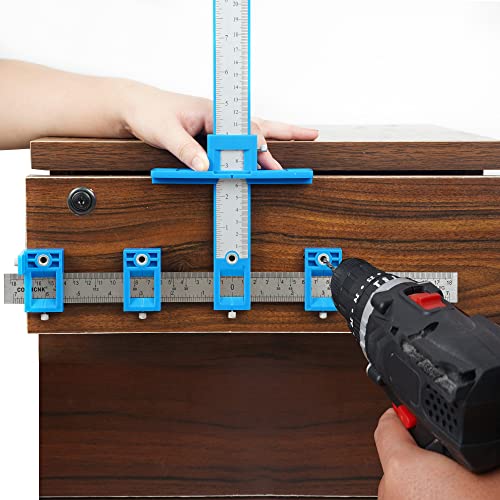
- •Precise drilling and positioning for doors, flaps and drawer front handles
- •installation instruction is included
- •Jig is made of virtually indestructible aluminum and the sliders is plastic
- •90 days money back guarantee.
Cabinet Hardware Jig Tool Both Inch and Metric,for Handles and Knobs Drawer Guide Jig on Doors and Drawer Fronts-Red
List Price: $41.89$37.70DEALYou Save: $4.19 (10%)
Free shippingFree Returns – 30 daysFree Order CancellationSecure Payment2–3 Days DeliveryGet It June 23, 2026In Stock (1)No marketing spamNo account requiredFulfilment by FedEx / Amazon / UPS / ShipwirePayPal / Card Buyer Protection
Customer Reviews
Reviews sourced from verified Amazon purchasers4.3
out of 5
Based on 10 reviews
5★
80%
4★
20%
3★
0%
2★
0%
1★
0%
Wished I bought 10 years ago
Kevin✓ Verified Purchase•October 19, 2023
The more I use this guide the easier it gets. Installed new hardware on approx 20 cabinet doors and drawers 1st time I used it. Seems to be good quality aluminum with hardened drill guides. Easy set up once you know where to locate the 1st pull.
Worth the Money
Spanky05✓ Verified Purchase•October 6, 2023
In the past I have tried to use the measure and drill procedure to mount cabinet hardware. More often that not things didn't quite line up. With a new set of expensive cabinets I wanted to avoid that problem. This thing works well for getting hardware aligned. The comments about no instructions are true, but a couple of minutes of messing with the various elements got me where I needed to be. Also once I got the jig set up I used clamps to hold it firmly in place while I drilled the holes. My only real complaint is the bushing holes are slightly larger than the drill size I wanted to use. Wrapping my drill bits with masking tape "cured" that for the six holes that needed drilling. If I needed to do more holes than that, I would look for a better, more durable, technique (bushings/sleeves?).
Nailed it, for a novice!
dg50484✓ Verified Purchase•September 9, 2023
This is a really great tool if you think like a novice. This is the very first time I've done this and it went perfectly. I put the steps below, along with four separate images, on how I did this. I mean no disrespect to the pros out there, but I simply ignored the measurements on the tool. As a matter of fact, if they didn't put any markings on this tool, it would still work great for what I was doing. The important part is the set-up, which took me about ten minutes. After that, it took me about twenty minutes to install seventeen handles. That's about one every minute. Really "“ you'll be amazed.
Step 1: The SET-UP - Using just your hand, position your hardware where you want it and mark off the bottom on three sides with painter's tape (see the image). I had pulled three pieces of tape off the roll and stuck them to my forearm before I got started.
Step 2: Find the center between the pieces of tape on each side and mark that spot. I used a cross marking (see image). DON'T think too much into it. Don't worry about exactly where the screw hole is. Just make a mark and move on.
Step 3: Align the bottom guide hole with the marking you just made and snug up the retaining screw. Here's what you need to know; the guide that comes with the additional piece, the flat piece that has the extra screw that holds the jib to the edge. You just need to place that somewhere at the bottom of the ruler part. It doesn't matter where you place it. Just put it on the bottom and tighten the screws so it doesn't move. the next guide up becomes the guide for the bottom of the hardware as I am showing it here. (It could be the top of the hardware if you have the jigs orientation flipped, but you get the idea). Note: I took this picture after the fact, so your jig won't have the tape on it yet at this point. Just ignore it in the image.
Step 4: Loosely mount your hardware onto the jig. IMPORTANT "“ the only piece on the jig that should be loose and movable at this point is the top large cross-member piece that has the additional ruler. The two small guides should be firmly in place at this point. If not then start over. Loosely mount the bottom of your hardware then slide the large upper guide in place so you can attach a screw to the top part of the hardware. Make sure your hardware is loose in the jig. You should be able to wiggle it a little. Next, tighten down all the remaining guide retaining screws. DON'T REMOVE THE HARDWARE just yet.
Step 5: Next I put painter's tape on the jig in such a way that I could see at a glance if the guides moved at any point during the hardware installation. Yes, the picture doesn't show the hardware on the jig, but yours should be there. Next, I wrapped a pair of pliers with electrical tape and used them to snug up all the retaining screws one last time. Afterward, I made sure my hardware was still loose in the jig. Now "“ REMOVE THE HARDWARE. This step marks the END OF THE SET-UP. You only have to do the above steps ONCE. Your jig is now set. All you need to do next is repeat Steps 6 and 8 for each handle. Step seven is optional and I only did it once at the beginning.
Step 6: Next, using a *good* center-punch, (I have an awesome Neiko 02638A, you can get right here on Amazon), punch a mark through each guide hole to mark your hardware position on your cabinet. I opted out of drilling through the jig. It was just my preference. I didn't feel like I would have good control over both the jig and the drill if I did it that way.
Step 7: (Optional) You can verify your punch marks if you wish (see image). I did this only on my first one.
Step 8: Using a really good drill bit that's the same diameter as your screw, drill your holes at each mark. Mount your hardware and you are done. Now just repeat steps 6 and 8 for each handle. As a time-saver, I went around and made all my punch marks at every location first. Then I put the jig down at this point.
I hope this helped someone out there.
Saved us so much time
Wendy✓ Verified Purchase•August 31, 2023
This worked great. The holes are all even and perfectly aligned. Good quality. Easy to use. Highly recommend it if you are putting up handles. Easy to adjust between handle sizes.
Works well
David J. Brown✓ Verified Purchase•August 31, 2023
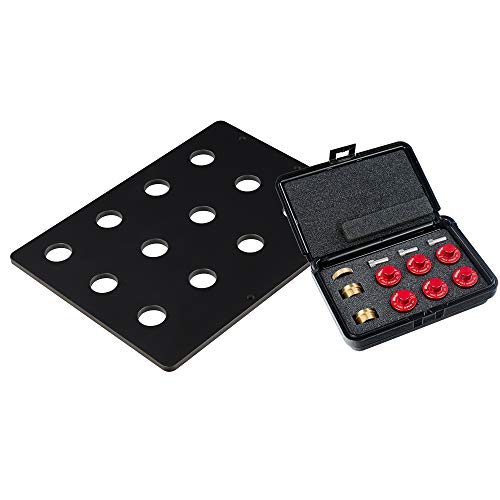
The jig works well, adjusts easily, sturdy enough. All in all I like it. It comes with a zippered case to protect and store all the pieces when not in use.
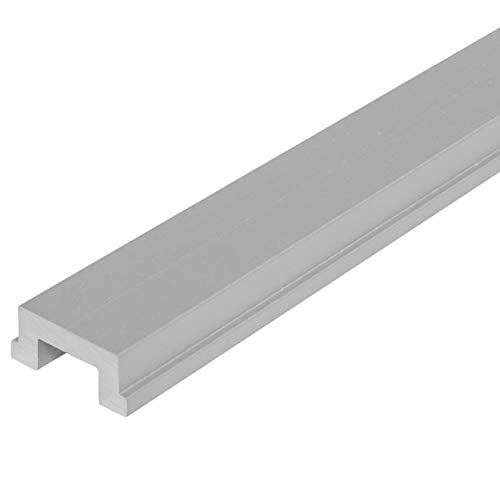
The metal cross bar has English on one face and metric on the other. Just flip it over. The drill guides slide along this bar and are locked in place by set screws.
The plastic vertical bar has only metric markings. You could probably glue an English measurement ruler on the back - like a paper or cloth seamstress tape, or few inches from a carpenters tape measure.
The guides are about 1/4" thick brass inserts, Enough to position a center punch or drill, but not enough to really guide the drill to make a true 90 hole. Don't rely on this to ensure straight holes.
Ideally, you'd use this jig to mark or punch the positions for the holes, then use a drill press or other guide to bore the holes. Hand alignment of the drill with the drawer already in the cabinet also works.
Page 1 of 2