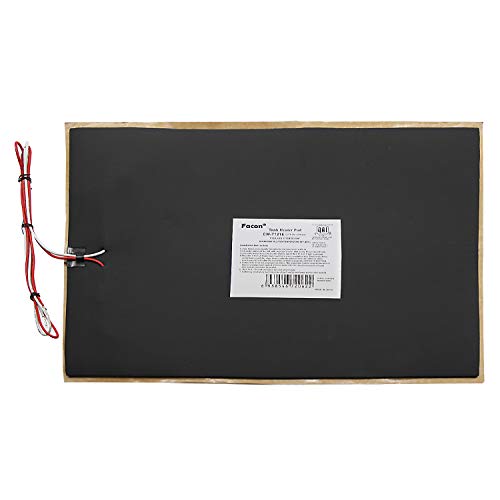
ECO Thermostat Assembly Replacement for Atwood 91447 Replacement Part for Water Heater Repair Parts Fit for RV, Motor Home Emergency Cutoff Service Kit


Key features
- •Water heater repair parts for RV, Motor, Home,etc.Easy installation, if follow our installation instructions
- •Fits Models:GCH6-4E, GCH6-6E, GCH6-7E, GC6A-7E, GH6-6E, GH6-7E, GH6-8E, G6A-6E, G6A-7E, G6A-8E, GCH6A-7E, GCH6A-8E, GCG6A-9E, GC6AA-7E, GC6AA-8E, GC6AA-9E, GCH10A-2E,GCH10A-3E, G10-1E, GH10-1E,G610-3E, GH610-3E, G10-2E, G10-3E, GC10-1E, GC10-2E, GH10-2E, GH10-3E, G6A-3E, GH6-3E, GH6-4E, G6A-4E, GCH6A-10E, GC6AA-10A, GC10A-4E, GCH10A-4E
- •Please check the part number before purchase to ensure proper coordination
- •Temperature Range (Deg F): 140 Degree Fahrenheit
- •90 Days Money Back Guarantee
BrandARU
ECO Thermostat Assembly Replacement for Atwood 91447 Replacement Part for Water Heater Repair Parts Fit for RV, Motor Home Emergency Cutoff Service Kit
List Price: $27.14$24.43DEALYou Save: $2.71 (10%)
Free shippingFree Returns – 30 daysFree Order CancellationSecure Payment2–3 Days DeliveryGet It June 25, 2026In Stock (1)No marketing spamNo account requiredFulfilment by FedEx / Amazon / UPS / ShipwirePayPal / Card Buyer Protection
Customer Reviews
Reviews sourced from verified Amazon purchasers4.6
out of 5
Based on 10 reviews
5★
100%
4★
0%
3★
0%
2★
0%
1★
0%
I have reliable hot water! (Full-timer review)
Brit Kai W. Anders✓ Verified Purchase•August 12, 2023
I have a new-to-me 1998 Four Winds Majestic that came without any manuals. I'm new to RV's, though with a lifetime of experience of full-time nomadic living. When I bought the Beast, the hot water heater worked when it wanted to, not when I wanted it to. I'd flip the switch and the ignitor would come on with a click and a roar, but then would click off as soon as the ignitor would shut off. I had to do a lot of research to find the potential problem, but eventually narrowed it down to these parts. It was the work of a couple of minutes to change them out, using a pair of needle nose pliers, and when I flipped the switch it worked like new. (Suggestion: when you go to work on your water heater, flip the switch on inside and unplug the unit going into the control panel outside by the heater. That way you can just plug it back in from the outside to test your work.)
Bottom line: If your water heater doesn't work, these will likely fix it. Very easy to install, even a complete novice could do it.
Bottom line: If your water heater doesn't work, these will likely fix it. Very easy to install, even a complete novice could do it.
Check the back of each unit!!
Farmerhouse✓ Verified Purchase•August 11, 2023
This unit was described perfectly. It is not easy to take the old ones out and install these. The videos must be fixed because they look easy. You'll have to have patience. There is only one other problem. The written instructions don't explain which unit is the thermostat and which is the ECO. On the back you will see two numbers, a "60" and an "82". The "60" is the thermostat and the "82" is the ECO. Mix them and the fault light will come on. I did and I ended up having a tech come to my RV at the campground. He also mixed them up. He should have known. I found out when I was watching a YouTube video on them. I actually watched five or six, but one of them mentioned the 60/82 mix. I switched them to the correct side and the water heater works perfectly. Another of life's lessons. The seller needs to include this information in the instructions. Had they done so I wouldn't have had to buy three sets!!!!
Very Nice Thermostat Kit
Scott D.✓ Verified Purchase•July 7, 2023
I replaced the thermostats on my RV water heater. This kit was very nice. Packaging, product, and instructions were fantastic. I've received this part from others and they were lame. I was actually shocked at the quality. Install is a pain regardless because location is inside a cabinet and its hard to reach. But I must say this one was much easier than the last one.
Direct replacement for Dometic WH-6GEA
WJ✓ Verified Purchase•June 27, 2023
Direct replacement for Dometic WH-6GEA.
Easy installation. My old thermostat and ECO were corroded and causing the water heater to overheat. Pressure relief valve was also corroded leading to a potentially dangerous tank explosion. Also discovered a pinhole later causing an interior water leak. Lesson learned. Buy an anode rod early to extend lifespan.
It would be nice if this kit included a small packet of thermal paste. I purchased some ARTIC MX-6 separately for better conduction.
My installation steps as a newbie...
0. Disconnected power from water heater and let cool down.
1. Labeled the new ECO 82c with a black marker as 'L'.
2. Labeled the new Thermostat 60c with a black marker as 'R'.
3. Labeled each wire left to right with 1, 2, 3 , and 4 with black marker.
4. Removed metal brackets.
5. Disconnected wires.
6. Removed old foam.
7. Rotated each old sensor until the slot on the collar aligned with one of the three tabs and removed the sensors.
8. Applied thermal compound to each new sensor face.
9. Reinstalled each sensors, ECO on left and Thermostat on right. Rotated until aligned and secure.
10. Trimmed new foam to size and pressed onto terminals to dry fit. Removed sticker back and secured in place.
11. Reinstalled wires in reverse order.
12. Reinstalled brackets.
Item works as designed
Robert Allen✓ Verified Purchase•June 19, 2023
Easy installation, fixed the no start.
Page 1 of 2