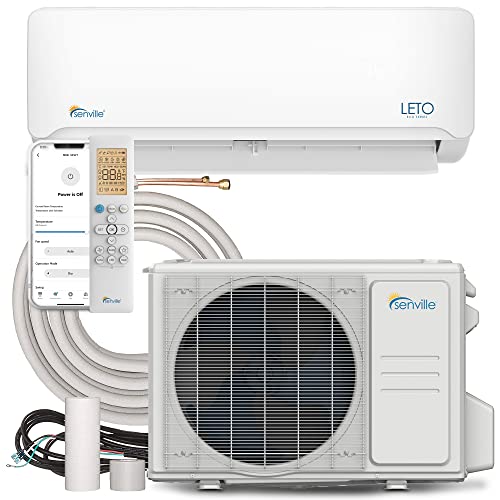
Senville LETO Series Mini Split Air Conditioner Heat Pump, 30000 BTU 208/230V, Inverter, Works with Alexa, 2.5 Ton, White


Key features
- •4-in-1 Mini Split Air Conditioner with Heat Pump. Built-In Air Conditioning, Heating (Up to 5F/-15C), Dehumidifier, Fan and Turbo Function.
- •Great for Bedrooms, Additions, Living Rooms, Garages, and Commercial Applications. Can Be Installed in Virtually Any Home, Condo or Space.
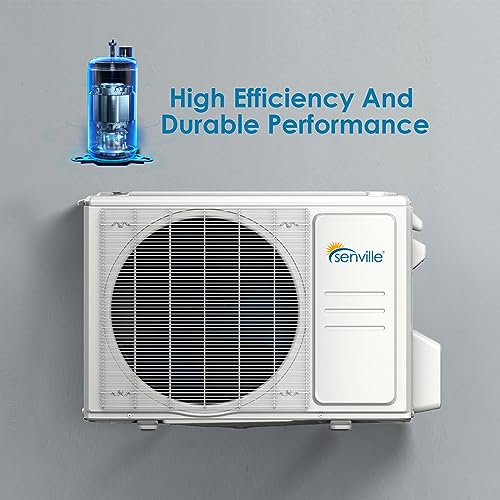
- •Whisper Quiet Operation (34dB). Energy Efficient Consumption and Engineered for the Harshest Climates.
- •5 Year Manufacturer Warranty. Senville Trusted Quality and Design. Free Technical & Installation Support Included.
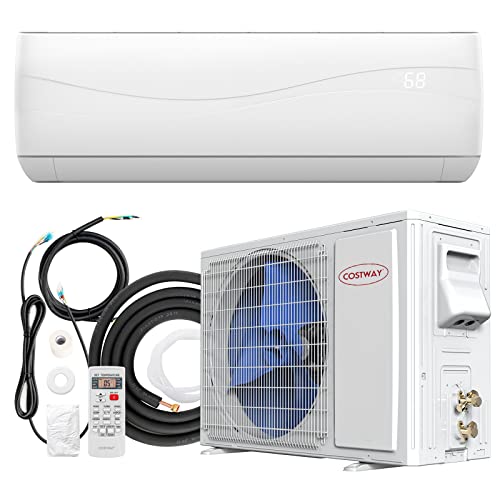
- •Includes 16 Ft. Installation Kit with Communication Cable and Copper Lines (Pre-Flared) and Remote Control. R410A Refrigerant Requires Professional Installation for Warranty to be Valid
Brandsenville
CategorySplit-System
Size30000 BTU 208/230V
ColorWhite
Warranty2 years (parts) / 5 year (compressor). Labor not included.
Senville LETO Series Mini Split Air Conditioner Heat Pump, 30000 BTU 208/230V, Inverter, Works with Alexa, 2.5 Ton, White
List Price: $2764.49$2488.04DEALYou Save: $276.45 (10%)
Free shippingFree Returns – 30 daysFree Order CancellationSecure Payment2–3 Days DeliveryGet It June 25, 2026In Stock (1)No marketing spamNo account requiredFulfilment by FedEx / Amazon / UPS / ShipwirePayPal / Card Buyer Protection
Customer Reviews
Reviews sourced from verified Amazon purchasers4.6
out of 5
Based on 10 reviews
5★
80%
4★
20%
3★
0%
2★
0%
1★
0%
Easy to install and works great!
Jeffrey✓ Verified Purchase•January 18, 2024
This 12,000 BTU (110/120v) unit was purchased to heat and cool just under 500 sq. ft of our sunroom that is connected to our primary suite. This unit is doing a great job at cooling the sunroom and our primary suite!
The only confusion we had was with the wiring to the outdoor condenser unit. Be sure to match up wires 1,2,&3 of the indoor unit to 1,2,&3 of the outdoor condenser unit (see pictures). The label sticker on the outdoor condenser unit cover can lead you astray.
Be very careful with the line set! We opted not to use a line set cover because we didn't want to risk kinking the copper lines.
For this install, I purchased a 2 1/2 inch hole saw, a up to 60 amp non-fusible AC disconnect box, a 20 amp single pole breaker, a 6 ft whip, and several feet of 10 or 12 gauge white, black, and green wire. I was told that I should not used Romex wire for this install. Luckily, our breaker box was just on the other side of the wall we chose to install the outdoor unit on. All wiring goes to the outdoor condenser unit, then a provided black wire set is ran to the indoor unit from the outdoor unit.
We chose to mount the outdoor condenser unit to the side of the house, and it does vibrate the wall when it speeds up and down. It sounds like a pickup truck or diesel is outside idling. We have ordered some rubber anti-vibration pads to put behind the mount and see if that helps. If not, we will be moving it to a stand. However, the outdoor and indoor units are very quiet. The vibration just drives me a bit crazy. No fault of the company or unit. This seems to be a common complaint among mini-split owners.
I will say, if you have any questions or need anything, their customer service was quick, easy, and awesome! I so appreciate them!
Be patient and the install will go smoothly.
TreeShade✓ Verified Purchase•January 12, 2024
What a sweet setup. I don't know how efficient it is but I'm 💯 it's more efficient than my central air condition I have currently.
Cons: the filter is something that I extremely dislike. I know I'll have to go in there and clean the coils one day b/c of how porous the filter element is. Of the 15+ yrs that I've owned my central air condition system, I have not cleaned my coils once b/c I use quality filters.
Bending the 90 degree bend a second time after it exits the wall - you better have a bender b/c that copper line will deform.
When it reaches temperature - the fan still runs but at a very low speed - this annoys me. When the motor is running, it's having a short life span. There is no way to turn it off completely once it reaches set temperature.
"”"”"”-
I bought a 25ft line set, saving the 16ft line set later for another future unit (so I can sweat it together for a 32ft line set). I Cut 5ft off of the lines and soldered the connections on (included photo). I dislike flare connections. I have compression connections on the high side on my central air inside unit and it never leaked but they are not flared connections. They should look into that instead.
A tip is once you drop the drain line outside, drop it straight down and let it drain then and there b/c it's not a hard line and the ribs will trap water and debris and will clog - I promise.
Don't bother trying to level the hanging brackets - install as is. Once you try, the brackets will be too far from the wall and you won't be able to anchor them correctly. I used 3/8"x4" tapcons.
1/22/21
I use this for heat - I know it's not as efficient as in cool mode but I keep a close eye on the kWh usage with a meter to see how efficient it is. It's very efficient. When I put this on full blast @ 80f, it will crank out 15amps for the first hour continuously. Levels off @ 3-4amps once temperature is nice and cozy. In about four hours, I've used about 1.7 kWh - that's less than $0.75.
I compare that to my 2.5 ton and I'm at $3$ for every four hours. It doesn't sound like much but when you run it for 8-10hrs a day x 30 days, it adds up ($170 in just electric alone not adding tax, fuel and other bogus charges utility likes to charge).
Extremely happy. Will update in the summer for cooling with conventional system is off the charts - like stupid expensive.
"”"”"”- 4/1/21
Absolutely love this thing. I run this bad boy 12hrs a day @ 78 degrees and it cost around 0.65 cents (I have a 220v kWh meter).
I will be building a filter shroud on top to use 12x36" filters. It will knock down efficiency so maybe 70-75 cents a day. The filter provided really and truly suck. It's built for efficiency but at a cost of air filtration and quality of air. It doesnt filter anything serious to write home about.
I still am disgusted about the lack function of not displaying the current temperature. I mean it's so easy to add - why did they omit it Idk.
The other thing is I'd like to mention is I've wired the mini split to run my central air fan so it circulates the air all around the house. Central air has a hepa filter and actually filters particles out from the air. This is crucial and very important. It turns off when the outside compressor turns off.
I plan to buy another unit so that I'll have two 30k btu units running. Don't buy the 36k btu - efficientcy drops to 16 seer :(. This unit is 19 seer - 2 seer difference but does make a big difference. In energy consumption. If youre gonna run a unit that has a seer rating of 16 - might as well fix or replace your central air.
I also bought a 12k btu unit and it's seer rating is also 19 but I'm very excited to find out power consumption. That's another review on to itself.
More updates as time goes by.
10/23/21. To date,I have used 2300kw and its a month short of a year. This is truly a money saver. Even if we multiply it by 13cents - that's only $300 the whole damn year :) . My office consumes 40-50kw a day with a 4ton central unit. Let that sink in for ya (that's 14,600kw a year / 365 days).
12/24/22: I turned off my split just for fun to show to myself and to you how inefficient central air unit (cau) is. Starting in October to month of December but didn't keep track of the $$$ b/c I was using cooling mode. It only increase about $70-75 with the cau.
It stared to become cold in December so I decided to keep tabs on the electric use. We had temps dipped down to 30f here in Florida and I tell you what, the cau is so inefficient I was using 115-250kwh a day. My electric bill? $500 for the month of December 😂. Jokes on me but I did it all for science.
To date, I have used a total of 5996.72kwh from December 2020 to October 2022. That's $900 for two years of the mini split. That's amazing!
My next step is to buy mini split cau and replacing my old cau. I can buy a 20seer cau but that's $20k vs a mini split cau for $5k. No brainer!
1/18/23: I bought another split unit. Klimaire 30,000 btu 21 seer ($2000). I didn't want to buy another sensiville b/c I wanted to try another brand. I will have two running. I'll attached a meter on this one as well. I'll keep you all posted.
2/7/23. Completed install of the Klimaire 30k btu. Advertisement says 21 seer but the product I received was 18.6 seer. I contacted them and they sent a new seer rating - so the seer rating on the boxes are false? According to federal law, that was illegal 😂. Doesn't matter to me anyways b/c"¦uhmmmm"¦.. it's the same unit as my Senville 30k btu. I used the Klimaire remote to control the Senville and vice versa. Units are dimensionally the same, guts are the same. Down to the location of the wall plate to even the wiring.
I won't get into too much details of the install but my installs are from personal experience and my views on what's logically sound may differ from yours. What I have learned so far on other units I have installed is the most important:
1. have them 30"away from the wall so you can actually clean the coils. I set mine on 4x4 + wall hanger kit. Came out great. If you install the unit perpendicular to the wall, you can have it however far you want b/c the coils will be easily accessible.
2. The styrofoam insulation that comes with the pipes are absolute donkey crap - of course I already knew this coming in. I said to myself this crap will break down under the sun and weather. What wasn't in the attic or encased in plastic shrouds were broken down by the elements.
3. Drill the inside hole angled downwards the outside. This will allow the correct slope for the drain pipe. Sometimes even having the hole right at the edge of the inside evaporator casing still won't allow enough drop for the drain pipe when your wall ls are 8-14" thick.
4. Try to drop the drain pipe straight from the wall and down. Less the drain pipe runs horizontally, the better.
5. If you need to go through concrete, buy the BINOTA Concrete Hole Saw Kit. Drills the most beautiful 3" holes any weekend warrior would approve of.
6. If your runs are long, sweat the tubes together with silver - don't connect them together via flair joints. I avoid flair joints as much as I can b/c they can easily leak.
7. If your runs are short, cut the tubes to size. Make new flares and or reuse the ones you cut off. I promise you the styrofoams that are coiled up behind the machines b/c you chose not the shorten the tubes, will all deteriorate and you will have to come back and fix it - that requires cutting them off! It's not fun.
8. Clean your coils and or check them at the beginning of each spring. This will give you the same efficiency or very little loss of efficiency eat season.
Now for some kWh testing. Before I get into the goods. I would like to put it out there that I hooked both units on one 40 amp breaker using #8 copper wire. I wanted to monitor kWh usage through one meter bc these two units will run simultaneously during the summer and winter while the central air fans circulate air throughout the entire house. 30amps max will be used.
I turned on both units with one remote lol. ran the unit for an hour. From 78f to 72f. My meter was at 15.75 kWh. After an hr run it was at 17.14 kWh. That's 1.4 kWh an hour running both machines FULL BLAST. WOW WOW WOW!
What I found interesting is the the Senville ran at 2.4a while the Klimaire ran at 4.2a for a total of 6.6a. The Klimaire outside condensing unit fan was loud and fast while the Senville was quiet and slow.
I'm really enjoying the new split unit and I simply can't wait for summer to come and run more tests. Upload a few photos - hopefully amazon won't delete my photos - idk why they keep on deleting them.
Cheers.
AWESOME ALL AROUND!
Amazon Customer✓ Verified Purchase•December 28, 2023
AWESOME mini-split and awesome company. Not only did it deliver fast and right into our garage on a sturdy pallet in good packaging, but when I realized that we had missed the Prime Day special by a few days, the company was more than happy to honor the discounted price. No hassle, no questions. Just an easy yes and a refund!
This unit is super quiet and works really well. My husband and I both WFH in a ground-floor office in our Texas waterfront home, and the area is humid and stuffy. We tried a window A/C unit out of desperation when our previous mini-split died in June (after only 7 years) and our HVAC company was going to charge us a fortune to replace. Unfortunately, the window A/C unit was loud and blew freezing air on you--and took up one of our few windows. The noise is a big deal when you are on video calls, as it was virtually impossible to hear, even with the volume turned all the way up.
We found an experienced professional to install, and we couldn't be happier. Haven't tried the heat yet (I mean, it is Texas y'all!), but I am assuming it will work just as well as the A/C.
So far, we give the whole experience an A+ and highly recommend the company and the minisplit!
24000 BTU - Very happy - Experienced DIY'ers or Professional HVAC installation recommended
soundsorcerer✓ Verified Purchase•December 17, 2023
Bought this for my 1350 Square Foot finished basement. This unit provides AC, Heat and dehumidifying which is exactly what I needed. After a month or more of use, it admirably provides all of that and does so efficiently and quietly!
Installation. This is the only Mini-split I have ever installed so there is always a learning curve. I am very familiar with HVAC and I have many of the tools already since I worked on automotive HVAC from time to time and I consider myself to be a pretty knowledgeable on the subject. You will need a set of gauges, evacuation/vacuum pump, you may need a flaring tool, a hole saw 3.5"....and if you were like me, I was going through brick and concrete block so be ready to spend some money on that since masonry bits that size with a drill to go with it are not cheap! If you are going through siding and wood it is a much easier proposition. I would also recommend getting a cover kit for all the piping so you can make it look neat and protect all of that from elements.
Power...you will need 220V at 25Amp, with a disconnect on the outside next to the unit and it will need to be accessible for future service and it is hardwired from your box to the outside AC unit. In my case, the air-handler that in on the inside of the home, is powered from a cable that comes from the outside unit so no additional receptacles were required.
With this purchase it came with 16' of copper hose (two), a control power cable and drain hose. Depending on your application you may want to shorten the hoses or you may need to add to it. In either case this will require a flaring tool...fittings do come with the system if you need to this. If you need to extend the tubing to over 25' you will also need to add "Freon" so unless you are a licensed A/C contractor, well you may need one for that. 16' was actually perfect for my application.
I have a family member who is an electrician, so I had that part installed and permitted to keep everything up and up especially when/if I sell the house. He also helped me install the Mini-Split. It took us about 4 hours to install and we had no issues with the installation and because he is an electrician he had the 3.5" masonry drill bit and 1/2 inch rotary drill that we needed.
I can say it was pretty straight forward and there are plenty of YouTube videos where people do step by step installation. The instructions are helpful but confusing at times, so this is where experience is helpful to read in between the lines...since the instructions are for multiple units they sell and they are not all the same!!!!
Now that I have done one I feel pretty confident to do another. I would also buy this product again with out hesitation. My only recommendation is if you have to buy the tools to be able to do the job, I would recommend just calling an AC professional and have them install. The cost of the necessary tools you may need may not be worth the investment unless you plan to do more of these in the future. If you do not even have a vacuum pump, gauges, flare tool etc, then you likely do not have experience either, and I would recommend you seek professional installation.
Note: I saw on some videos people not vacuuming out the lines and just putting the systems together and releasing the preloaded Freon into the system (avoiding the need to purchase or rent a evacuation/vac pump). This is a bad idea since it introduces air and moisture into the system that will degrade its performance, shorten life span of the components and voids the warranty, plus you need that step to check for leaks. Freon is not cheap!
Take a gut check on this. If you are handy and confident with your skills, go for it! If you are not sure, maybe seek someone out who has done it to help, or just call an competent HVAC tech to come out and do it for you.
Great product-- Difficult DIY
drband✓ Verified Purchase•December 13, 2023
This is a great, high-quality product that functions well. I thoroughly recommend the Senville for quality and performance.
The install is a difficult level DIY and should only be attempted after proper research and with proper tools.
Physically installing the units is easy. Wiring the units is not difficult but is time consuming, especially accounting for running a dedicated 20A electrical circuit.
Line set installation is more involved. I chose to hang the inside unit before attaching the line set because of how I chose to run the refrigerant piping inside the room and then straight through the wall to the outside unit. I made my own wall pass-through sleeve from 3" pvc to give a little more working space. The included sleeve is very thin and flimsy. Line set flare nuts MUST be torqued to spec. I had one nut that failed and had to remove, replace with an included extra, and reflare the connection when I found the leak during the first pressure test. I shortened the refrigerant piping at the outside unit to fit with no looping of pipes. I used an eccentric flaring tool to remake the connection after shortening.
Next step of pressure testing with nitrogen MUST NOT BE OMITTED. You will need a HVAC charging manifold, special fittings, a micron vacuum gauge, HVAC leak test soap, a compressed nitrogen tank and regulator, and a vacuum pump. A competent pro installer will do this--but many HVAC techs skip the pressure test step.
I pressure tested and found the bad flare nut leak, repaired it, and pressure tested again to 300psi nitrogen. This forces most air and water out of the lines. I left the lines on pressure, applied leak test soap and left the set up for over 1 hour. There was absolutely no leakage according to the HVAC manifold gauge.
After pressure testing, a vacuum test was performed using a micron vacuum gauge to make sure all nitrogen, air and water vapor was removed from the lines. You will need special fittings as mentioned, to insure that the lines remain isolated from the pump after evacuating. I vacuumed down to 220microns and let it sit for 30+ minutes. The gauge remained well below 300 microns. (the standard is to remain below 500 microns). This step double checks for leakage and confirms removal of all gasses and water before releasing the factory charge into the system. Next, isolate the gauge from the system using the special fittings, and release the refrigerant charge from the compressor into the system. After a final check for leaks after removing all gauges and fittings, the system was ready to power up and test run.
Note: the flare nuts are crudely shaped on the outside (seem to be cast, rather than machined) so normal open ended wrenches do not fit them well. You will have to use adjustable wrenches to adjust them when installing. Using a torque wrench on those flare nuts is difficult because of the non-standard finish and sizing. A $175 adjustable wrench head HVAC torque wrench (made by Yellow Jacket) would really assist here, but I had a standard torque wrench with crow's foot wrench adapters. I made it work... but that's not an easy way to do it. I doubt many techs carry the special torque wrench and will just do the flare nuts by feel based on experience.
The test run of the unit revealed no leaks, so I wrapped up the line set at the connection points and finished the install. I used a line set cover flashing to protect the lines where they emerged from the outside wall. Zip ties where needed to secure the wrapping tape. Big HVAC type zip ties screwed to the wall to mount the indoor line set in permanent fashion. double checked the drain line was working properly without restriction by pouring water in the top of the inside unit and verifying full drainage. I left the primary drain line joint uncovered inside so I could have access if there was ever a blockage.
The unit heats wonderfully, cooling is great, too, but I will have to confirm how that works on a really hot day this summer. You will have to run the cooling check on manual cool override if temperature is below 62º outside (it was cool here on the test day). The air output on cooling feels ice-cold.
Spend the time and money to install it correctly and the Senville will serve you well, I think. If you are not comfortable doing it DIY, then hire a good installer.
You will not have factory warranty without a professional installer according to Senville. I chose DIY anyway after researching the process and finding than some installers skip the pressure test. (Senville in fact does not insist on a pressure test in the install manual.)
22 months in, I could not be more pleased. Keeps my garage/workshop comfortable year round (outside temps ranging from 7° to 97°) and has very little impact on my power bill. Just keep the filters and fins clean for best efficiency. So far, I have not needed to clean the blower wheel. No problems with the condensate drain at all.
Page 1 of 2
Related products


Mrcool DIY 12K BTU 4th Gen Energy Star Ductless Mini-Split Air Conditioner
List: $2528.79$2275.91DEAL