Granite Repair Kit & Marble Repair Kit (Color Match), Quartz Countertop Repair Kit, Granite Epoxy for Marble Granite Porcelain Quartz Corian Tiles and Stones with Color Brown Gray White Beige Black


Key features
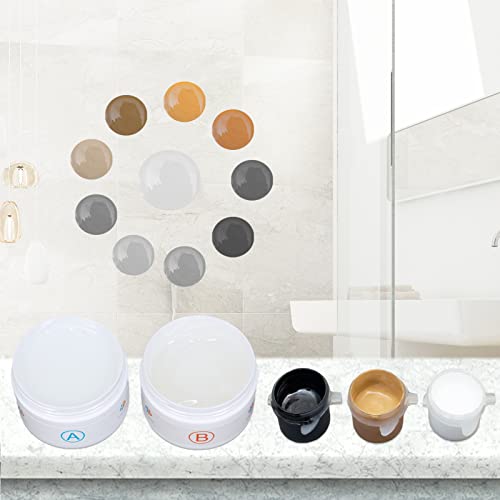
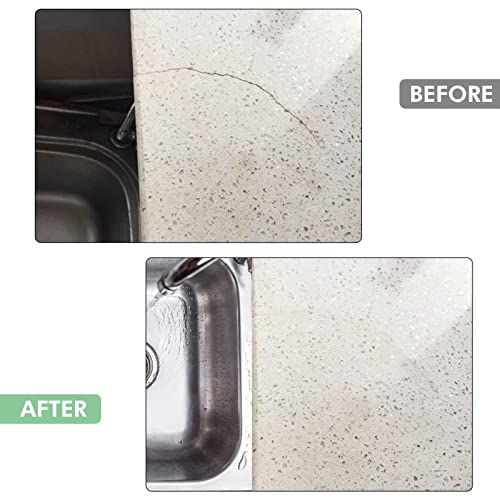
- •CORIAN REPAIR KIT - Repair chips and cracks & fill holes on marble granite quartz corian countertops tiles and stones
- •DIY COLOR MATCH KIT - Kit provides professional epoxy resin color tint to match your needs, Support brown, gray, white, beige, black, cream, yellow and more
- •ENVIRONMENTAL FRIENDLY - Food safe epoxy resin ,NON-TOXIC AND ODORLESS
- •EASY TO USE - Mix and apply, Even non-professionals can easily do a perfect job with guidance
- •PERMANENT FIX - The surface can be maintained for minimum of 10 years after restoration which saves you tons of money
Granite Repair Kit & Marble Repair Kit (Color Match), Quartz Countertop Repair Kit, Granite Epoxy for Marble Granite Porcelain Quartz Corian Tiles and Stones with Color Brown Gray White Beige Black
List Price: $29.08$26.17DEALYou Save: $2.91 (10%)
Free shippingFree Returns – 30 daysFree Order CancellationSecure Payment2–3 Days DeliveryGet It June 25, 2026In Stock (1)No marketing spamNo account requiredFulfilment by FedEx / Amazon / UPS / ShipwirePayPal / Card Buyer Protection
Customer Reviews
Reviews sourced from verified Amazon purchasers4.1
out of 5
Based on 10 reviews
5★
70%
4★
30%
3★
0%
2★
0%
1★
0%
This saved my quartz countertop
tangodancer✓ Verified Purchase•September 25, 2023
I used this to fill a very small (2mm) white chip in my tan-with-brown-spotted quartz countertop. I also watched a youtube video about how to do the repair which helped with getting it right--adding exactly equal amounts of the epoxy plus hardener, and that a little color goes a long way. I couldn't be happier with the result--which was a whole lot better than the other recommendation, which was to replace the entire countertop!
Worked great for repairing holes in a marble shower sill
Jeremy✓ Verified Purchase•September 10, 2023
Needed to fill drill holes in a white marble sill along the base of a shower after installing a new glass enclosure.
Color matching wasn't too difficult since it was white, but I did need to add a tiny bit of the black dye to get the right match. The dye set for this kit doesn't have a lot of options, but you can also use the 2-part epoxy base with dyes from other kits.
It was easy to mix and apply. I over-filled the holes a bit and sanded it down with sanding discs in sequence from 100 up to 3000. YOU WILL WANT A ROTARY SANDER OR DRILL WITH SANDING DISC KIT if you're going to use this on a smooth / polished surface. As you can see in the pictures, the repair isn't noticeable unless you really get up close and look for it.
The material is not nearly as hard as the marble (which is a good thing since I needed to sand it). I'd say it feels kind of like a very hard plastic when hardened. I also ordered an acrylic-based tile repair kit, but I liked the way this epoxy material hardened much more than the acrylic putty (which seemed more brittle and crumbly) - so for repairs to some holes in blue tile I used the dye set from the acrylic kit with the epoxy from this one.
great product
john w hofert✓ Verified Purchase•August 25, 2023
item arrived and performed as advertised.
Worked great
Philip Farnsworth✓ Verified Purchase•August 25, 2023
We needed to piece together a couple pieces of granite and this kit worked perfect for what we needed!! Word of advice a little color goes a long way so don't over add the color when dying the adhesive
a stopgap for me
J. Young✓ Verified Purchase•August 1, 2023
Let me preface by saying I have ordered two of these for a job that is probably beyond what this is intended for. I have porous shower tiles that are basically crumbling and needed to use this to halt further deterioration. For that purpose, it appears to have worked. Some advice...
1 - The 1:1 ratio to get the stuff to dry is very important, and given that you have only one tongue depressor to gather the stuff, you aren't going to get a perfect 1:1. If you don't, it will remain sticky and undry for a while, perhaps several days. But it will congeal enough to where you can still take a shower if your tiles are on the shower walls like mine.
2 - It ships with 2 toothpicks and 1 tongue depressor, but you have 3 containers of paint and 2 containers of epoxy and bonding agent. It should've come with 3 toothpicks and 2 tongue depressors due to this.
3 - Get a piece of paper or two and mix the paint on that. It's going to be a messy process. You can open the paint without the gloves, but strongly recommend using the gloves that come with the kit after that. I didn't the first time and learned my lesson. No issues the second time using them.
4 - If you are using this to repair the edges of a tile like I was, use some painters tape to mark the edges and remove it while the stuff is still wet when you are done. I didn't the first time and have some sloppy edges as a result where the epoxy cut into my grout lines.
5 - My final result does not look particularly great, but I also realize that my shower is beyond saving. I can only delay the inevitable demo and reconstruct, and for that it was fine. I am not worrying about the water leaking through the worn away tiles and into the wall anymore.
6 - The sandpaper is beyond useless. The grain is just too fine to do much. But I used my electric sander with heavier grain and it still didn't do a lot because my first go round I made it a bit too bumpy. ABSOLUTELY USE THE SUPPLIED TROWEL to make the filler as flush as possible.
That's about all I can think of. I think for small repairs like chips and cracks, this should do the trick pretty easily. Just make sure you get your ratio right.
Page 1 of 2