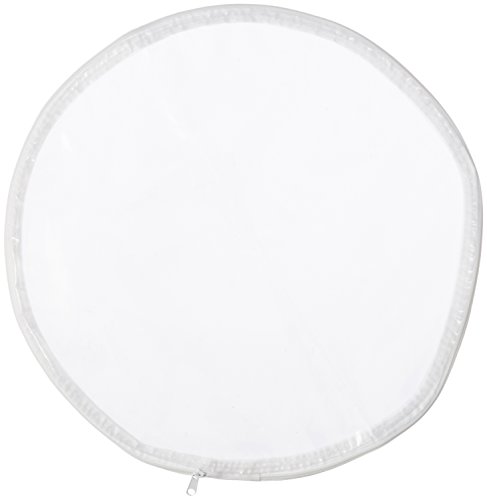
Mrs. Anderson's Baking Easy No-Mess Pie Crust Maker Bag, Rolls 14-Inch Crust For 11 to 12-Inch Pies


Key features
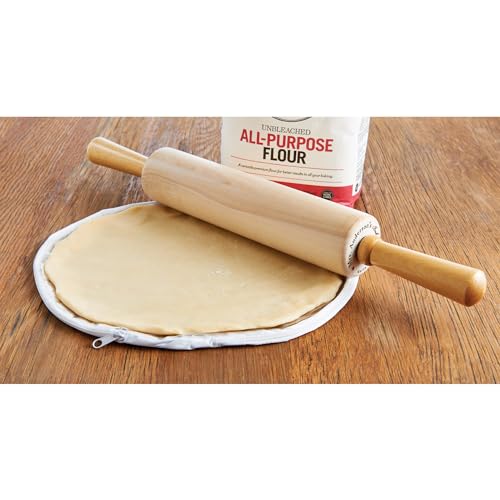
- •Mrs. Anderson's Easy Pie Crust Maker for perfectly round pie crusts with a consistent thickness that bakes evenly without the floury, sticky mess
- •Made from BPA-free plastic; strong, durable, reusable; stays in place when in use; transparent material displays contents clearly; lays flat to store
- •Dust dough with flour, place inside Crust Maker and press flat with hand, zip Crust Maker closed and roll; for 11-inch, 12-inch and deep-dish pies
- •Safely transfer delicate dough without it tearing; unzip Crust Maker, center pie dish face down on dough, hold both together and turn upright
- •Great for rolling cookie, pastry, pizza, and pasta dough too; turn inside out and wash in warm, soapy water; dry thoroughly; instructions included
Mrs. Anderson's Baking Easy No-Mess Pie Crust Maker Bag, Rolls 14-Inch Crust For 11 to 12-Inch Pies
List Price: $19.38$17.44DEALYou Save: $1.94 (10%)
Free shippingFree Returns – 30 daysFree Order CancellationSecure Payment2–3 Days DeliveryGet It June 23, 2026In Stock (8)No marketing spamNo account requiredFulfilment by FedEx / Amazon / UPS / ShipwirePayPal / Card Buyer Protection
Customer Reviews
Reviews sourced from verified Amazon purchasers4.4
out of 5
Based on 10 reviews
5★
80%
4★
20%
3★
0%
2★
0%
1★
0%
Useful after practice
stpauley✓ Verified Purchase•January 13, 2018
I read all the comments but went ahead and purchased because of the recommendation on Cooks Illustrated's website. Took me a couple times to figure out best practices with this item. It's necessary to flour both sides of the bag. The bag is a bit small for a standard pie crust.
I now roll the crust out to the edge of the bag, then open it and trim an inch all round. Then I close the bag and continue rolling. Result is a crust which fits a standard 9-inch pie tin and which doesn't need trimming. Without the trimming in process, my crust recipe is not fully rolled out.
Best part of the bag is the ease with which the crust can be placed in the pie tin (that is, if it is floured on both sides).
Makes pie crust rolling easier
KellyJM✓ Verified Purchase•December 3, 2017
Very easy to use! I bought this to replace an old one of the same style. It is easy to get the right shape, and then to transfer to your pan (just peel off the plastic). You do need to keep flour in between the crust and the plastic to make removal easier and neater. Moisten your counter before rolling, and it doesn't slide around as much. The plastic is very thin, however, and when I scraped off bits of stuck-on dough, crumbs on the other side caused tiny holes to poke in the plastic. It is completely usable this way, just disappointing. My old one had more sturdy plastic. It cleans up easily in warm soapy dishwater, then drape to dry.
Great, but miscalculated the size to buy.
Poppy-HG✓ Verified Purchase•May 6, 2017
This pie crust bag really did take the guess work out of rolling a perfect round shape in the specified size.
I didn't have to hold the inverted pie plate over the crust, to keep checking for size and shape, as I rolled it out. I used to always patch my dough.
Unfortunately, the 11-inch bag was too small for my pan, which measures: 7.25 inch bottom diameter, 1.5 inch deep, with a .5 inch rim = 11.25 inches
The crust didn't cover the rim, and there was not enough dough to make a decorative edge. The14-inch bag should be perfect for my pan.
Some reviewers complained of their wet dough being difficult to handle or sticking. I learned to ignore the amount of iced water called for in my recipe.
After the butter and shortening have been cut into the dried ingredients, I put the mixture into a big bowl. Then I add 1 Tablespoon of iced water, gently tossing with my hands. Sprinkle more water and toss until the dough just sticks together when pressed into a ball. Maybe it's the humidity, but my recipe had too much water. (It calls for 5-6 Tablespoons and I used less than 2 Tablespoons.)
Here's my favorite tip: Put your prepared pie crusts (in their pie pans) into the freezer, while you make a custard or pumpkin filling. Pour the filling into the frozen crust and place in the hot oven immediately. The bottom crust will not get soggy.
Update - Nov. 21, 2017
I purchased the 14-inch bag and it's perfect for my 9-inch pie pan (see dimensions above)! It leaves extra overhanging dough to make a generous crimped crust. I hadn't baked a pie in a while, so I skipped a few preventive measures and had to roll it out again:
After rolling out the crust, the dough absorbs some or all of the flour in the bag. Unzip the bag and carefully lift the cover. If the dough seems moist or sticky, sprinkle a little flour over and spread it out with your hand. Zip the bag, flip it over and repeat. Refrigerate the bag (on a plate or cookie sheet, so it doesn't wrinkle) until the colder dough is easier to handle. Place the crust into the pie pan and freeze a few minutes before filling and baking, to prevent a soggy bottom crust.
This recipe for Layered Pumpkin Custard Pie fits this 9-inch pie plate. I found it on the Internet and it's delicious!
Pie making must.
SJME✓ Verified Purchase•April 14, 2017
This is a great idea for making a perfect pie crust. No more mess all over the kitchen counter. Previous reviews I read before buying really helped such as putting a small amount of flour inside and shaking to distribute before introducing the pie dough. Another good idea I read somewhere about flour used to coat the dough is to use an empty spice shaker container to distribute the flour evenly. Pie crust has always been a challenge even for good cooks and this is a big assist.
Buy!
B✓ Verified Purchase•April 23, 2016
I am not a "gadget" person. I do not buy the latest, greatest gimmick on the market, so when Cook's Illustrated recommended this pie crust bag I was skeptical. I went ahead and purchased this as I was planning on making 16 pies for a friend's memorial service. Wow! Very handy! I was able to roll out the dough and use the bag to perfectly position the dough over the pie pan. Another feature that is probably overlooked is that the zipper acts as a leveler of sorts for rolling an even dough. Usually I use wooden skewers on either side of my dough so that I can roll dough evenly, but I was able to skip this step thanks to the zipper. I still had to flour both sides of the dough to keep it from sticking, but I would have done that anyway. Enjoy this product!
Page 1 of 2