Vantage Point CGUPM12-S Front Projector Mount - Silver


Key features
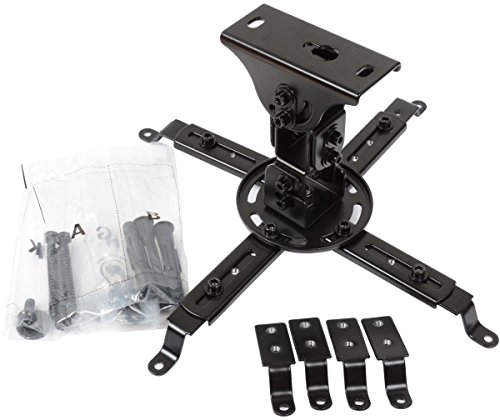
- •Universal LCD/DLP projector mount with 12" drop
- •Tilt and yaw (roll) adjustment
- •360-degree rotation
- •Individual height adjustment for each mounting arm
Vantage Point CGUPM12-S Front Projector Mount - Silver
List Price: $95.53$85.98DEALYou Save: $9.55 (10%)
Free shippingFree Returns – 30 daysFree Order CancellationSecure Payment2–3 Days DeliveryGet It June 22, 2026In Stock (1)No marketing spamNo account requiredFulfilment by FedEx / Amazon / UPS / ShipwirePayPal / Card Buyer Protection
Customer Reviews
Reviews sourced from verified Amazon purchasers4.5
out of 5
Based on 10 reviews
5★
80%
4★
20%
3★
0%
2★
0%
1★
0%
Cannot be happier!
aquido✓ Verified Purchase•July 28, 2023
This is very highly recommended.
Very high quality materials, all parts are very well designed and fit very well.
Easy to install, and adjustability is just amazing.
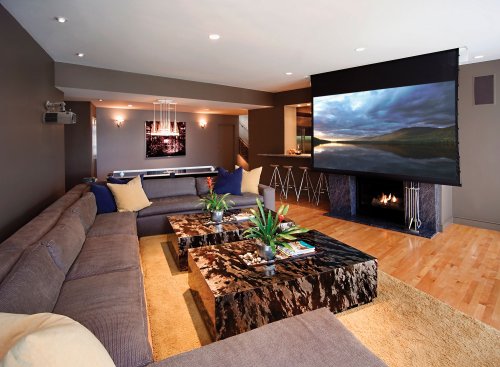
I have a short throw projector "BenQ W770ST", I used to project my screen from tea table between sofa and screen.
However, I bought a reclining love seats and tea table was getting on the way since my home theatre room is tiny.
I tried a cheaper mount first "Mustang Low Profile Projector Mount (MV-PROJSP-FLAT-B)" which was around $40, but it was absolutely terrible.
Bolts were rough and none of the parts fit smoothly. I had to use all my strength trying to tighten up bolts.
I couldn't even try mounting my projector as I could never get it installed from the first place. Frustrated, I threw it away.
Then, I found this beautiful Vintage Point mount.
It seemed little expensive at first, but positive reviews gave me enough confidence to have another go.
I received it couple of weeks ago but didn't have enough time to install it until today.
It took about an hour and half drilling, mounting, adjusting, cleaning.
Whole process was hassle free as everything was dead straight forward.
Manual was fairly simple and does its job.
All parts were precise.
There are two options.
You can mount it close to the ceiling or you can also use extender to make it little longer.
I used extension to avoid from ceiling light.
As other reviewers have already mentioned,
Adjustability is amazing with this mount.
It can be rotated, tilted in either direction..
I could get perfect picture on my 92" screen in less than 3 minutes after mounting in on the ceiling.
horizontal and vertical placement can be easily adjusted as well, so you won't have to drill with exact precision.
Very satisfied.
Very high quality materials, all parts are very well designed and fit very well.
Easy to install, and adjustability is just amazing.
I have a short throw projector "BenQ W770ST", I used to project my screen from tea table between sofa and screen.
However, I bought a reclining love seats and tea table was getting on the way since my home theatre room is tiny.
I tried a cheaper mount first "Mustang Low Profile Projector Mount (MV-PROJSP-FLAT-B)" which was around $40, but it was absolutely terrible.
Bolts were rough and none of the parts fit smoothly. I had to use all my strength trying to tighten up bolts.
I couldn't even try mounting my projector as I could never get it installed from the first place. Frustrated, I threw it away.
Then, I found this beautiful Vintage Point mount.
It seemed little expensive at first, but positive reviews gave me enough confidence to have another go.
I received it couple of weeks ago but didn't have enough time to install it until today.
It took about an hour and half drilling, mounting, adjusting, cleaning.
Whole process was hassle free as everything was dead straight forward.
Manual was fairly simple and does its job.
All parts were precise.
There are two options.
You can mount it close to the ceiling or you can also use extender to make it little longer.
I used extension to avoid from ceiling light.
As other reviewers have already mentioned,
Adjustability is amazing with this mount.
It can be rotated, tilted in either direction..
I could get perfect picture on my 92" screen in less than 3 minutes after mounting in on the ceiling.
horizontal and vertical placement can be easily adjusted as well, so you won't have to drill with exact precision.
Very satisfied.
Very sturdy and adjustable projector mount
Gary A. Aide✓ Verified Purchase•July 11, 2023
I needed a mount for my new BenQ TK850 projector and this mount turned out to be just what the doctor ordered. As you can see by the photos, I have log beams running across the room. I had hoped to hang the projector directly on the bottom of the beam but the required distance from the screen to the projector was just a few inches further back. This Vantage Point mount allowed me to set the projector back from the screen just enough for what I needed. Also, while you should measure carefully to make sure the center of the projector lens (not the projector body), lined up perfectly with the left-right center of the screen, this mount will allow for some minor left-right adjustment as well.
Before I purchased this mount, I noticed on the reviews that some customers had trouble figuring out how to assemble it. No doubt about it, the enclosed assembly instructions are very basic, but if you study the picture of the mount on the box and compare it to the instructions, it should make sense. I was worried also about whether the mount would lock down enough to keep it from sagging over time. No worries because after you find the correct position, there is a "lock screw" with an Allen wrench head that you tighten down on the joint. The Allen wrench and screw is included with the mount.
By the way, adjusting the position of the projector in the mount is pretty easy. Just loosen bolt in the appropriate arm enough to allow for nudging projector into position then tighten down. I was able to do it alone but another person could make adjustments a little easier.
I've owned 3 previous projectors with 3 different mounts. The Vantage Point mount has been the easiest and less costly to install. I am very pleased with the mount and the BenQ TK850 projector.
Very solid!
Gary W.✓ Verified Purchase•July 4, 2023
This product is very sturdy and well put together. I like the fact that you can shorten it or keep the extension to add length from the ceiling. Overall great product would definitely buy again.
Flexible
James✓ Verified Purchase•July 1, 2023
Got an Optima projector which has to be installed in the exact center of the floor. Thanks to this mount! Really flexible.
Easy, Strong, Secure and *Almost* Universal
Geetar Don✓ Verified Purchase•June 29, 2023
The Vantage Point Universal projector mount is both well designed and well built. It is fairly easy to set up, is stronger than it's spidery construction might suggest, and hold even a good sized projector (such as my JVC SX21) very securely.
But "universal" it is not. At least with the hardware provided in the box.
There are 8 steps in mounting a projector using this unit.
1) The correct position of the hanger needs to be determined. This will depend on lens throw - i.e, the required distance and placement from the screen which ideally has been chosen and mounted first.
2) The mount's base needs to be securely affixed to the ceiling (or wall). The approved way to do this is with three provided screws which are designed to go through the ceiling into a supporting beam. But what if there is no beam at or near the desired mounting position? Then an alternative needs to be created. I chose to to substitute three 'winged' ceiling hangers for the screws. This worked very well for me but would not if the ceiling had been less solid.
3) Once the base is attached to the ceiling the adjustable sections of the mount are screwed together. This is then attached to the base.
4) Step four is where I ran into a problem. (I actually had discovered it and solved it before going through the above three steps) It was this: The cleverly designed units that attach the mount to the projector came with three different sizes screws, one of which, apparently, was meant to work on any projector. However, none were large enough for the threaded mounting holes on the SX21. Worse, the larger screw needed could not go through the provided adjustable mounting points.
I got around the above by simply buying three good quality screw of the proper diameter, length and thread pitch plus some spacers and washers. -All items available at a good sized hardware store. With these in hand attaching the projector to the mount was simple.
5) The projector's placement on the mounting structure needs to be adjusted for correct center of balance. I.e., the projector should, when hung by the connector joint, hang straight and even. (This may sound difficult. It is not)
6) The projector with attached mounting bracket is then attached to the unit on the ceiling with a single bolt.
7) The power and signal cables are attached to the projector. (I used open "U" hooks screwed into the adjacent wall to support the weight of the heavy component cables I was using.)
8) With the adjustment locking screws slightly loose the projected image is then progressively aligned with the screen. As each parameter is gotten right the related locking screw(s) is/are tightened, then the focus adjusted.
With the above accomplished the projector is firmly and securely in place.
The Vantage Point Universal mount looks good and IS good. If you feel comfortable doing the steps above you can't go wrong with this unit.
Page 1 of 2