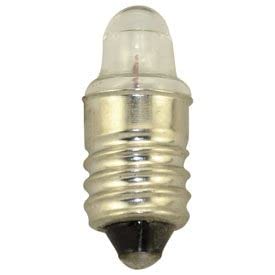
Moonrays 95534 Tier Light Kit, Incandescent Lamp, 4 W, 12 V, White Light


Key features
- •Low Voltage Outdoor Lighting Kit Patio Walkway Lights
- •95534
BrandMoonrays
CategoryIncandescent Bulbs
SizeBlack Plastic,
ColorPlasticFrosted Lenses
Warranty1 year limited warranty.
Moonrays 95534 Tier Light Kit, Incandescent Lamp, 4 W, 12 V, White Light
List Price: $145.49$130.94DEALYou Save: $14.55 (10%)
Free shippingFree Returns – 30 daysFree Order CancellationSecure Payment2–3 Days DeliveryGet It June 23, 2026In Stock (1)No marketing spamNo account requiredFulfilment by FedEx / Amazon / UPS / ShipwirePayPal / Card Buyer Protection
Customer Reviews
Reviews sourced from verified Amazon purchasers4.3
out of 5
Based on 10 reviews
5★
30%
4★
70%
3★
0%
2★
0%
1★
0%
Hard to find wired flowerbed lights
KATHY RAMSEY✓ Verified Purchase•September 27, 2023
Once we figured out how to put these together, they look really nice! The downside for me was the wire that came with it is too short because you have to waste so much on each light threading it. Also, you have to figure out how to place them so the plug you are using is close enough for the light monitor. It said not to use an extension cord but it was the only way we could pug it in. They seem to work fine with it. I measured before I bought to make sure 50 ft was long enough but I did not know about the extra needed to ensemble them. We were only able to use 6 out of the ten for the area we wanted them for but we are pleased with the end result!
They work & look fine
Alice Lindley✓ Verified Purchase•September 11, 2023
Have limited sunlight for solar, PIA to assemble but work great, look good & on timer. Have used lights like this 30+ yrs, dependable security!
that getting good electrical contact between the cable and the prongs on ...
James Stenzel✓ Verified Purchase•August 11, 2023
All the reviews were helpful, and due to the previous feedback I had a positive experience. When my lights arrived, and I saw how everything fit together I decided to do a little cable modification during the installation. It was obvious from all the issues that people had with these lights, that getting good electrical contact between the cable and the prongs on the lampholder was the weakpoint in the design. I really didn't want to buy 14 gauge cable, which is really not necessary from a current capacity standpoint, and so here's how I attacked the poor connection problem: As I assembled each lamp, and created the loop in the cable, I pinched the loop tight to make the bend as sharp as possible. Then I shaved off a little insulation using a very sharp block plane (I happen to be a woodworker as well as an engineer); the thing to stress is that very little insulation was taken off, maybe 1/32 of an inch making a flat spot about 3/16 inch long. This is not even half the thickness of the insulation, so the wire in the center of the cable wasn't even close to being exposed. Using this simple technique, and having the cable hooked up to power so that I could verify each connection as I made it, I had a 10 for 10 success rate with no issues with any connections. I will update after these have been on for a few months.
By the way, the 50 foot cable will only allow a run of about 40 feet due the the loops at each lamp that consume about 10 inches each.
By the way, the 50 foot cable will only allow a run of about 40 feet due the the loops at each lamp that consume about 10 inches each.
Complicated
Doug H.✓ Verified Purchase•July 12, 2023
I have had several different low voltage systems and this one is the most complicated. An engineer must have designed it. My main problem is that I am replacing some existing lights which already has the wire in place with not enough excess to loop the wire into the light fixture. Therefore I have to cut about a two foot of wire and use your instructions to wire the fixture but then cut my existing wire and splice into it.
What happened to the old screw down attachment to the wire? This system is perfect for a completely new installation but not so easy for existing systems. The quality is good and the price is good. I can make it work but just wanted everyone know my experience.
What happened to the old screw down attachment to the wire? This system is perfect for a completely new installation but not so easy for existing systems. The quality is good and the price is good. I can make it work but just wanted everyone know my experience.
Nice lights for the money
Alexander D. Rossi✓ Verified Purchase•June 7, 2023
I almost did not buy these lights because of all the negative reviews. Mostly for he connection problems. Here is how I overcame the problems. First, when you receive the lights READ the directions. Then you will understand what I am talking about. Next put the lamp heads together. All that entails is slipping the rings on the globe until they lock in place, then snap the cap on. Put them aside. Next put the transformer in place and connect the wire to the terminals then run the wire along the route that you plan to put the lights. Start with the light closest to the transformer. Loop the wire and push through the pole. push the loop hard into the lens base so it make a pin hole in the cable. Here is where people have the most trouble, making a good connection to the wire. Pull the wire out of the base and you will see the marks the pins made in the wire. Use an awl and enlarge those holes then push the wire back in the base the same way. Now you have to push the cam connector into the slot. Use the awl on the opposite end of the slot to guide the cam connector straight into the slot. It must go straight in to the other side. Use a a screwdriver to turn the cam so it is firm in the slot. This is the most important part of the installation. Next put a bulb in the socket and cover the sensor on the transformer with your hand. The bulb should light. If not go back and recheck the connection. Once you have a good connection, put the lamp head on the base. Pull the loop so the connector is tight against the pole. Push the stake into the pole. That will hold the base tightly against the pole. Place the light where you want it to go. Continue the same routine with the rest of the lights making sure each one lights before going on to the next one. It takes patience.
Page 1 of 2