Elgato Video Capture – USB 2.0 Capture Card Device, Easy to Use, Convert Analog to Digital, with VHS VCR TV to DVD Adapter, for Mac, Windows or iPad


Key features
- •Transfer video from a VCR or other analog video source to your Mac or PC
- •Put family memories and family videos on your computer
- •Easy-to-use software guides you through every step and turns your analog into digital
- •Captures video in the universal H.264 digital format - ready for iPad, iMovie, Windows Live Movie Maker, and YouTube
- •World-ready; handles NTSC, SECAM, PAL and PAL/60 video
- •Comes with Elgato Video Capture, Composite-to-SCART adapter, Composite video/RCA stereo cable
Elgato Video Capture – USB 2.0 Capture Card Device, Easy to Use, Convert Analog to Digital, with VHS VCR TV to DVD Adapter, for Mac, Windows or iPad
List Price: $130.94$117.85DEALYou Save: $13.09 (10%)
Free shippingFree Returns – 30 daysFree Order CancellationSecure Payment2–3 Days DeliveryGet It June 24, 2026In Stock (2)No marketing spamNo account requiredFulfilment by FedEx / Amazon / UPS / ShipwirePayPal / Card Buyer Protection
Customer Reviews
Reviews sourced from verified Amazon purchasers4.4
out of 5
Based on 10 reviews
5★
60%
4★
40%
3★
0%
2★
0%
1★
0%
Works great with Windows 7, plus a comparison with competing products
Randy Forgaard✓ Verified Purchase•July 27, 2023
My apologies for this long review. Hopefully, though, it will be useful to someone.
I've spent some time the past 2 weeks comparing competing products for transferring home videos into digital format on my Windows 7 PC for long-term preservation and so that I can edit the videos on my PC. I tried or considered three different products including this Elgato Video Capture, and one high-end video transfer company, all on the same Hi8 analog video cassette with a family video that is 15 years old. Along the way, I have gotten some familiarity with the various technologies available today for transferring magnetic tapes into digital form. I found out some interesting things, and thought I would share them, in the hope that it might help others.
First, and you probably already know this, if you have any video memories on magnetic video tape, you want to get them transferred into digital form onto your PC or DVD or Blu-ray as soon as possible, before the video badly deteriorates. This especially includes regular VHS tapes, Video8 tapes, and normal Hi8 tapes, all of which are analog formats and are particularly susceptible to deterioration starting after about 10 years. Somewhat less susceptible to deterioration are Digital8 (which is also recorded on Hi8 tapes) and MiniDV tapes, because those are digital formats. But even for digital tapes, it is still magnetic tape which deteriorates over time, and you need to get those videos off of there. Seriously, at the risk of sounding like a doomsayer, if you have precious memories on magnetic video tape, you need to transfer that video off of those tapes and into digital form as soon as possible, or risk losing them forever. It's not hard to do, and you'll sleep better at night when you get it done!
In my case, I have a bunch of precious Hi8 family video tapes recorded on a high-end Sony consumer camcorder between 10 and 19 years ago, and I am rescuing these Hi8 videos a little on the late side. I wish I had started this project 5 years ago instead. These tapes are still watchable, but they have developed some lines and drop-outs and "hiccups" and digital artifacts. With multiple playback retries, I can fortunately still coax out fairly high quality from these tapes.
A quick note: Digital8 and MiniDV video tape camcorders have USB ports on them for digitally transferring your videos to your PC or Mac. If this is your situation, there is NO need to purchase one of these video transfer products (like Elgato Video Capture). You will get the best quality, by far, by using a USB cable to connect your camcorder to your PC or Mac, playing back your video in the camcorder, and using any of a whole bunch of different inexpensive software products on the market that will allow you to capture video from the USB port on your computer. This way, you are getting the digital video in its original form, which is great. You will get worse quality if you use a video transfer product that captures the video off of the video ports on the camcorder, because the camcorder is converting the digital video into analog, then the video transfer product converts the analog back to digital (not ideal, for sure).
So, for the rest of this review, I will assume you have analog magnetic video tape (like VHS, Video8, or normal Hi8), in which case you need a video transfer product like this Elgato Video Capture or something similar.
A note about video resolution: The analog video tape formats (VHS, Video8, and normal Hi8) all have native video resolutions less than 640x480. All of the video transfer products on the market record the video from these formats at either 640x480 or 720x480. It doesn't really matter which of these two resolutions the product records at. The point is, all of the video transfer products record at higher resolution than the original video, so you are capturing all of the resolution of the original video when you do the video transfer, which is good.
A note about overscan lines at the bottom of captured video: As documented all over the Internet, when capturing digital video from an analog video source like an analog magnetic video tape, you will end up with some additional fuzzy lines at the bottom of the captured video. This is totally normal. When played back on a regular TV, these overscan lines are usually chopped off because they appear "below the bottom of the screen," but the digital capture grabs them. To get rid of those lines, you can crop or zoom in slightly when you do your video editing. Interestingly, this Elgato Video Capture device automatically does a minor zoom on all captured video to remove those fuzzy lines.
A remark about video editing: Two of the products below (Elgato and Hauppauge) produce video files that use H.264 compression. This is an excellent video compression standard for viewing, and is supported by just about all video editing software. However, if you are going to do significant video editing, you may want to use some video conversion software to convert these video files to uncompressed or MJPEG-compressed AVI or MOV files for editing. (There are many inexpensive or perhaps even free software packages that will do this conversion.) The problem with editing H.264 compressed video files directly is that the extreme compression, which crosses video frame boundaries, can cause problems for video editing software, resulting sometimes in digital artifacts or out-of-sync audio in the final edited video output. An uncompressed or MJPEG-compressed AVI or MOV video source file avoids these problems.
A word about using an outside company to make a high-quality transfer of your analog video tape: A search of the Internet reveals many companies that will transfer your video tape into digital form, and send the digital files back to you on a fairly inexpensive USB hard drive that you can supply yourself or that they will sell you. Some of these companies are better than others. A few of these companies are very high-end, using expensive video transfer equipment. I used one of these very high-end video transfer companies, using their most expensive Premium service, to transfer the very same 15-year-old Hi8 tape that I also tried at home with the video transfer products below. I discovered that the transfer done by the outside company was significantly WORSE (lots of lines through the video and tracking problems) than what I was able to do at home with the products below. I don't necessarily think this is the fault of the video transfer company. At home, I was able to use the very same Sony Hi8 camcorder to do the transfer that I originally used to shoot the original video tape. My suspicion is that, especially for older analog video tapes, it helps to use the same camcorder for transfer as you used to shoot the video originally, so that any idiosyncracies in tracking or video head alignment won't be as much of an issue. Just food for thought.
Anyway, as noted above, I have done an experiment over the past 2 weeks, transferring the exact same 15-year-old Hi8 tape to my PC using the high-end video transfer company (above), plus two different video transfer products at home (Elgato and Hauppauge, below), and I also considered a third video transfer product (Blackmagic, below), to compare the pros and cons of each of each approach. Here's what I found out:
Elgato Video Capture (this product): Gets the best reviews on Amazon for a relatively inexpensive product for video transfer on both Windows and Mac. It captures video at 640x480 resolution, which means it grabs the full resolution and more of VHS, Video8, and normal Hi8 tapes. This worked great on my 64-bit Windows 7 computer. I just downloaded the latest driver and software from the Elgato web site, installed them both, and I was ready to go. It's incredibly easy to use. It connects to any USB 2.0 port on your computer. There are really no settings; the software guides you through the very simple process, and it transfers your video to your computer as an MP4 file. In case you are curious, the MP4 file it writes uses H.264 compression at 640x480 resolution and (basically) 29.97 frames/sec (standard NTSC) and a video data rate of between about 1100 kbps and 1500 kbps, depending on the complexity of the particular video you transferred. The audio in the MP4 file is AAC format at 48 kHz 16-bit stereo with an audio data rate of 128 kbps. When capturing a 2-hour video, I ended up with an MP4 file that was 1.5 GB in size. This Elgato product scores big points for ease-of-use. However, the video quality, while quite good, is not as high as the Hauppauge HD PVR (see below), because of the heavy video compression the Elgato uses to make a relatively small MP4 file with fairly low data rates. If you look closely at the captured video from the Elgato product, you will notice some minor squares of slightly distorted color at times, where the video has been over-compressed. Also, as noted above, the Elgato Video Capture automatically does a minor zoom on all captured video to avoid the fuzzy lines at the bottom of the captured video. On the plus side, this saves you the step of doing that zoom yourself in video editing. On the minus side, it is cropping all 4 sides of the video slightly, which might not be what you want.
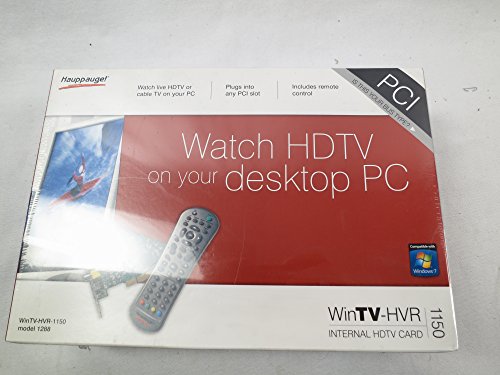
Hauppauge HD PVR : This product exists in two very similar versions, the Model 1212 and the Model 1445 Gaming Edition , but the functionality of the two models is identical when capturing video from analog video magnetic tape. Although designed for high-def video capture, it's by far the best product I tried for standard-def video capture as well. This product gets excellent reviews on Amazon, and rightfully so. It works out of the box on Windows (including 64-bit Windows 7, which I use), and also supports the Mac with separately downloadable software. The Hauppauge product captures video at 720x480 resolution, which means it grabs the full resolution and more of VHS, Video8, and normal Hi8 tapes. Like the Elgato product, the Hauppague is very easy to use, though the software give you a few recording options, unlike the Elgato. The Hauppauge connects to any USB 2.0 port on your computer. It gives you a choice of recording video in three different formats: .TS, .M2TS, or .MP4. It doesn't matter much, choose whatever format is most convenient for you; most digital video editing applications can handle any of these formats with no problem. In all three cases, the output file uses H.264 compression, is 720x480 resolution, 29.97 frames/sec (standard NTSC) and a user-selectable video rate between 1 Mbit/sec and 13.5 Mbit/sec. I chose 5 Mbit/sec, and ended up with a crystal-clear video capture with a variable video data rate of 20 kbps (MUCH higher data rate and much lower compression than the Elgato, which means a clearer picture). The audio is AC-3 format at 48 kHz and a data rate of 384 kbps (again, much less compression than the Elgato, which means the Hauppauge perhaps yields slightly higher audio quality). If these technical details sound confusing, it's not important. The point is, the video capture from the Hauppauge product is significantly higher quality than from the Elgato, at the expense of significantly larger output files, and like the Elgato, can be edited with most video editing software. (A 2-hour video capture on the Hauppauge gave me a 5 GB file, as opposed to the 1.5 GB file from the Elgato for the same video tape.) Note that, like most video capture devices, the Hauppauge gives you the full captured video frame, which means you end up with some fuzzy lines at the bottom, as explained above. You can eliminate those fuzzy lines during editing with a crop or minor zoom.
Blackmagic Design Intensity Shuttle : This is the cream-of-the-crop for video capture. It comes in either a USB 3.0 model for Windows or a Thunderbolt model for the Mac. It captures both high-def and standard-def video in full, uncompressed format, so there is no loss of video quality for compression. For true archival quality of your video memories, this is the Rolls Royce option. However, there are two trade-offs to obtain this quality. The first is that your uncompressed video takes a LOT of disk space. The second, and more important, consideration is that you need a computer that can handle the extremely high data rate coming from the Blackmagic device (since the video is uncompressed). If you run Windows, you need a high-speed computer using an Intel x58 based motherboard, a true USB 3.0 port, and the latest USB 3.0 drivers. Most computers don't meet this requirement, even when they have a USB 3.0 port. There is a list of officially tested motherboards on the Blackmagic web site. My 1st-generation Dell XPS 17 laptop (which has two USB 3.0 ports) does not meet this requirement, so I can't use the Intensity Shuttle, and thus I haven't tried it. Though not officially listed as a supported system, there is a YouTube video called "Intensity Shuttle and Dell XPS Laptop From Scratch - Tutorial" that explains how use a SECOND-generation Dell XPS 17 laptop with the Intensity Shuttle if you re-install Windows 7 and strip down the software running in the background to the bare minimum. Many people who want to use the Intensity Shuttle will buy or build a computer specifically for this purpose. If you don't already have a computer that is compatible with the Blackmagic Intensity Shuttle, and you aren't willing to invest to purchase or build one, or you don't need the full uncompressed archival quality video that is captured by the Intensity Shuttle, go with the Hauppauge or Elgato products, above.
I hope this comparative review is helpful to someone. Good luck, and good for you for transferring your precious older analog video tapes!
I've spent some time the past 2 weeks comparing competing products for transferring home videos into digital format on my Windows 7 PC for long-term preservation and so that I can edit the videos on my PC. I tried or considered three different products including this Elgato Video Capture, and one high-end video transfer company, all on the same Hi8 analog video cassette with a family video that is 15 years old. Along the way, I have gotten some familiarity with the various technologies available today for transferring magnetic tapes into digital form. I found out some interesting things, and thought I would share them, in the hope that it might help others.
First, and you probably already know this, if you have any video memories on magnetic video tape, you want to get them transferred into digital form onto your PC or DVD or Blu-ray as soon as possible, before the video badly deteriorates. This especially includes regular VHS tapes, Video8 tapes, and normal Hi8 tapes, all of which are analog formats and are particularly susceptible to deterioration starting after about 10 years. Somewhat less susceptible to deterioration are Digital8 (which is also recorded on Hi8 tapes) and MiniDV tapes, because those are digital formats. But even for digital tapes, it is still magnetic tape which deteriorates over time, and you need to get those videos off of there. Seriously, at the risk of sounding like a doomsayer, if you have precious memories on magnetic video tape, you need to transfer that video off of those tapes and into digital form as soon as possible, or risk losing them forever. It's not hard to do, and you'll sleep better at night when you get it done!
In my case, I have a bunch of precious Hi8 family video tapes recorded on a high-end Sony consumer camcorder between 10 and 19 years ago, and I am rescuing these Hi8 videos a little on the late side. I wish I had started this project 5 years ago instead. These tapes are still watchable, but they have developed some lines and drop-outs and "hiccups" and digital artifacts. With multiple playback retries, I can fortunately still coax out fairly high quality from these tapes.
A quick note: Digital8 and MiniDV video tape camcorders have USB ports on them for digitally transferring your videos to your PC or Mac. If this is your situation, there is NO need to purchase one of these video transfer products (like Elgato Video Capture). You will get the best quality, by far, by using a USB cable to connect your camcorder to your PC or Mac, playing back your video in the camcorder, and using any of a whole bunch of different inexpensive software products on the market that will allow you to capture video from the USB port on your computer. This way, you are getting the digital video in its original form, which is great. You will get worse quality if you use a video transfer product that captures the video off of the video ports on the camcorder, because the camcorder is converting the digital video into analog, then the video transfer product converts the analog back to digital (not ideal, for sure).
So, for the rest of this review, I will assume you have analog magnetic video tape (like VHS, Video8, or normal Hi8), in which case you need a video transfer product like this Elgato Video Capture or something similar.
A note about video resolution: The analog video tape formats (VHS, Video8, and normal Hi8) all have native video resolutions less than 640x480. All of the video transfer products on the market record the video from these formats at either 640x480 or 720x480. It doesn't really matter which of these two resolutions the product records at. The point is, all of the video transfer products record at higher resolution than the original video, so you are capturing all of the resolution of the original video when you do the video transfer, which is good.
A note about overscan lines at the bottom of captured video: As documented all over the Internet, when capturing digital video from an analog video source like an analog magnetic video tape, you will end up with some additional fuzzy lines at the bottom of the captured video. This is totally normal. When played back on a regular TV, these overscan lines are usually chopped off because they appear "below the bottom of the screen," but the digital capture grabs them. To get rid of those lines, you can crop or zoom in slightly when you do your video editing. Interestingly, this Elgato Video Capture device automatically does a minor zoom on all captured video to remove those fuzzy lines.
A remark about video editing: Two of the products below (Elgato and Hauppauge) produce video files that use H.264 compression. This is an excellent video compression standard for viewing, and is supported by just about all video editing software. However, if you are going to do significant video editing, you may want to use some video conversion software to convert these video files to uncompressed or MJPEG-compressed AVI or MOV files for editing. (There are many inexpensive or perhaps even free software packages that will do this conversion.) The problem with editing H.264 compressed video files directly is that the extreme compression, which crosses video frame boundaries, can cause problems for video editing software, resulting sometimes in digital artifacts or out-of-sync audio in the final edited video output. An uncompressed or MJPEG-compressed AVI or MOV video source file avoids these problems.
A word about using an outside company to make a high-quality transfer of your analog video tape: A search of the Internet reveals many companies that will transfer your video tape into digital form, and send the digital files back to you on a fairly inexpensive USB hard drive that you can supply yourself or that they will sell you. Some of these companies are better than others. A few of these companies are very high-end, using expensive video transfer equipment. I used one of these very high-end video transfer companies, using their most expensive Premium service, to transfer the very same 15-year-old Hi8 tape that I also tried at home with the video transfer products below. I discovered that the transfer done by the outside company was significantly WORSE (lots of lines through the video and tracking problems) than what I was able to do at home with the products below. I don't necessarily think this is the fault of the video transfer company. At home, I was able to use the very same Sony Hi8 camcorder to do the transfer that I originally used to shoot the original video tape. My suspicion is that, especially for older analog video tapes, it helps to use the same camcorder for transfer as you used to shoot the video originally, so that any idiosyncracies in tracking or video head alignment won't be as much of an issue. Just food for thought.
Anyway, as noted above, I have done an experiment over the past 2 weeks, transferring the exact same 15-year-old Hi8 tape to my PC using the high-end video transfer company (above), plus two different video transfer products at home (Elgato and Hauppauge, below), and I also considered a third video transfer product (Blackmagic, below), to compare the pros and cons of each of each approach. Here's what I found out:
Elgato Video Capture (this product): Gets the best reviews on Amazon for a relatively inexpensive product for video transfer on both Windows and Mac. It captures video at 640x480 resolution, which means it grabs the full resolution and more of VHS, Video8, and normal Hi8 tapes. This worked great on my 64-bit Windows 7 computer. I just downloaded the latest driver and software from the Elgato web site, installed them both, and I was ready to go. It's incredibly easy to use. It connects to any USB 2.0 port on your computer. There are really no settings; the software guides you through the very simple process, and it transfers your video to your computer as an MP4 file. In case you are curious, the MP4 file it writes uses H.264 compression at 640x480 resolution and (basically) 29.97 frames/sec (standard NTSC) and a video data rate of between about 1100 kbps and 1500 kbps, depending on the complexity of the particular video you transferred. The audio in the MP4 file is AAC format at 48 kHz 16-bit stereo with an audio data rate of 128 kbps. When capturing a 2-hour video, I ended up with an MP4 file that was 1.5 GB in size. This Elgato product scores big points for ease-of-use. However, the video quality, while quite good, is not as high as the Hauppauge HD PVR (see below), because of the heavy video compression the Elgato uses to make a relatively small MP4 file with fairly low data rates. If you look closely at the captured video from the Elgato product, you will notice some minor squares of slightly distorted color at times, where the video has been over-compressed. Also, as noted above, the Elgato Video Capture automatically does a minor zoom on all captured video to avoid the fuzzy lines at the bottom of the captured video. On the plus side, this saves you the step of doing that zoom yourself in video editing. On the minus side, it is cropping all 4 sides of the video slightly, which might not be what you want.
Hauppauge HD PVR : This product exists in two very similar versions, the Model 1212 and the Model 1445 Gaming Edition , but the functionality of the two models is identical when capturing video from analog video magnetic tape. Although designed for high-def video capture, it's by far the best product I tried for standard-def video capture as well. This product gets excellent reviews on Amazon, and rightfully so. It works out of the box on Windows (including 64-bit Windows 7, which I use), and also supports the Mac with separately downloadable software. The Hauppauge product captures video at 720x480 resolution, which means it grabs the full resolution and more of VHS, Video8, and normal Hi8 tapes. Like the Elgato product, the Hauppague is very easy to use, though the software give you a few recording options, unlike the Elgato. The Hauppauge connects to any USB 2.0 port on your computer. It gives you a choice of recording video in three different formats: .TS, .M2TS, or .MP4. It doesn't matter much, choose whatever format is most convenient for you; most digital video editing applications can handle any of these formats with no problem. In all three cases, the output file uses H.264 compression, is 720x480 resolution, 29.97 frames/sec (standard NTSC) and a user-selectable video rate between 1 Mbit/sec and 13.5 Mbit/sec. I chose 5 Mbit/sec, and ended up with a crystal-clear video capture with a variable video data rate of 20 kbps (MUCH higher data rate and much lower compression than the Elgato, which means a clearer picture). The audio is AC-3 format at 48 kHz and a data rate of 384 kbps (again, much less compression than the Elgato, which means the Hauppauge perhaps yields slightly higher audio quality). If these technical details sound confusing, it's not important. The point is, the video capture from the Hauppauge product is significantly higher quality than from the Elgato, at the expense of significantly larger output files, and like the Elgato, can be edited with most video editing software. (A 2-hour video capture on the Hauppauge gave me a 5 GB file, as opposed to the 1.5 GB file from the Elgato for the same video tape.) Note that, like most video capture devices, the Hauppauge gives you the full captured video frame, which means you end up with some fuzzy lines at the bottom, as explained above. You can eliminate those fuzzy lines during editing with a crop or minor zoom.
Blackmagic Design Intensity Shuttle : This is the cream-of-the-crop for video capture. It comes in either a USB 3.0 model for Windows or a Thunderbolt model for the Mac. It captures both high-def and standard-def video in full, uncompressed format, so there is no loss of video quality for compression. For true archival quality of your video memories, this is the Rolls Royce option. However, there are two trade-offs to obtain this quality. The first is that your uncompressed video takes a LOT of disk space. The second, and more important, consideration is that you need a computer that can handle the extremely high data rate coming from the Blackmagic device (since the video is uncompressed). If you run Windows, you need a high-speed computer using an Intel x58 based motherboard, a true USB 3.0 port, and the latest USB 3.0 drivers. Most computers don't meet this requirement, even when they have a USB 3.0 port. There is a list of officially tested motherboards on the Blackmagic web site. My 1st-generation Dell XPS 17 laptop (which has two USB 3.0 ports) does not meet this requirement, so I can't use the Intensity Shuttle, and thus I haven't tried it. Though not officially listed as a supported system, there is a YouTube video called "Intensity Shuttle and Dell XPS Laptop From Scratch - Tutorial" that explains how use a SECOND-generation Dell XPS 17 laptop with the Intensity Shuttle if you re-install Windows 7 and strip down the software running in the background to the bare minimum. Many people who want to use the Intensity Shuttle will buy or build a computer specifically for this purpose. If you don't already have a computer that is compatible with the Blackmagic Intensity Shuttle, and you aren't willing to invest to purchase or build one, or you don't need the full uncompressed archival quality video that is captured by the Intensity Shuttle, go with the Hauppauge or Elgato products, above.
I hope this comparative review is helpful to someone. Good luck, and good for you for transferring your precious older analog video tapes!
Great capture device if you ONLY want .MP4 files
Jerry Stigliano✓ Verified Purchase•June 26, 2023
Setup, connection and software are all quick and easy. There are big limitations here, so if you're anything other than a novice this might not be for you. I like to capture other formats like .MPG2 and .AVI for different reasons, but there's no choice here: .MP4 only. Further, there's no quality adjustment; you can't change the bitrate or any parameters of the picture. On the other hand, when using their simple software (that you must download for free), each capture allows you to specify file name you're creating, timed or untimed capture length, audio level, piture adjustments for bright/contrast/hue/saturation; aspect either 4:3 or 16:9, and finally record destination/folder and audio level. You can opt to hear audio or mute it during capture. I love that! You can change it on the fly as well. While capturing if you change your mind about length you can either just stop recording or unclick the timer you set when you started. Capturing starts immediately when you click start, and when it's done capturing you are prompted to a "trim" window. If you don't trim the in/out points, click continue and it saves your .MP4. It's very intuitive, easy and fast. While limited (you can't trim multi-segments or go back later and trim more), and you cannot change quality parameters of the recording (bitrate or resolution), the captured video quality looks very good. I can overlook limitations of the software to get good-looking .MP4 video out of it. You can always load it into other software for further editing. You can choose S-Video or RCA Composite video which is nice. This no-frills device will have you capturing video - from unboxing it - within five minutes. Downloading and installing the software is a cinch and doesn't require logins or registering. I've captured about 10 VHS tapes so far and I'm impressed by the results.
Simple and Easy. Great device.
Marianne✓ Verified Purchase•May 10, 2023
I just bought the Elgato Video Capture and I absolutely love it. It's dead simple and does exactly what I want.
In the box:
- Elgato Video Capture hardware
- Elgato Video Capture software CD-ROM (for Mac 10.5.8+ and Windows 7)
- Cyberlink PowerDirector 8 CD-ROM
- Proof of purchase key (on the Video Capture software CD envelope, which I never had to type in anywhere for some reason)
- Composite-to-SCART adaptor
- Composite video/RCA stereo cable (which is only three feet long, so you may want to invest in a longer cord)
Something to keep in mind if you're going to purchase this used like I did, the one I bought came with everything but the Cyberlink PowerDirector 8 CD and the composite to SCART adaptor, so I can't comment on either of those items. But I believe if you have iMovie or Windows Movie Maker, you probably won't need the PowerDirector program. Also, although I don't intend to install this on Windows (especially considering my laptop is running Vista, not 7), I'm very happy that this device works on both Mac and Windows.
Setup (I'm using an Intel iMac, running Leopard 10.5.8 with 4GB RAM):
Setup was quick and painless: connect the composite cables into the back of the device you want to record from (in my case, the TV 1 area on the back of my DVR). Connect the other ends into the Elgato capture hardware and then plug the USB into a USB port on your computer. Then install the application by putting the CD in and then dragging the app icon into the /Applications folder. Boom, done.
The Software:
The app itself is very straightforward and I haven't had any issues with it crashing or hanging. The app is in a setup format:
Screen 1: Naming the video file and choosing how long the recording will be. The time length option is only for letting you know how many MB the final file will be, rather than a time restriction.
Screen 2: Selecting the video input and aspect ratio. Here, you can select if the video input is S-Video or Composite and if the aspect ratio is 4:3 or 16:9. Personally, I would play around with the aspect ratio to get the best looking picture. For instance, even though my TV is a widescreen, I chose 4:3 in the app and adjusted my TV to stretch 4:3 (non-HD) video across the screen (making it 16:9) and that was the best choice for video quality (in my opinion). I used 16:9 in the app to record a 16:9 (HD) video. It really depends, so I would suggest doing a couple of tests with different settings to see what will give you the best video quality.
Screen 3: Audio check. Nothing to do here except make sure you have sound.
Screen 4: Recording. There are two checkboxes for automatically stopping the recording after 10 minutes and muting the sound (not of the recording but of the playback over your computer speakers) and a large red record button. There is next to no lag time when you press the record button. Also, there's a timer at the bottom of the screen that shows how long you've been recording, as well as how large the file is becoming (which is very helpful to know). A 30 second clip is about 6mb, so make sure you have plenty of space on your hardrive.
Screen 5: Viewing and trimming the video. If you recorded too much, you can trim the beginning and end (no ability to trim video from the middle). You don't have to utilize this feature if you plan on editing in iMovie later but it's very helpful if you just want to trim, export and go.
Screen 6: Once you make it to this page, the video will export to the location of your choice (which you can choose in the Preferences pane). This screen lists where the file was saved, as well as giving you options to play the video in Quicktime Player, add to iTunes, edit with iMovie and upload to Youtube (the app stays open if you choose any of the options). At the bottom are two buttons to exit the app or begin the process again.
The Preferences are also short and sweet:
Tab 1: Choose where the videos will be saved, which format the video will be (Automatic, MPEG-4 or H.264) and a checkbox for checking for updates automatically [haven't had any updates (and I probably won't since I'm on Leopard) but I feel better knowing that updates will come in the app rather than requiring me to go searching all over].
Tab 2: Video adjustments (Brightness, Contrast, Saturation and Hue controlled by percentage sliders, which you can adjust while watching the video, before recording)
Tab 3: Audio adjustments (Volume)
Video and Audio Quality:
Here are some screencaps showing the video quality:
Screencap of a 4:3 recording (originally 4:3 video stretched to 16:9 on the TV): [...]
Screencap of a 4:3 recording (originally 4:3 video kept at 4:3 on the TV): [...]
Screencap of a 16:9 recording (originally 16:9 video kept at 16:9 on the TV): [...]
I was worried the video quality wouldn't be very good, based on some of the reviews, but I'm very happy with it. It's not HD quality but I didn't expect it to be (you're using composite cables... can't get much better than 480i). It's slightly fuzzy but otherwise, very acceptable for my purposes (I just wanted to archive some clips on my computer, not burn Blu-ray quality video to disc). Compared to the Dazzle DVC 80 I used to use long ago, this is much better. I'd give the video quality a 4.5 out of 5. The audio quality is superb.
Negatives (nitpicks, really):
- I don't like that the app always creates a new folder in the /Documents folder called EyeTV Archive. There's nothing in it... so why is it there? It's harmless enough but I just hate when programs create folders unasked.
- I wish the input source and audio check screens were located in the preferences pane instead of the main app. Once it's set up, I don't need to adjust the input (it is what it is) or audio (I can hear the audio through my computer speakers when I'm on the record screen so I'll know if the audio is working or not). It's just a bit of a waste, having to run through those screens every time.
Overall:
I fell in love with this device after five minutes and I think you will, too. It does what it says it will and it does it well.
Helped preserve deteriorating VHS tapes in time!
ProductReview✓ Verified Purchase•May 3, 2023
After researching ways to transfer my old VHS tapes to digital, decided this was the
best for me to try out. At first, had a hard time trying to get it to work with my pc.
Called tech support who was able to easily help solve the issue I did not understand while
providing excellent customer assistance!
Was then able to easily transfer videos from my VHS player to my computer.
Thank goodness because some of my VHS videos are beginning to deteriorate.
Very happy to have purchased these in good time before the videos were lost.
Thank you very much Elgato for your wonderful product!
Very pleased with this purchase and highly recommend!
Inexpensive, easy option for video capture
Tracy✓ Verified Purchase•April 27, 2023
I love this product. I didn't want to pay hundreds of dollars to mail my videos in and have someone else transfer them to video files. I looked at some online reviews and chose this product. It is super easy to use, you just need to have a VCR. You hook the device up to the VCR and to your laptop or desktop computer via USB port. You can easily see what is on your VHS tapes and copy what you want to mp4 files. If you let it run too long, you can trim the end and cut out any extra. I have transferred the contents of over 20 VHS tapes already. I recommend an external hard drive for backing up your video files once you transfer them. Great product for the price.
Page 1 of 2