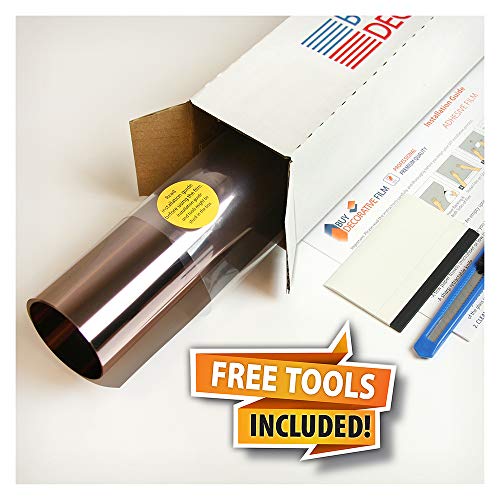
BDF BRZ35 Window Film Bronze Sun and Heat Control (Medium) - 36in X 7ft


Key features
- •MEDIUM BRONZE SHADE adds a refined look to your window and helps reduce heat and glare.
- •EXCELLENT UV REJECTION. Blocks harmful UV rays. Reduces fading of interior furnitures caused by the sun.
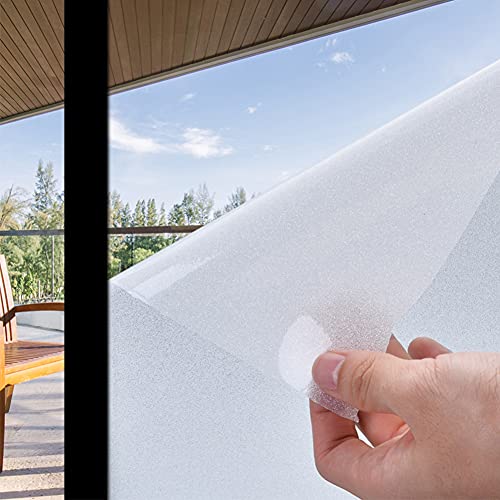
- •STRONG ADHESIVES to last many years. For easier installation, remember to use A LOT of soap/water mixture to soak both the adhesive side and window.
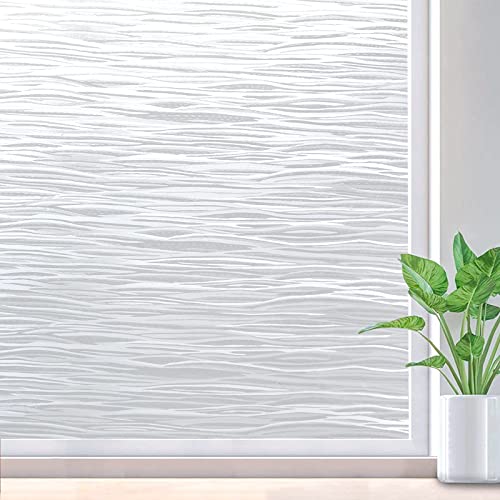
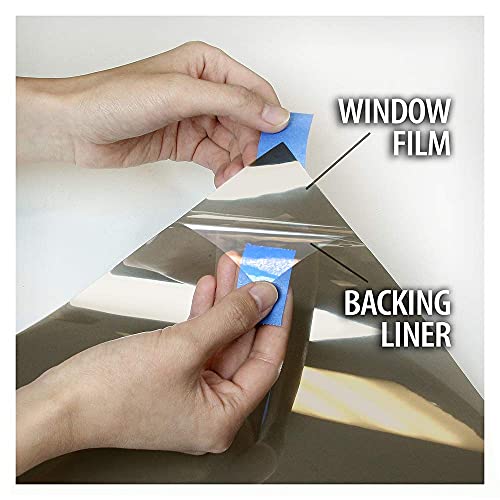
- •HIGH QUALITY PERFORMANCE films that are sensitive by nature. Please remember to take caution when handling the film as the slightest fold will create a permanent wrinkle.
- •FREE TOOLS AND EASY INSTALLATION GUIDE to make installation DIY-friendly. Make sure window surface is completely clean and absolutely free of any blemishes.
BDF BRZ35 Window Film Bronze Sun and Heat Control (Medium) - 36in X 7ft
List Price: $69.22$62.30DEALYou Save: $6.92 (10%)
Free shippingFree Returns – 30 daysFree Order CancellationSecure Payment2–3 Days DeliveryGet It June 23, 2026In Stock (1)No marketing spamNo account requiredFulfilment by FedEx / Amazon / UPS / ShipwirePayPal / Card Buyer Protection
Customer Reviews
Reviews sourced from verified Amazon purchasers4.1
out of 5
Based on 10 reviews
5★
60%
4★
40%
3★
0%
2★
0%
1★
0%
Works great!!
Cindy Bailey Grayston✓ Verified Purchase•September 12, 2023
Super easy to put up ! Keeps the sun out and is pretty dark so no one can see in.
Great value
K Y Beard✓ Verified Purchase•September 7, 2023
Put an my south facing windows that are 78" x 48" while there was a learning curve I read the enclosed directions and the glass came out great I am using this for migraine relief and it's working wonderfully the film is in a large roll and does require two people a several points in the process one can manage most of the time I recommend this be a two person job and it goes very fast you also need a clean surface that is dust and hair free to cut and take the backing off I had a lot of very large windows not just those doors it worked great
Like wallpaper --
AirTog✓ Verified Purchase•September 2, 2023
I installed on my patio / deck sliding glass doors. If you're familiar with Wallpaper installation, it's similar -- and because it's plastic, it loves to adhere to glass wet surfaces. Tips follow;
- Make sure your glass is really clean -- follow instructions for cleaning. I used a non scratching cleaning pad and a razor blade with a squeegee. Then wiped with a microfiber towel.
- Don't cheat by trying to use a pre-cut edge on the sides or tops. I learned the hard way that if you do, the film's edge will pull away from the window's edge as you squeegee into position. This caused me to have to re-position several times and I finally gave up when the film stuck to itself when re-applying. DO overlap all edges and trip after the film is squeegeed into position.
- SQUEEGEE with the soft side (wrapped) first into position making a T as described in their video. This will get the film to "seat". Then squeegee using the hard side to push excess water to the sides in the same T pattern. Across the top first, then from the middle to each side all the way down.
- EXCESS water. On my first attempt and due to re-positioning as noted above, I was able to only do one of the sliding glass door panels. I had to order another kit to complete the other panel. However -- the day after -- I noted a lot of what I call "orange peel" on the film -- small little bumps that made the film appear dimpled. You could see a texture to the film. I figured once dry and cured in 72 hours, it would go away as indicated on the instructions. 2 days later when my new kit appeared I noted that the "orange peel" texture had not gone away. Not knowing if it was too late and figuring I now had enough film to do it again, I took a chance and re-squeegeed it. Amazingly, using the hard side of the supplied squeegee I was able to slowly remove the orange peeling. The little bumps were actually excess fluid that I was able to remove in my T shaped pattern -- 2 days after it was originally installed to produce a perfect finish / result.
Recommendation --- MAKE SURE YOU squeegee until you see no more fluid being pushed by the squeegee. Use the squeegee to "push" the fluid rather than pull and keep the squeegee at a 45 degree angle against the glass.
Heat Gun. There was one place near an edge at the bottom that kept getting an air bubble that seeped in from the bottom although I'd squeegeed it out repeatedly. I used a heat gun to heat the film while pushing the air bubble out and held the squeegee there while removing the heat. This effectively dried the film an enabled it to shape to the window without re-appearance of the bubble.
Recommendation: Hang the film on the opposite window/door with the glue side / plastic protector facing in by wetting that door. and sticking the film to the door. Pull the protector off wetting the glue side of the film as you remove the protector. This makes is a lot easier to remove that protective film without having to handle the film just before installation. Just make sure that the glue side is fully wet as you go -- this helps ensure that if it does curl on itself, you'll have a chance to uncurl it. Then simply spray the window that it's being applied on and lift the film from where it's hanging, reverse it and apply it to the window. When reversing, make sure it doesn't curl onto itself.
Overall review: Good stuff! It's forgiving in that it can be adjusted as long as there's plenty of fluid beneath the film. Bronze color adds warmth to the room and makes outside colors a bit more vibrant -- as in polarized sunglasses. I used the medium tint film as I do want the light -- not the UV. Reflective on the outside makes it hard - not impossible - to see inside during the day. At night, it's semi transparent -- you can see inside without the reflectivity, but its shaded like sunglasses. A very nice effect.
I'd recommend this product -- but if it's your first time at hanging sheets of material like this or wall paper -- order extra to account for practice or a curling mishap. With cleaning the window (inside and out) and applying -- total time for each panel is about 30 minutes. Actual application of the film itself took only about 15 minutes and most of that time was in squeegeeing over and over again until NO fluid remained.
good privacy option
Amazon Customer✓ Verified Purchase•August 25, 2023
We live in the city, and wanted something that would allow us to to leave blinds open during the day without putting our slovenly lifestyle on full display. Now I can enjoy the garden from our kitchen in pajamas and hair uncombed while eating a watermelon over the sink. Instructions were clear. It took a window or two to get the hang of it. Advise you to install on a cooler or cloudy day to give you more time to work. Otherwise, you might need to race the sun to squeegie out all air bubbles before it dries. Be generous with soapy water spraying.
great quality and ease of application
Amazon Customer✓ Verified Purchase•August 14, 2023
great quality and ease of application. I ordered the bronze and was rather perfect color
Page 1 of 2