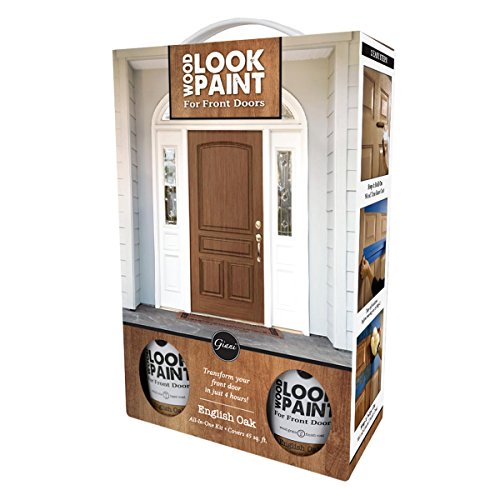
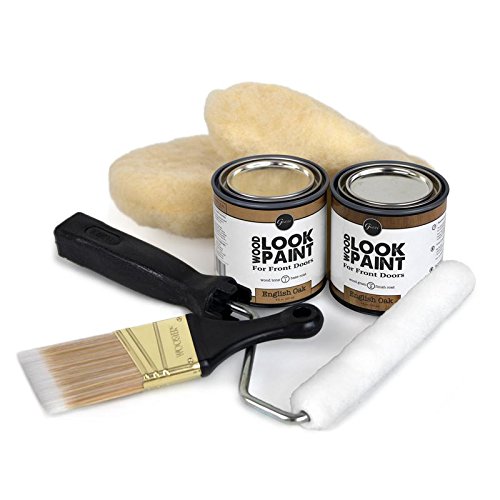
Giani Wood Look Paint Kit for Front & Interior Doors (English Oak)


Key features
- •Add instant curb appeal to your home in just 4 hours
- •For use on exterior or interior doors
- •Ideal for painted steel, aluminum and wood, the standard materials of most front and interior doors
- •Simple, 3-step application and quick-dry formula allows you to paint and close your door in the same day
- •Pairs well with Antique Brass, Satin Nickel, and Polished Brass door hardware
Giani Wood Look Paint Kit for Front & Interior Doors (English Oak)
List Price: $64.25$57.83DEALYou Save: $6.42 (10%)
Free shippingFree Returns – 30 daysFree Order CancellationSecure Payment2–3 Days DeliveryGet It June 23, 2026In Stock (1)No marketing spamNo account requiredFulfilment by FedEx / Amazon / UPS / ShipwirePayPal / Card Buyer Protection
Customer Reviews
Reviews sourced from verified Amazon purchasers4.5
out of 5
Based on 10 reviews
5★
80%
4★
20%
3★
0%
2★
0%
1★
0%
Unsure but the neighbors love it!
M. MASON✓ Verified Purchase•May 21, 2024
Started from the bottom now we're here"¦ actually started w your basic white garage door, then did the primer, then I did 3 coats because I did not like what it looked liked after the first two. I'm not a fan of it up close, but woowee from the street she looks good!!
I totally bought the wrong color. I should have went with honey oak vs English oak but I thought my front door was English Oak. I was WRONG! It still doesn't look too bad. It complements the trim on the home and if it really bothers me I can always stain the door darker. It's not that serious.
The project took maybe 4 hours to complete. My white door was super dirty so cleaning it took a little time. The paint goes on super easy with great adhesion! I did use the mit. I folded it into a square vs putting it on my hand. I was nervous as hell when I started but quickly realized my door had the grooves so I slapped it on and kept moving! It was approx 65 degrees out, garage door shaded, so the stain didn't dry too fast for me. I did work in small sections as suggested though strictly out of fear from all the other reviews. Once I did the first stain, I dropped the mit in a bowl of water, set the timer, and repeated. Don't be scared you are going to put too much on, with the mit being damp it really helps spread the stain. Also, if you don't like the way it looks after the first couple times, keep going to achieve the look you are going for!
I'm satisfied with the end results. My neighbors are extremely satisfied with the end results! I get a ton of complements on my "new garage door." Just goes to show sometimes we are our own worst critics.
Lastly, I was VERY pleased with the kit in its entirety! Has everything you need to complete the project except a paint tray. Worth every penny!
DIY rating = easy & fun!
Easy to use, quick drying, and amazing results
Mario✓ Verified Purchase•April 27, 2024
Product arrived in two days but took me awhile to use because of the weather lately but finally got a nice sunny 75 degree day. I ordered two kits just in case since I have a bigger garage door and I ended up using both kits. Extremely easy to use and they really do give you everything in the kit you need. My bigger garage door I did end up using my own larger roller to speed up the process. Very simple. Clean the doors, prime, and I applied two coats of finisher. The results were definitely worth the work. Took me about four hours time with all steps and this stuff drys quick. Last picture you can see it rained this morning lol held up and beautiful
This is a FAUX finish!
Lisa✓ Verified Purchase•April 24, 2024
Color: I chose the Honey Oak color for my back door since the entryway flooring was honey oak vinyl. I felt the base color was very light and slightly pinkish. The stain color is OK, but I think the contrast between base and stain (I refer to it as stain, but it is really a type of glaze that creates the wood grain look) is too great and a less than perfect application is very noticeable. I wasn't totally pleased with the results, but intrigued enough to try a different color. I chose English Oak this time. The base wasn't that much darker, but it had a warmer tone and the stain was much darker.
Door: Essentially, the door I was working with was in pretty sad shape and not worth too much trouble. Layers of paint collected in panels that couldn't be easily sanded had to remain and I couldn't remove the door or knobs in fear that it could not be rehung properly or locks function. Removing the door is not necessary, but definitely remove hardware if possible.
Application: I learned alot from my first attempt!
1. Base coat is easy, just straight painting. Directions say to pour half into a tray, but a little goes a long way and I just used it straight out of the can. Less waste/clean-up.
2. Taping for the staining is key. If you have a panel door, you will stain in two directions. Instructions say to tape out horizontal panels, stain/dry and then vertical panels, stain/dry. I felt the inset panels looked messy when the whole panel was done horizontally. I took an extra step to tape out the vertical and horizontal sections of the panel and created the look of a mitred corner(I did this in the window corners also). Even though it's a crappy door, it made a difference.
3. The graining mitt is huge! As a woman I don't have a small hand, but I was swimming in it and it was hard to control. I tucked the thumb to prevent it from creating unwanted strokes in the finish and I only applied stain directly to the end of the mitt (not the whole palm as instructed). The instructions say to dampen the mitt in water and wring out the excess. It was very difficult to wring it enough and the stain got watery and dripped excessively. Learning from this I only lightly damped the one side of the mitt I used.
4. Use quick light strokes. Instructions say 2-3 coats depending on desired effect. I used four. (I might have done 5, but I was low on stain because I had also refinished the beadboard under the back door overhang. Looks great and only used 3 coats) The first couple coats might look a little messy, but as it gets darker with additional coats there is less contrast and it starts to look more natural. It dries fast, but with the extra coat I wanted to be sure the taped corners were dry so I did my vertical and horizontal sections on separate days.
All said and done I am fairly pleased with the results, but I also accept it for what it is, FAUX!! I don't feel it would be worthy of my front door, but I am considering the garage door version. The kit is loaded with everything you need. It's too recent to really judge the durability, but seems pretty good so far.
So easy to use. Perfect effect I was looking for.
Ted and Katie✓ Verified Purchase•April 14, 2024
I took this photo with only half the fireplace done so you could see the original color bricks next to the painted ones. I did the 1:1 ratio without wiping because I wanted to cover a lot of the tan color in the bricks. It's very watery and drips quite a bit so it's easier if you don't put tons on your brush. I used a small craft brush for the grout lines and it was significantly faster. Very happy with this product and I was able to make a huge impact on the look of my living room for a very affordable price and just some elbow grease.
Great product!
Mary Lynn Rogers✓ Verified Purchase•March 17, 2024
I couldn't be more pleased with this purchase! I have wanted to redo my countertops for a while now but my husband despises any kind of home improvements or carpentry work, so I had to find something I could do on my own. This wool one weekend to do (the longest part is the 8 hour wait for the paint to dry). The whole process was simple and easy! Not messy, easy cleanup, and a great value!
Page 1 of 2