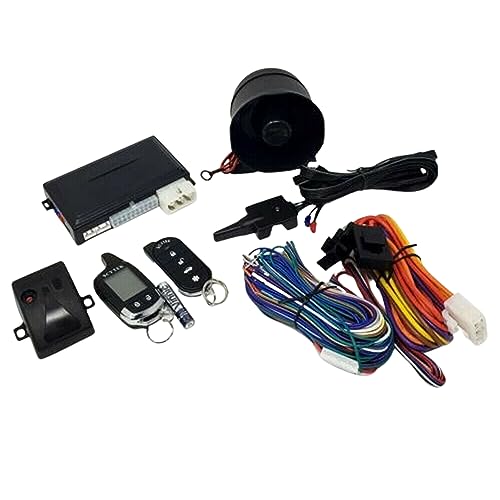
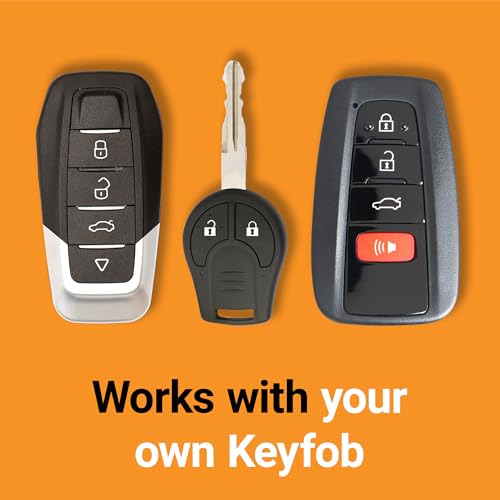
Start-X Remote Starter Kit for Non-Hybrid Highlander (2014-2019), C-HR (2018-2019), Land Cruiser (2016-2018) Vehicles with Push-to-Start Ignition Only | Plug & Play Install | Use Your OEM Key Fob


Key features
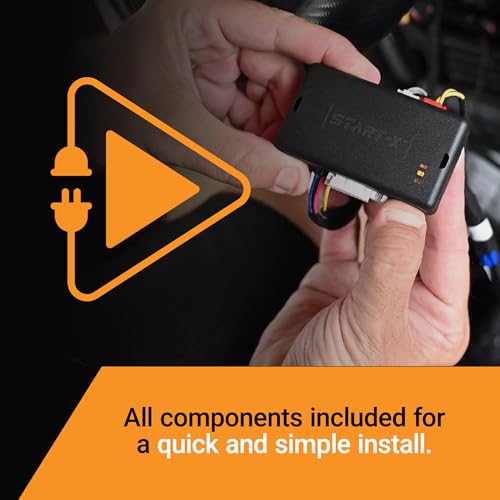
- •✅ START YOUR VEHICLE REMOTELY - Use the most complete Plug N Play Remote Starter KIT to warm or cool your vehicle. No more waiting 10 min to defog your windshield.
- •✅ COMPATIBILITY- PUSH TO START ONLY – This kit is compatible only with the following push to start vehicles. C-HR 18-19, Highlander 14-19, Land Cruiser 16-18. ✅ ✅ ✅ NOT COMPATIBLE WITH HYBRIDS ✅ ✅ ✅ It is compatible and fits the 2019 Push to Start Highlander.
- •✅ PLUG 'N PLAY T-Harness – Revised, unique Start-X T-Harness designed specifically for select vehicles. No wires need to be cut or spliced. However, there is some disassembly of your truck required. Please see the video. Instructions are included, or you may view our instruction video for super easy and fast installation.
- •✅ 3 X LOCK – No need for extra devices. Start your vehicle with clicking 3x lock on your factory remote. Press the lock button 3x again and the Start-X Remote Starter will turn off your vehicle too.
- •✅ OPEN DOOR SHUTDOWN, RANGE - When you open the door to the vehicle the engine will shut down. There is no way around this. After remote starting you will need to restart the engine before driving. The distance from where you can remote start is the distance you can lock your vehicle from. Please test your key fob to see the distance you will be able to remote start from.
BrandStart-X
CategoryRemote Starters
Start-X Remote Starter Kit for Non-Hybrid Highlander (2014-2019), C-HR (2018-2019), Land Cruiser (2016-2018) Vehicles with Push-to-Start Ignition Only | Plug & Play Install | Use Your OEM Key Fob
List Price: $162.96$146.66DEALYou Save: $16.30 (10%)
Free shippingFree Returns – 30 daysFree Order CancellationSecure Payment2–3 Days DeliveryGet It June 24, 2026In Stock (30)No marketing spamNo account requiredFulfilment by FedEx / Amazon / UPS / ShipwirePayPal / Card Buyer Protection
Customer Reviews
Reviews sourced from verified Amazon purchasers4.6
out of 5
Based on 10 reviews
5★
80%
4★
20%
3★
0%
2★
0%
1★
0%
I don't do dishes
AJ✓ Verified Purchase•September 16, 2023
As a matter of fact, I hate doing the dishes. Laundry tends to pile up and I'm not exactly a great house keeper but I'm pretty good at building computers and troubleshooting.
So, installing a remote start, like this one, is kinda right up my alley.
I did watch a few different videos and the install seemed pretty straightforward. I thought it might me 20-30 minutes to install. So, I gathered my tools and Start-X remote starter kit and headed out to the garage.
I began with popping off the dash panels. Some videos removed more panels than others and I came to find out later, I removed more than necessary. My mistake #1.
After removing the panels, I followed a video and the booklet that was provided in the kit and began to connect the harness to the ECU. This looked fairly easy and since I have small hands, I had no problem attaching the harness and module. My mistake #2.
After attaching the harness and module, your next step is to program the module by following a few easy steps. Then, it's done right? No.. not so fast there sister... The module was supposed to flash blue... instead it didn't flash or show any lights. The dash console informed me that there was an electrical error.
Error?
I unclipped the harness and redid the steps again. Four tries later and still didn't work. But that electrical error kept flashing after each try. Then I panicked... Did I just fry my ECU?
No... it wasn't that drastic of a mistake but a mistake I did make.
They don't have a support phone number so if you need help you can only email. Which was very frustrating.
After back and forth emails, I was told to remove the harness and check the tiny pins inside one of the clips. Check if any are bent. Well... if you look at my last photo. One was bent.
I had to figure out a way to unbending it with doing more damage to the pins. I used a tweezer to sorta straighten it out. I reattached the harness and module. Then one last try at programming or they would send me a new harness.
It worked! That was my 3rd mistake. Not checking the pins before clipping it to the ECU. I should of checked it before I even tried to clip it.
Now... my last mistake was doing this install to late in the morning and in the summer. I began at 8am, I live in Phoenix Az, 3 hours later it was 110° and I was trying to reattach the dash panels in a hot car with black leather seats. This was, by far, the worst part of the whole process. Reattaching the too many panels I took off. Also, they don't go on the same way the videos show how they came off. At least, not for my vehicle.
Plus, if I didnt need my car... I would of lit a match and walked away 🔥
But all in all... I'd buy it again. I'd just take it somewhere or hire someone to install it. Not necessarily because it was hard to do. Because by the time I was done. I looked like a red sweaty tomato ðŸ…
**2017 Toyota Highlander XLE
Wow, That's All I Can Say. Wish all after market car parts were this easy to install.
Amazon Customer✓ Verified Purchase•September 10, 2023
The Remote Starter worked wonderfully on a 2014 Toyota Highlander XLE with PUSH BUTTON START (This will NOT work on a key ignition model).
I watched tons of You Tube videos on how to install it include ones I think that were made by Start-X (which was helpful somewhat but didn't explain everything). The best You Tube video was from "trackpalmer" (9/11/2021) which was by far the most comprehensive including the programming part.
It comes with everything you need including the trim removal tool.
Tips:
1. I would remove the floor trims to get to the bolts holding the lower console panel and the one screw next to it. I didn't have to remove the other screw on the other side as I was able to get to the cables easily. But it's a personal preference. I've seem some videos where they don't bother and just pried the lower panel open with the trim tool but I didn't want to break the tabs or put stress on them but also it gives you more room as you will need to zip tie the cables and module down.
2. I would remove the steering wheel cover next.
3. Go backwards when installing the trim. Will make your life easier I feel.
4. DO NOT yank on the 2 connectors. They have these very small release tabs (you can see them on the t-harness), push them down and then pull the connector. DO NOT pull the cables by the wires. Pull the connector. Which is why you need all the space you can get.
5. Make sure you hear a "CLICK" when pushing in the connector and then gently pull the connector to make sure its seated in correctly.
6. Test, test, test before putting the trim back. I tested both remote start and also normal push button start just to make sure. I tested again after zip tie all cables/module. And then again after trim pieces were replaced. Yes, I'm that OCD. You will see why.
The biggest pain point is the trim removal. I get the car manufacturers want the inside to look clean, etc not bolts and screws sticking out, but man what a pain. It will take you longer to remove the trim than the actual connections and programming. Be patient and go slowly.
Cons: Which isn't the fault of the device but more the car manufacturer. The lower steering wheel cover didn't seem to go back or fit as nice IMO once I pulled it off. I checked all the tabs and nothing seems to be broken but felt that it was a poor design.
Wish I had taken some photos after install before putting back the trim.
Works great but boy did it take some time to install
Bruce D✓ Verified Purchase•August 29, 2023
Works great and it only took 45 minutes to install. Instructions were not really clear once you opened up the dash to plug it in. Had to watch Youtube videos to figure out how to install this. For a short synapsis of the install.
step 1) remove the plastics from the door sill to the dash and don't forget the nut at the very end by the brake pedal.
step 2) Remove the 10mm bolt and 4 screws that holds the bottom dash panel to the upper panel
step 3) turn the steering wheel left and remove the screw and then right to remove the second screw.
step 4) separate the plastics on the steering wheel and also the upper and lower dash (this will not separate fully (Thanks Toyota)
step 5) celebrate that you are half way done and spent about 30 minutes to get to this step by drinking a cold beverage of your choice.
step 6) unplug the ignition cable from the steering column and plug it into the T connector and plug the T connector back into the column (refer to video)
step 6a) watch the video to verify which damn plug to swap out of 5 identical plugs (about 5 to 8 minutes) and router the cabling back into this cavity (this will be the final resting place for the unit)
step 7) unplug the correct plug and plug it into the T connector and plug the T connector into the module you unplugged from
step 8) (this is not covered very well in the instructions) While pressing the programming button on the side of the box, plug in the black connector on the wiring harness into its socket. Don't let go of the button
step 9) the lights on the box will cycle through a pattern of red, yellow, red/blue, and blue this pattern continues until you release the button, release the button when the blue light is on. once you release the button you can insert the remaining connecters to their sockets.
step 10) press the push to start button twice without the brake pedal and wait for the blue LED to flash (once it is flashing it is programmed) turn the car off and test by pressing lock 3 time slowly ( about 1-2 seconds between presses)
step 11) spend 15 minutes and a couple of cold drinks to tie up the device and put the dash and door sills back together.
All in all this was not hard but my plastics would not line up correctly on putting this together. Now I want to say that the install of this module was just as hard on my Ford F150 but it was not. On my Ford it took 5 minutes to install. I got in the Truck unclipped the wire harness from the back of the OBDII port plugged in the T harness, plugged in the black connector, turned on the key and released when the LED was blue, plugged in the other connectors, shut down the truck, tested, and the zip tied everything under the dash. 5 minutes (10 minutes tops to play with the starter to show family and neighbors) (it was also -2F outside when I installed these devices). I had no disassembly to do on the truck other than to unclip the OBDII port. I hope this helps someone and I would not recommend doing this in cold weather due to the fact that the door of the car remains open because the lower dash assembly blocks the door (or you can just crush it) but this is a good spring time project or heated garage.
Awesome and Easy
Mike Schatz✓ Verified Purchase•August 5, 2023
I am not mechanical! Nor am I an automotive techie. I've wanted a remote start but had trouble with the $500-700 price tags.
I jumped on Prime and searched auto starts for my vehicle. There it was in all its alluring beauty, Easy to install, no special tools needed, plug & play ease, installation videos, and a price tag of less than $150!!!
I was sucked in hook, line and sinker!
It came the next day. It was much smaller than I expected. It had a lot of wires! What did I get into.
I studied the videos and installation guide. A week later I was ready!
I got in my vehicle, turned on the video, followed it step by step, and 63 minutes later I had a fully operable remote start!
YEAH BABY! Now I cannot reccomend this product enough. Literally if I can do it, anyone can.
This is it folks ! Look no further! Your remote start at an incredible price is here!!
Once installed.....easy to operate
Jomantra✓ Verified Purchase•August 5, 2023
This review is for the Start-X Plug N Play Remote Start Starter for Toyota Highlander 2014-2019. It is for the push-to-start (not keyed) Highlanders only. I have a late in the year model 2019 Toyota Highlander I installed this device in, meaning they had changed the configuration of the under the dash plugs from what the instructions showed. It took me a little longer to install than anticipated because of this. I watch the video from the manufacturer which brushed over some difficult spots, like removing the dash panel in front of the driver's knee (not the side panel between the door and the dash), and the plugs in the video weren't exactly configured like the plugs under my dash that I needed to plug into. The dash panel (in front of the driver's knee) was more difficult to remove than what the manufacturer's video portrayed or actually didn't show. I can't even describe how to remove it accurately, (I finally grasped both sides of the dash panel, pulled down, and it popped off), but I finally removed it. You just want to lower the panel enough to get to the plugs under the dash with your hand and arm. The steering wheel cover came off easily and the plugs fit perfectly for the steering wheel connection. The plugs under the dash were another story! None of the plugs under the dash looked like the plug on the Remote Starter (RS) unit. The one that closest resembled the RS plug, did not fit. So, I was exasperated and ready to send the unit back to Amazon....but I noticed a link in the instructions that one could use to get installation help. So, not expecting much, I sent my request for help to the noted link (Amazon will not allow links to be posted, so I can't post it). Thinking that I wouldn't receive a reply for a couple of days, I noted on my request that the unit was going back 'tomorrow' unless I got help today.......which it would have. Beyond my expectations, I received a reply within about 30 minutes of sending my request! They wanted to know what the problem was (I couldn't find which plug under the dash that needed to be removed to plug the RS into). They requested a photo of my under dash plugs be sent to them, which, with my cell phone, I took the picture of the plugs and replied. Within the hour I had my photo back with the appropriate plug to be removed circled in red. I removed the specified plug that was circled in red, and....'walla', the RS unit plug fit exactly. Everything else worked as expected.....the replacement of the steering wheel cover, the dash covers, and using the zip ties to secure the RS in place under the dash, went well. Once everything was back together, you use your vehicle's remote to start the engine by pressing the lock button three times (the RS unit DOES NOT have a remote start provided with the unit....not needed anyway). I did this....the headlights flashed twice....then nothing! For about eight seconds....nothing (except for the headlights flashing) happens after pressing the remote lock button 3 times, then the engine cranks and starts! So, give it 8 seconds to start. The RS will shut the engine off if you open any door on the vehicle. The RS will also shut the engine off after about 12 minutes if the vehicle has been left running. Also, the RS will work from the same distance you can lock/unlock your vehicle! For example, if you can lock/unlock your car doors from 60 feet away, then you will be able to remote start your vehicle from that same distance too. The RS works as described. The only frustrating part was trying to ascertain which under the dash plug to remove....but the customer assistance came to the rescue rather promptly. It ended up taking me about 2.5 hours to install, with assistance from their help desk. Had I known which plug to remove, it would have taken about 30-40 minutes. Watch the video first! I wish they had a phone number to call for immediate assistance, but one is not provided! Again, the RS is only for Highlanders with a push-to-start button on the dash, not a keyed-to-start. I am pleased with this device now that it is installed and working!
Page 1 of 2
Related products


11 thru 14 F-150 OEM Genuine Ford Remote Starter Kit - Plug N Play - RPO NEW
List: $432.06$388.85DEAL

![KICKY RIDE Plug in Remote Start Kit Compatible with SELECT 2014-2024 Ford & Lincoln Vehicles [CHECK IMAGES FOR MODELS COVERED] Bronco, F-150, F-250, F-350, Ranger, Fusion, Edge, Ecosport, MKZ, & More!](https://m.media-amazon.com/images/I/41TzNL0X76L._SL500_.jpg)