Start-X Remote Starter Kit for Nissan Frontier (2008, 2009, 2010, 2011, 2012, 2013, 2014, 2015, 2016, 2017, 2018, 2019) Trucks | Key Ignition | Plug & Play Install | Lock 3X to Remote Start


Key features
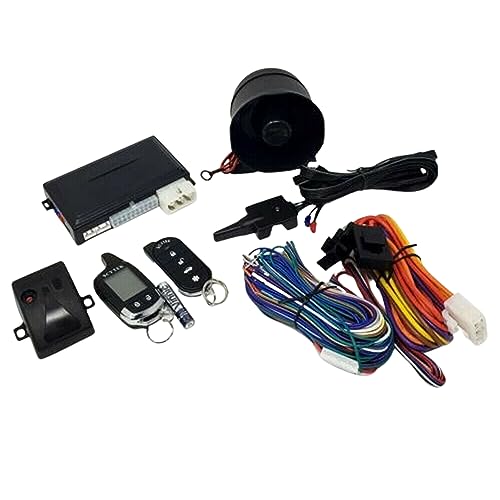
- •✅ START YOUR TRUCK REMOTELY - Use the most complete Plug N Play Remote Starter KIT to warm or cool your vehicle. No more waiting 10 min to defog your windshield. 😊
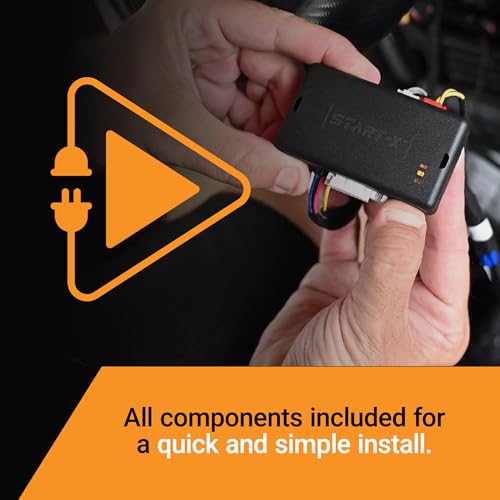
- •✅ PLUG 'N PLAY - Completely Plug N Play no wire splicing/tapping is required. Please see the video and included instructions.
- •✅ 10 MINUTE INSTALL - Installation is super easy and fast. There is no disassembly of your vehicle required. There are 4 vehicle connectors accessible under the dash panel under the steering wheel, without removing anything.
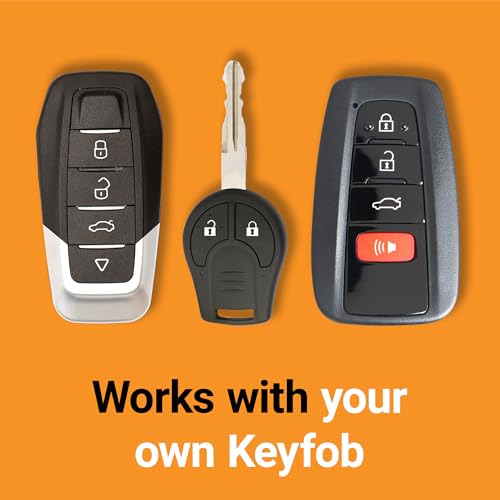
- •✅ NO NEED FOR EXTRA DEVICES - Start your vehicle by pressing 3x lock on your factory remote. Press the lock 3x again and the Start-X Remote Starter will turn off your truck too!
- •✅ RANGE - The distance you can remote start from is the same distance you can lock/unlock your truck. You may want to test your remote to see if its enough for your remote start needs. Plug N Play long range remotes are available at an additional discounted cost.
BrandStart-X
CategoryRemote Starters
Start-X Remote Starter Kit for Nissan Frontier (2008, 2009, 2010, 2011, 2012, 2013, 2014, 2015, 2016, 2017, 2018, 2019) Trucks | Key Ignition | Plug & Play Install | Lock 3X to Remote Start
List Price: $318.65$286.79DEALYou Save: $31.86 (10%)
Free shippingFree Returns – 30 daysFree Order CancellationSecure Payment2–3 Days DeliveryGet It June 23, 2026In Stock (1)No marketing spamNo account requiredFulfilment by FedEx / Amazon / UPS / ShipwirePayPal / Card Buyer Protection
Customer Reviews
Reviews sourced from verified Amazon purchasers4.7
out of 5
Based on 20 reviews
5★
80%
4★
20%
3★
0%
2★
0%
1★
0%
Easy install - Details matter.
Keith L.✓ Verified Purchase•August 2, 2023
I give the Remote-X 5 stars and don't know what more I could add that hasn't already been said. Rather than repeating the positive things others have written, I thought sharing a few pointers on the installation may be more helpful for some. For reference, my Frontier is a 2016. Other years may be slightly different, so your experience may vary slightly.
Lower Dash Panel - As advertised, and as others have reported, the kit can be installed without the removal of panels. On some vehicles it would take longer to remove a panel than to install the kit. However, this is not the case on the Frontier. Personally, I found the 5 additional minutes it took to remove and replace the lower dash panel paid dividends. Panel removal also exposes a horizontal brace that allows you to securely and neatly fasten the module and wires to. If you're the type that likes to cuss, welcomes a challenge, feeling a little flexible and "froggy" and pain is your thing, then please skip this part and knock your lights out. For the rest of you, read on.
The panel is secured by two screws and clips. One screw on the top left is hidden behind trim. Start by pulling back the top of the driver's kick panel (panel at your left foot in the driver's position) just enough so the top of the kick panel clears the door gasket. Pull back about 18" of the door gasket starting from the lower dash panel upwards to the small trim piece located between the upper dash and gasket. Pull outward on the bottom end of trim piece to release the clips that hold it and expose the screw securing the upper left corner of the lower dash panel. Remove the screw on bottom right of the panel next to the center console. The panel is now only held by clips and can be pulled free. Remove the wire connectors and set panel aside. You now have easy two-handed access and a clear view of everything you need to do. It undoubtably took me longer to write this than to physically remove the panel.
BCM- The BCM is a black box approximately the same size as the Start-X module and located directly behind the back of the key switch, with 3 wire connectors plugged in it's side. The wide white connector positioned horizontally at the bottom and the long black connector positioned vertically near the top are the 2 used. The black connector has 2 locking tabs; one on the top and one on bottom end, unlike all the other connectors that just have 1 locking tab on the side. A word of caution; the black connector uses 2 rows of pins for indexing the connector's position: a row of wide pins and a row of narrow. Pay attention to the pins position when connecting as you can unintentionally install backwards and bend pins. In-other-words, if it don't fit, check before you force it.
Installation video - I played the YouTube video on my phone and followed along while installing, pausing as needed. This was especially helpful during the programming.
Horn Beep - If your neighbors are giving you hell because they're tired of hearing your horn beeping 3 times at 4AM when you remote start, it can be easily disabled to keep the peace. Hold down both the lock & unlock buttons on the remote for about 3 seconds. The parking lights will flash and the horn is now disabled. To enable the horn, repeat the process and the horn will beep indicating it is now enabled. If you're not feeling neighborly, then this additional step may be optional.
Set your climate controls, heated seat switch, etc. ahead of time so everything will be cozy after you remote start. Add an aftermarket heated mirror kit and you might forget your driving a Frontier with all these luxuries at your fingertips.
Quite easy to install
Tech25✓ Verified Purchase•July 19, 2023
I read a few reviews, watched the video several times and read the manual and honestly, this wasn't to difficult to install. If you ever installed a radio in your car you have the skill to do this install. Hope that gives you a reasonable comparison of the skill necessary to install this remote starter. It took me about 45 minutes to physically install the unit. It took me another 15 minutes to program it because I screwed up the programming. Don't make the same mistake I did. Step 8 in the install booklet says to WAIT for the rapidly flashing yellow LED. It can take MINUTES. I think it took maybe 2-3 minutes. BE PATIENT! In my case I failed to wait long enough. I just reset the unit to default according to the instruction manual and repeated the re-programming and it worked just fine the second time.
Yes, you can probably install this without removing the lower dash cover but the lower dash panel is incredibly easy to remove on a 2017 Frontier. I can't help but think this would be the same for several model years before and after. It took me 3-5 minutes to remove the lower dash cover which made things way easier. Panel removal also exposes horizontal brackets on the left and right that allow you to cable tie the unit and dress the cables nicely (See pictures). The cover is secured by two screws easily located and removed (See pictures). One screw on the top left is hidden behind trim (See pictures). Start by pulling back the top of the driver's kick panel (panel at your left foot in the driver's position) just enough so the top of the kick panel clears the door gasket. Pull outward on the bottom end of strip/trim to release the clips that hold it and expose the screw securing the upper left corner of the lower dash panel. Remove the screw on bottom right of the panel next to the center console (See picture). The panel is now only being held by plastic tabs molded into the panel that are pressed into rectangular holes in the metal frame. These tabs are held in place by friction. Simply tug the panel straight out towards the seat to free it. Depress the clips holding the switches to that cover and popped them out except for the one on the right. I just unplugged that one and removed the entire panel. Seriously, I'd do this. It makes it WAY easier to reach and see what the heck you are doing!
The connectors on the BCM (Whatever that means) are pretty hard to get to and have two clips at each end of the connectors. For the back one (Vertical) I had to again unplug the ignition plug so I could see what I was doing and used my right hand with a flat blade screw driver to push up on the connectors bottom clip while simultaneously depressing the top clip with the index finger of my left hand. It took a bit but I finally got it disconnected. This is by far the hardest connector to get at. The other one (Horizontal) was difficult but manageable to depress the clips with your left hand index finger and thumb and remove. Fortunately, I'm left handed! Good luck Righty's...
NOTE: The vertical black connector that's the most difficult to get out has 2 rows of pins. A row of wide pins and a row of narrow ones. Just be aware of where they are (Orientation) when the plug is unplugged so the Tee cable/plug you will be installing from the kit into the BCM, can be plugged in with the correct orientation. Whatever you do, DO NOT force that connector into its slot. take your time! It should easily plug in smoothly once properly aligned.
NOTE: Discovered by accident: Horn Beep during remote activation -To disable the horn beep when activating the remote starter, hold down both the lock & unlock buttons on the remote for about 3 seconds. The parking lights flash and the horn will be disabled. To re-enable the horn, repeat this process. The horn will beep indicating it is now re-enabled. Might come in handy for some. All in all GREAT PRODUCT!
Confirmed it works with 2019 Nissan Frontier SV (Install time roughly 30 mins)
QSFYC - Support Guy✓ Verified Purchase•July 8, 2023
Before getting started I would strongly recommend watching the two videos (They can both be found on YouTube) :
1. The recommended manufacture video for the overall process and programming on YouTube: Start-X Remote Starter For Nissan Frontier 2005+
2. 12volt solutions video 2005-2020 Nissan Frontier Plug & Play Remote Start Kit - FULL INSTALL (White Nissan Frontier
There is one caveat this install is not the exact instructions that are included in the package. However, the tech
does a much better job explaining the process and provides better camera angles to the modules you will need
to cross connect. But as I mentioned before this is not the exact install you will not have a ground wire nor will you have to wire tap any wires.
The only tools need:
- Long flat head screw driver
- Light or two
- A few extra zip ties. The manufacture provides a few but you many want to tie up the cables in smaller bundles to make look nice.
- A lot of patience when attempting the pull out the black connector from the BCM module.
Pros
- Fair Price
- Solid programming video
Cons
- Instructions included in the box could be better. The manufacture installation video is the only saving grace to complete this project.
- The BCM Module - I am not a small man but it took me roughly 15 minutes to get the connector loose. The key is prayer, followed by wiggling as close to the base board as you can, and reaching up to grab the black BCM with one hand on both sides to pull it out. The video warns that it will be difficult but this is an understatement. After a few tries I was able to get it off.
- Programming - When you turn the key to the On position wait... wait... waaaaait for the blue light to star flashing. We thought at first that we may have configured the device wrong and we would have to reset it because the device continued to blink yellow. However, after a few minutes it eventually shifted to a blue flashing light.
Other thoughts: I wish the manufacture included best practices to zip tie the cables or at least a picture of the finished product installed. It just jumps to testing without showing the device mounted.
Great Remote Starter!!!
Loud✓ Verified Purchase•July 4, 2023
Super easy install!! Took a little longer than they suggested as I'm a bit more precise about placing wires and such. I would suggest removing the panel above your legs to have more room to work & more light. I've used this through the entire winter 22'-23' and have had no issues!! Hopefully that will be the case until it's time to move into another truck!
This was installed in my 2016 Nissan Frontier 6cyl 4x4.
This was installed in my 2016 Nissan Frontier 6cyl 4x4.
Easy install - Details matter.
Keith L.✓ Verified Purchase•July 1, 2023
I give the Remote-X 5 stars and don't know what more I could add that hasn't already been said. Rather than repeating the positive things others have written, I thought sharing a few pointers on the installation may be more helpful for some. For reference, my Frontier is a 2016. Other years may be slightly different, so your experience may vary slightly.
Lower Dash Panel - As advertised, and as others have reported, the kit can be installed without the removal of panels. On some vehicles it would take longer to remove a panel than to install the kit. However, this is not the case on the Frontier. Personally, I found the 5 additional minutes it took to remove and replace the lower dash panel paid dividends. Panel removal also exposes a horizontal brace that allows you to securely and neatly fasten the module and wires to. If you're the type that likes to cuss, welcomes a challenge, feeling a little flexible and "froggy" and pain is your thing, then please skip this part and knock your lights out. For the rest of you, read on.
The panel is secured by two screws and clips. One screw on the top left is hidden behind trim. Start by pulling back the top of the driver's kick panel (panel at your left foot in the driver's position) just enough so the top of the kick panel clears the door gasket. Pull back about 18" of the door gasket starting from the lower dash panel upwards to the small trim piece located between the upper dash and gasket. Pull outward on the bottom end of trim piece to release the clips that hold it and expose the screw securing the upper left corner of the lower dash panel. Remove the screw on bottom right of the panel next to the center console. The panel is now only held by clips and can be pulled free. Remove the wire connectors and set panel aside. You now have easy two-handed access and a clear view of everything you need to do. It undoubtably took me longer to write this than to physically remove the panel.
BCM- The BCM is a black box approximately the same size as the Start-X module and located directly behind the back of the key switch, with 3 wire connectors plugged in it's side. The wide white connector positioned horizontally at the bottom and the long black connector positioned vertically near the top are the 2 used. The black connector has 2 locking tabs; one on the top and one on bottom end, unlike all the other connectors that just have 1 locking tab on the side. A word of caution; the black connector uses 2 rows of pins for indexing the connector's position: a row of wide pins and a row of narrow. Pay attention to the pins position when connecting as you can unintentionally install backwards and bend pins. In-other-words, if it don't fit, check before you force it.
Installation video - I played the YouTube video on my phone and followed along while installing, pausing as needed. This was especially helpful during the programming.
Horn Beep - If your neighbors are giving you hell because they're tired of hearing your horn beeping 3 times at 4AM when you remote start, it can be easily disabled to keep the peace. Hold down both the lock & unlock buttons on the remote for about 3 seconds. The parking lights will flash and the horn is now disabled. To enable the horn, repeat the process and the horn will beep indicating it is now enabled. If you're not feeling neighborly, then this additional step may be optional.
Set your climate controls, heated seat switch, etc. ahead of time so everything will be cozy after you remote start. Add an aftermarket heated mirror kit and you might forget your driving a Frontier with all these luxuries at your fingertips.
Lower Dash Panel - As advertised, and as others have reported, the kit can be installed without the removal of panels. On some vehicles it would take longer to remove a panel than to install the kit. However, this is not the case on the Frontier. Personally, I found the 5 additional minutes it took to remove and replace the lower dash panel paid dividends. Panel removal also exposes a horizontal brace that allows you to securely and neatly fasten the module and wires to. If you're the type that likes to cuss, welcomes a challenge, feeling a little flexible and "froggy" and pain is your thing, then please skip this part and knock your lights out. For the rest of you, read on.
The panel is secured by two screws and clips. One screw on the top left is hidden behind trim. Start by pulling back the top of the driver's kick panel (panel at your left foot in the driver's position) just enough so the top of the kick panel clears the door gasket. Pull back about 18" of the door gasket starting from the lower dash panel upwards to the small trim piece located between the upper dash and gasket. Pull outward on the bottom end of trim piece to release the clips that hold it and expose the screw securing the upper left corner of the lower dash panel. Remove the screw on bottom right of the panel next to the center console. The panel is now only held by clips and can be pulled free. Remove the wire connectors and set panel aside. You now have easy two-handed access and a clear view of everything you need to do. It undoubtably took me longer to write this than to physically remove the panel.
BCM- The BCM is a black box approximately the same size as the Start-X module and located directly behind the back of the key switch, with 3 wire connectors plugged in it's side. The wide white connector positioned horizontally at the bottom and the long black connector positioned vertically near the top are the 2 used. The black connector has 2 locking tabs; one on the top and one on bottom end, unlike all the other connectors that just have 1 locking tab on the side. A word of caution; the black connector uses 2 rows of pins for indexing the connector's position: a row of wide pins and a row of narrow. Pay attention to the pins position when connecting as you can unintentionally install backwards and bend pins. In-other-words, if it don't fit, check before you force it.
Installation video - I played the YouTube video on my phone and followed along while installing, pausing as needed. This was especially helpful during the programming.
Horn Beep - If your neighbors are giving you hell because they're tired of hearing your horn beeping 3 times at 4AM when you remote start, it can be easily disabled to keep the peace. Hold down both the lock & unlock buttons on the remote for about 3 seconds. The parking lights will flash and the horn is now disabled. To enable the horn, repeat the process and the horn will beep indicating it is now enabled. If you're not feeling neighborly, then this additional step may be optional.
Set your climate controls, heated seat switch, etc. ahead of time so everything will be cozy after you remote start. Add an aftermarket heated mirror kit and you might forget your driving a Frontier with all these luxuries at your fingertips.
Page 1 of 4
Related products


11 thru 14 F-150 OEM Genuine Ford Remote Starter Kit - Plug N Play - RPO NEW
List: $432.06$388.85DEAL

![KICKY RIDE Plug in Remote Start Kit Compatible with SELECT 2014-2024 Ford & Lincoln Vehicles [CHECK IMAGES FOR MODELS COVERED] Bronco, F-150, F-250, F-350, Ranger, Fusion, Edge, Ecosport, MKZ, & More!](https://m.media-amazon.com/images/I/41TzNL0X76L._SL500_.jpg)