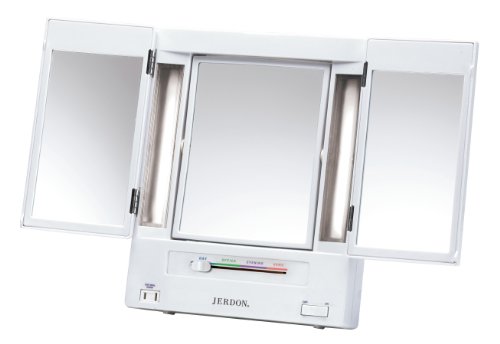
JERDON Tri-Fold Two-Sided Makeup Mirror with Lights - Vanity Mirror with 5X-1X Magnification & Multiple Light Settings - White - Model JGL9W


Key features
- •Adjustable magnification, lighting and built-in electrical outlet
- •Sharp look and attractive white finish will match any home décor
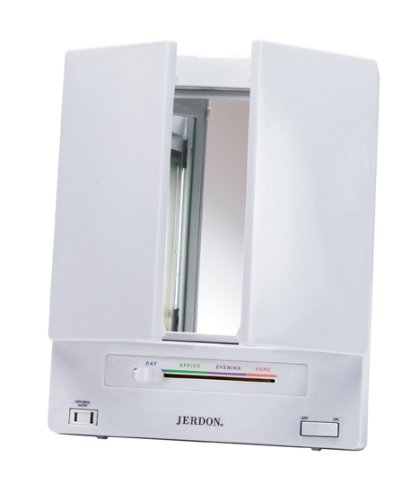
- •Includes 4 adjustable settings for daytime, evening, home and office environments
- •1x and 5x magnification options to make sure every detail is in place
- •Comes with a 1-year limited warranty
BrandJERDON
CategoryKitchen & Dining Features
Size11.8"L x 9.6"W
ColorJgl9w Original White
Warranty1 year limited warranty.
JERDON Tri-Fold Two-Sided Makeup Mirror with Lights - Vanity Mirror with 5X-1X Magnification & Multiple Light Settings - White - Model JGL9W
List Price: $80.43$72.39DEALYou Save: $8.04 (10%)
Free shippingFree Returns – 30 daysFree Order CancellationSecure Payment2–3 Days DeliveryGet It October 25, 2026In Stock (4)No marketing spamNo account requiredFulfilment by FedEx / Amazon / UPS / ShipwirePayPal / Card Buyer Protection
Customer Reviews
Reviews sourced from verified Amazon purchasers4.6
out of 5
Based on 10 reviews
5★
80%
4★
20%
3★
0%
2★
0%
1★
0%
Replacing your Windmere?
Diane✓ Verified Purchase•September 28, 2023
Looks exactly like your old Windmere if you are replacing it. The lights are very bright which is not a problem. However the flip side of the middle mirror is 5x not 3x like the Windmere. The 5x is all wonky looking unless you are right up close to the middle area. Since I am a bit farsighted I used the 3x constantly and the 5x is too much. Not pleased with that side of the mirror at all. But hey if you're looking for a lost contact lens in your eye that could come in really handy 🤣. Also if you leave it on the magnified side all the time the doors won't close completely you have to flip it back over to the normal side mirror. Hope this helps someone!
Great Replacement for my old mirror
M. Roberts✓ Verified Purchase•September 14, 2023
I've had several Conair makeup mirrors since I was about 12. Since Conair doesn't make this mirror anymore, I did my research and decided on this Jerdon mirror. I'm very satisfied with my decision and I'm glad I took the chance on it. I especially like that there's an extra place to plug in a curling iron or other accessory. I don't think it would be great for travel because it's a full-size mirror.
Best makeup mirror ever
Deborah Boyette✓ Verified Purchase•September 3, 2023
Great mirror and had a few over the years but one thing I HATE is the FLIMSY kick stand supporting the heavy -although- good mirror unit. The 3 or 4 like this one I had in the past always accidentally breaking the crummy stand. Weird they haven't improved that part of the product..but then they wouldn't sell as many when you have to start propping it up"¦hope this helps💜that said it is still the only makeup mirror I've found works in spite of the stand issues
This is How to Take the Jerdon Model JGL9W Apart
Steven S. Showers✓ Verified Purchase•August 15, 2023
How do you take the Jerdon Model JGL9W apart?
DO NOT TRY TO PRY IT APART! That will NEVER work. I tried that. That is some tough plastic. I found out that the back is not made to simply pop off. And no amount of prying will get it off. The unit is held together by four (4) rather substantial screws.
Where are the screws? On the back of the unit you will see four (4) round slightly recessed areas. The recessed plastic inside of these four circles hides the screw heads. If you take a medium size phillips screw driver and press it into the center of that circle you should penetrate through the 1/16 inch or so of the covering plastic, and find the screw head right underneath.
(I used the word "if" and "should" because I removed the plastic with a 5/16 inch forstner bit on my drill press, not knowing what was under there. I thought it was a support post, internally glued, and I was going to separate it from the back by removing the plastic material around it. But, to my surprise, the drill bit hit metal quickly, and in that way I found the screw head.)
Note: Before you seperate the front and the back of the unit, use the flat end of a screw driver to pop out the slider knob.
With that caveat, when you get those four screws out, the unit comes apart easily.
Why did I take it apart? This unit worked fine for one year, and 11 months, wherein, it came to pass, that both of the lights stopped working. Even if you held the switch down for a minute the lights would not light.
Now, because both lights would not light, I figured it was probably not an issue with the lights themselves. I thought I might find something wrong with the switch. When I had the unit apart, and I plugged it in, I operated the switch, and it had a different feel to it, it clicked on, and it clicked off. Before I took the unit apart, the switch had no such mechanical feedback. I am not sure what I did to invoke that change in behavior. Nevertheless, I was rewarded for my efforts, as is often the case in situations like this, where you make the effort, but you are not sure exactly what you did to make it work, but by golly, both the lights come on now!
And so, if I had not broken one of the small brackets that holds one end of one of the lense movement assemblies during my effort to pry the unit apart with a big screwdriver, I could simply put it back together and give it back to my mom, as the lights appears to work fine now. But because of this broken bracket issue I need to figure out how to glue it back on before I can put it back together. I don't see a major problem there. (Update: that was no problem. I made a new bracket, glued it on, and the unit is reassembled and functioning properly).
While looking inside this unit, I must report to you, that it is well made, and quite substantial. I think people who buy this unit are getting a good deal. All electrical connections are made with solid crimp connections, and everything is well insulated. The ballast transformer looks to be so substantial that one might expect it to last for a century or more. And the lense movement assemblies are quite cleverly and substantially designed too.
For those of you who want to know how to change the fluorescent light bulbs in this unit, i.e. if they ever did fail, well then, you would take the unit apart as described above. Beyond that, the rest is speculation on my part derived from looking at the issue from the inside. As noted I did not need to replace the bulbs in this unit.
Inside the case, on a label close to the bulbs, it tells you what kind of bulb you need. However, the bulbs do not have sockets. They are hard wired in there with crimp connectors. To remove the old bulb or bulbs, you would have to clip the wires close to the bulb pins, remove the old bulbs, and put in the new ones, and then crimp the wires back onto the pins of the new bulb. I suppose you could solder the wires on, using some shrink wrap insulation to make sure that there is no bare metal showing after you are done.
For a person to accomplish this successfully, you would need to have some electrical knowledge before hand. Not a lot, but some. Like don't work on the unit while it's plugged in. And how to crimp, or solder, and how to insulate the bulb pin connections. And how to keep track of where the wires go. You could take a digital photo first, before you disconnect anything.
Moreover, the replacement of the light bulbs would be further complicated by the fact that these light bulbs are mounted inside of the lens movement mechanisms. It appears that the main mounting bracket (one per side) for the lens movement mechanism must be unscrewed and moved at least partially out of the way before you can get your hands on the phenolic strips which serve as the mounting structure for the bulbs, and through which the pins extend. I poked around in there and tried to see how these might come out. It is not clear. It Looks like somewhat of a mechanical puzzle. And when it comes to the lens movement mechanism, we are speaking about a string driven spring loaded apparatus, and it will take some mechanical aptitude to get it put back together and properly realigned, that is tracking from side to side.
(To adjust tracking, you need to relieve the string tension on one side, and spin the lens into the proper position. I needed to do this before I put this unit back together.)
Replacing the light bulbs in this unit is not impossible. But it would NOT be considered easy. Apart from the time it would take to find the right replacement bulbs, and have them at hand ready to install, I think you would be talking about a couple of hours of shop time, factoring in the time you will need to explore and fathom just how to get the old bulbs out of there.
A factory technician who has done this a hundred times, who has the bulbs, the tools, and the experience, might be able to complete the job in about fifteen minutes. A person who sees the inside of this unit for the first time will take longer.
If you are electrically and mechanically inclined, and have the time to spare, it might be an enjoyable project, which would pay some dividends, I think, in terms of making the end-user very happy. Giving new life to an old friend will certainly give her something to smile about.
DO NOT TRY TO PRY IT APART! That will NEVER work. I tried that. That is some tough plastic. I found out that the back is not made to simply pop off. And no amount of prying will get it off. The unit is held together by four (4) rather substantial screws.
Where are the screws? On the back of the unit you will see four (4) round slightly recessed areas. The recessed plastic inside of these four circles hides the screw heads. If you take a medium size phillips screw driver and press it into the center of that circle you should penetrate through the 1/16 inch or so of the covering plastic, and find the screw head right underneath.
(I used the word "if" and "should" because I removed the plastic with a 5/16 inch forstner bit on my drill press, not knowing what was under there. I thought it was a support post, internally glued, and I was going to separate it from the back by removing the plastic material around it. But, to my surprise, the drill bit hit metal quickly, and in that way I found the screw head.)
Note: Before you seperate the front and the back of the unit, use the flat end of a screw driver to pop out the slider knob.
With that caveat, when you get those four screws out, the unit comes apart easily.
Why did I take it apart? This unit worked fine for one year, and 11 months, wherein, it came to pass, that both of the lights stopped working. Even if you held the switch down for a minute the lights would not light.
Now, because both lights would not light, I figured it was probably not an issue with the lights themselves. I thought I might find something wrong with the switch. When I had the unit apart, and I plugged it in, I operated the switch, and it had a different feel to it, it clicked on, and it clicked off. Before I took the unit apart, the switch had no such mechanical feedback. I am not sure what I did to invoke that change in behavior. Nevertheless, I was rewarded for my efforts, as is often the case in situations like this, where you make the effort, but you are not sure exactly what you did to make it work, but by golly, both the lights come on now!
And so, if I had not broken one of the small brackets that holds one end of one of the lense movement assemblies during my effort to pry the unit apart with a big screwdriver, I could simply put it back together and give it back to my mom, as the lights appears to work fine now. But because of this broken bracket issue I need to figure out how to glue it back on before I can put it back together. I don't see a major problem there. (Update: that was no problem. I made a new bracket, glued it on, and the unit is reassembled and functioning properly).
While looking inside this unit, I must report to you, that it is well made, and quite substantial. I think people who buy this unit are getting a good deal. All electrical connections are made with solid crimp connections, and everything is well insulated. The ballast transformer looks to be so substantial that one might expect it to last for a century or more. And the lense movement assemblies are quite cleverly and substantially designed too.
For those of you who want to know how to change the fluorescent light bulbs in this unit, i.e. if they ever did fail, well then, you would take the unit apart as described above. Beyond that, the rest is speculation on my part derived from looking at the issue from the inside. As noted I did not need to replace the bulbs in this unit.
Inside the case, on a label close to the bulbs, it tells you what kind of bulb you need. However, the bulbs do not have sockets. They are hard wired in there with crimp connectors. To remove the old bulb or bulbs, you would have to clip the wires close to the bulb pins, remove the old bulbs, and put in the new ones, and then crimp the wires back onto the pins of the new bulb. I suppose you could solder the wires on, using some shrink wrap insulation to make sure that there is no bare metal showing after you are done.
For a person to accomplish this successfully, you would need to have some electrical knowledge before hand. Not a lot, but some. Like don't work on the unit while it's plugged in. And how to crimp, or solder, and how to insulate the bulb pin connections. And how to keep track of where the wires go. You could take a digital photo first, before you disconnect anything.
Moreover, the replacement of the light bulbs would be further complicated by the fact that these light bulbs are mounted inside of the lens movement mechanisms. It appears that the main mounting bracket (one per side) for the lens movement mechanism must be unscrewed and moved at least partially out of the way before you can get your hands on the phenolic strips which serve as the mounting structure for the bulbs, and through which the pins extend. I poked around in there and tried to see how these might come out. It is not clear. It Looks like somewhat of a mechanical puzzle. And when it comes to the lens movement mechanism, we are speaking about a string driven spring loaded apparatus, and it will take some mechanical aptitude to get it put back together and properly realigned, that is tracking from side to side.
(To adjust tracking, you need to relieve the string tension on one side, and spin the lens into the proper position. I needed to do this before I put this unit back together.)
Replacing the light bulbs in this unit is not impossible. But it would NOT be considered easy. Apart from the time it would take to find the right replacement bulbs, and have them at hand ready to install, I think you would be talking about a couple of hours of shop time, factoring in the time you will need to explore and fathom just how to get the old bulbs out of there.
A factory technician who has done this a hundred times, who has the bulbs, the tools, and the experience, might be able to complete the job in about fifteen minutes. A person who sees the inside of this unit for the first time will take longer.
If you are electrically and mechanically inclined, and have the time to spare, it might be an enjoyable project, which would pay some dividends, I think, in terms of making the end-user very happy. Giving new life to an old friend will certainly give her something to smile about.
Love this Mirror!
Gloria✓ Verified Purchase•July 26, 2023
Finally a mirror with afjustable lighting and magnification that works! Love that the middle mirror tilts top to bottom, as you can adjust angle instead of adjusting the stand. Hope it lasts as long as my prior Clairol model!
Page 1 of 2