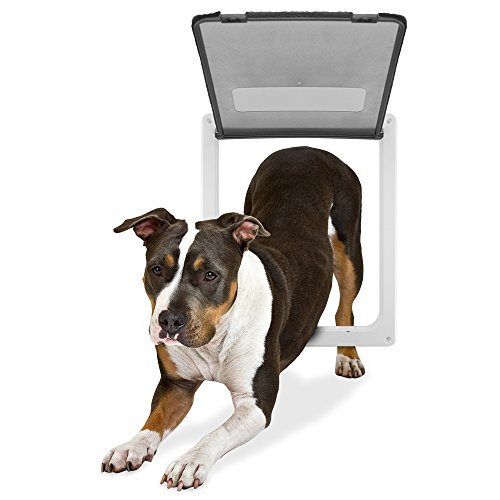
Cat Mate 4 Way Locking Cat Flap with Door Liner, White


Key features
- •White 4 way locking cat door w/liner
- •2-Inch trimmable door liner enables neat, easy installation in all doors, panels and walls
- •Exterior rain seal included
- •Brush strip to reduce energy loss and silent action
- •Poly carbonate flap
Cat Mate 4 Way Locking Cat Flap with Door Liner, White
List Price: $46.97$42.27DEALYou Save: $4.70 (10%)
Free shippingFree Returns – 30 daysFree Order CancellationSecure Payment2–3 Days DeliveryGet It June 22, 2026In Stock (6)No marketing spamNo account requiredFulfilment by FedEx / Amazon / UPS / ShipwirePayPal / Card Buyer Protection
Customer Reviews
Reviews sourced from verified Amazon purchasers4.4
out of 5
Based on 10 reviews
5★
70%
4★
10%
3★
20%
2★
0%
1★
0%
Mounted on insulated Garage door - only needed to buy different screws
The Yellow Streak•July 4, 2017
Bought this to allow our semi-feral cats in/out of the garage - which they use for shelter. We used to leave the garage door open a few inches so they can get in/out. Finally decided to put in a cat door. Installed this on a garage door that is insulated with Styrofoam insulation, so the mounting screws would not work to secure inside frame to styrofoam. Replaced the supplied screws with 6-32 x 2" screws, washers, and locking nuts. Had to widen the pre-drilled mounting holes on one of the frames to accomodate the new screws - I forget which, but it'll be obvious. After cutting the hole in the garage door with my Dremel with jigsaw attachment, mounting revealed that I needed to trim the inside bracket to fit the door's 1 inch depth... easily done with the Dremel and cutting disk. Wear eye protection - plastic shards did fly into my face... ok... I didn't wear any. do as I say, not as I do... Once that was done - it was a matter of drilling the screw holes from the outside through the door, aligning the screws --- strongly recommend drilling one hole, mounting and securing one corner at a time (do opposite corners) to minimize the movement of the frames for each subsequent hole you drill because you want to the holes of both frames to line up as you will be putting a 2" screw through both frames.
I've propped the door open with a bungee cord for cat 'training' - and they've already figured out there is a hole in the door to go in/out. I'll give it another day or so before I drop the door flap. Overall - quite happy with this. One other tip - if you are mounting this to your garage door like I did - measure the depth carefully, and take the cat door to the hardware store to visually size out the length of screws you will need. My Ace Hardware did not have 1.75" length screws, so the screws stick out a bit more than 1/4" on the inside.
I've propped the door open with a bungee cord for cat 'training' - and they've already figured out there is a hole in the door to go in/out. I'll give it another day or so before I drop the door flap. Overall - quite happy with this. One other tip - if you are mounting this to your garage door like I did - measure the depth carefully, and take the cat door to the hardware store to visually size out the length of screws you will need. My Ace Hardware did not have 1.75" length screws, so the screws stick out a bit more than 1/4" on the inside.
great quality, price, very nice looking and functional door. I've install four of these, note that it's a bit of a handy(person
kenamazon•March 27, 2017
great quality, price, very nice looking and functional door. I've install four of these, note that it's a bit of a handy(person) project in that you're cutting a pretty decent size hole in a door (do you have the tools, do you remove the door, etc.). I remove the doors just because I find it more convenient but it could be done while the door is hung if you're in a hurry. I will say 2 of the doors where metal (garage-to-house door and a garage-to-outside door) and these where much more challenging than the wood doors; the very thin metal skins and styrofoam cores make not make creating the cutouts tougher (the thin metal tends to bounce up and down while you cut) and then the screws don't have much to bite into when you mount it. I ended filling the interior corners with bondo to hold the screws better.
Sturdy, cost effective cat flap
Barakah•August 17, 2016
With 7 cats in the house, I got tired of opening and closing doors. So I set about finding a cost effective solution to my problem. Having read a number of reviews on different products, I settled on the Cat Mate cat flap, primarily because of this wall liner Cat Mate Wall Liner, which seemed sturdier than most.
We have fitted one external flap and 3 internal ones. My husband seemed to have no problem fitting them - the holes on both sides of the walls matched! It took 2 additional wall liners for each cat flap (we have standard walls) and we stuck them together using superglue. I also sealed around the joints with a good quality caulk. Initially, I wasn't sure if they would hold up to all the wear and tear they were going to get - but they have proven to be sturdier that I thought. I just wish they produced a double width liner, rather than having to put 2 together.
We have now had them in place for 9 months - and they have been extensively used (as you can imagine) by 5 of the 7 cats. The other 2 will use them if I hold the flap open for them. A couple of the younger cats literally fly through the flaps at full pelt and they have stood up to this absolutely fine. They also play with the cat flap - a cat on one sides of the flap leaning though and smacking the other one. I found that my next problem became being kept awake at night with them constantly opening and closing the flap - thank goodness for the lock!
I have absolutely no complaints with either the cat flaps or the liner. The magnetic strip holding the cat door shut has been effective and we have no drafts coming into the house from outside.
I would buy these again and recommend to anyone.
If I could install it, pretty much anyone can!
ccbutterfly•July 30, 2016
Shopped around first; got this at a great price here on amazon. Arrived very quickly thanks to Prime. It took me two days to work up the nerve to put a hole in my wall, but I did it. I am so happy with the way it turned out! The liner makes it very forgiving if your cuts aren't 100% perfectly straight (mine weren't, probably because I was shaking while cutting the wall!) Incidentally, I used a Dremel tool with a drywall bit to cut it, making easy work of it. All I can say about the installation is that if I can do it, pretty much anyone can. My experience with household tools is mostly limited to hanging pictures (not very well) and assembling furniture with a screwdriver.
Installation went like this: Use the included template to trace out the opening area on the wall. (Make sure there are no studs behind the cut-out area). Use the Dremel to cut on the lines as closely as possible. Place the liner in the opening and mark the screw holes. Remove the liner and drill thin pilot/guide holes where the screws will go. Place the liner and the door itself in the opening and screw them in place. Ta-da! That's it!
The red and green buttons in the picture are sliders you can set to "in only" or "out only" if you want. This is a great feature! Of course, they'll both normally be set to be open in both directions, but if I should need to close it off for any reason and I'm not sure which side of the door the cats are on at the moment, I can set them to "in only". I can think of other handy uses for these sliders as well. They were a surprise bonus as I had thought "locking" simply meant it was either open or closed up tight.
The seal around the outside, as well as through the flap is nice and snug, keeping the outside air out and vice-versa. However, it isn't so tight that my cats can't push themselves through it. Kittens may have to grow into it, though.
I bought three of these. One is to give the cats access to go outside through the garage. (Not using on an exterior wall) The other two are to give them access to two rooms with litter boxes so I won't have to worry about keeping a door open for them. This is going to make my "life with cats" much easier.
All pros for me - No cons; other than having to put a hole in the wall to make it work. Can't get around that, though! I decided to hang on to the piece of drywall I removed in case I move or change my mind about having a cat door there. It will make the repair a bit easier, I think. Regardless, it makes me feel better to have it.
Great door
M. Spielman•November 10, 2015
Our toddler killed our old pet door to the basement when he thought it would be fun to kick so I got this one instead. It's a very nice pet door and was the same size of our old one so I didn't need to do much to my door in terms of cutting/repair to fit it in.
I installed this on the door to our basement steps which is a standard thickness, hollow-core door. Standard builder's grade stuff. Our previous pet door had bolts that went through the entire door so you would tighten the nut from the other side. However, for this unit, on our thickness door, you actually screw each side into the door itself rather than bolting through. That means you need to install 8 screws (4 on each side) to secure this. It also means if you're cutting a new hole in your door you must follow the template provided carefully for cutting.
Post install, this door works great. The door is transparent which actually makes our cats much more comfortable using it as they can see what is on the other side. The red and green latches each control either in or out. So you can allow your pets to pass one-way or both ways through the door. The latches are also very sturdy. There is also a magnetic catch in the bottom of the door so that it won't stay open a little bit if you have a draft through your house.
It has also survived several kicks from our toddler without any noticeable damage.
A+ product.
Page 1 of 2