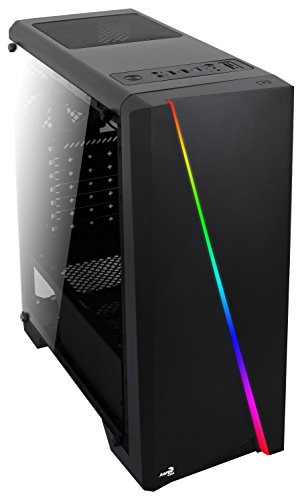
Phanteks Enthoo Pro Full Tower Chassis with Window Cases PH-ES614P_BK,Black


Key features
- •Enthoo Pro includes 1 x 200mm fan in front and 1 x 140mm fan in the rear. Ability to upgrade to additional fans is possible. All fans included are Phanteks' new redesigned and better performing SP series fans. Budget friendly case.
- •Appearance: Brushed plastic with an aluminum appearance; Stealth interior: hidden PSU / hidden HDD
- •Cooling: Extreme cooling capacity; 2 included Phanteks' premium fans ; The PWM hub makes it possible to control all the connected fans (also 3-pin fans) with PWM function through 1 PWM connector and create a better cable management
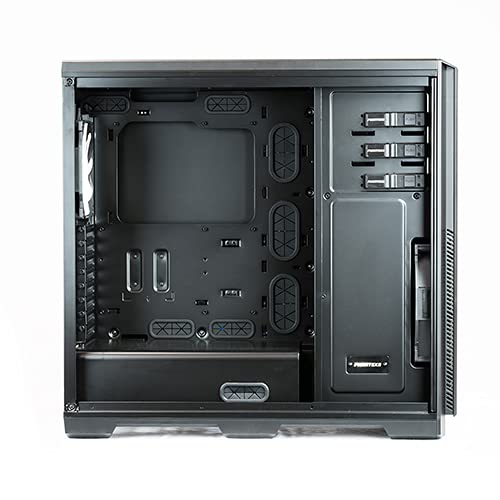
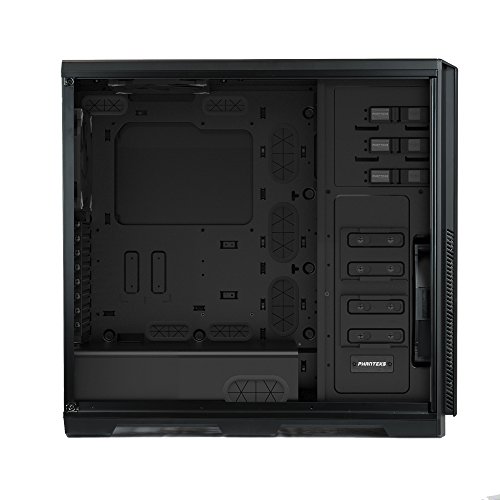
- •Extensive water cooling support. Provides up to 4 diff installation areas for radiators vary from single to triple (120mm & 140mm form factors). Clearance for push-pull fan configurations; Innovative liquid cooling mounting systems
- •Closed HDD panel strengthens the chassis' rigidity, even when both HDD cages are removed. Removable Drop-n-Lock SSD bracket that can be installed on 2 different locations. (1 bracket incl.)
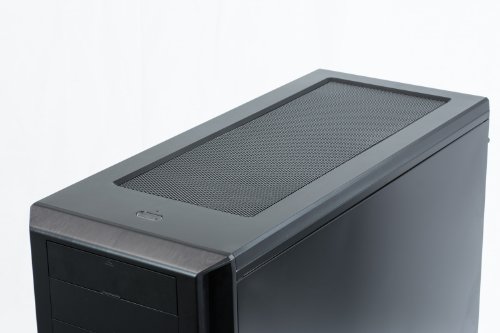
- •Removable dust filters for easy maintenance. Pre-installed cable management tools behind the motherboard tray that can be fastened and released.2x USB 3.0, 2x USB 2.0, microphone, 3.5mm audio jack
Phanteks Enthoo Pro Full Tower Chassis with Window Cases PH-ES614P_BK,Black
List Price: $173.13$155.82DEALYou Save: $17.31 (10%)
Free shippingFree Returns – 30 daysFree Order CancellationSecure Payment2–3 Days DeliveryGet It June 22, 2026In Stock (4)No marketing spamNo account requiredFulfilment by FedEx / Amazon / UPS / ShipwirePayPal / Card Buyer Protection
Customer Reviews
Reviews sourced from verified Amazon purchasers4.7
out of 5
Based on 10 reviews
5★
90%
4★
10%
3★
0%
2★
0%
1★
0%
Amazing case.
Michael G.✓ Verified Purchase•August 24, 2017
I was getting very frustrated with my previous case; a Raidmax Horus. There wasnt necessarily anything wrong with that case but as my computer grew, it was such a pain to rework that case everytime I wanted to add a component and the overall temperature was starting to heat up. Enter the Enthoo pro. I transplanted my computer into this case and it has been amazing. The room to work and the cable management is superb. I added another hard drive and four fans over my previous build and dropped my temps 10c. This case has been nothing short of amazing.
There were a few "cons" although I feel they don't add up to the reduction of a star. To start: the power supply shroud. I do not like how it is secured with the three thumb screws. The placement of the screws has them covered up by cables and also requires you to take off both side panels to remove the shroud. Its not terrible because the panels are super easy to remove and replace. Also with the shroud, it not only covers up the power supply but the bottom case fan as well. I took the rear 140 mm fan and placed it on the bottom. With the shroud in place (which looks very nice) covering up my bottom fan, temperatures were 2 degrees C higher than without the shroud. Although it does not look as slick, I chose to leave the shroud out for the cooler temperatures and better air flow. One possible con to some may be the size. It is a full tower case and as such is gigantic. I personally love it as I am not concerned with form factor, I am concerned with functionality and ease of use. Two things this case delivers in spades. The only other negative I can recall relates to the hard drive mounting brackets. There are two separate HDD cages that can be removed independently. On each of these cages it was exceptionally hard to slide the bottom mounting bracket into place. All other positions slid in with ease.
All in all this is the best case I have ever purchased and would highly recommend it to anybody that wants a nice clean, organized build with great airflow. Thanks to Phanteks for the best case ever and Amazon for prompt two day shipping.
Lots of Options, None of them Practical (Unless you work for it)
Kaelaen✓ Verified Purchase•July 21, 2017
There are many options for this case. Many ways to assemble and reassemble things to customize it to how you want it. None of the options I actually needed were supported. I wanted to put my NZXT Kraken x62 to act as my front radiator. It did not fit. It could fit properly if I removed the side plating and the optical drive cages, but come on. If I wanted no optical drives in my computer case then I would have bought one of those new-fangled cases everyone makes with a huge square plate at the front blocking all air flow. I don't understand why those are all the rage. Sorry, but just because optical drives are completely useless in this day and age doesn't mean a computer shouldn't have one. This isn't a tablet.
I wanted to move the 200mm intake fan to be an exhaust at the top. Some instruction manuals say this is possible. The one that came with the case said it did not. I tried it in real life. It did not. Still, I made it fit up there just fine using command strips. And then I moved it back to the front because I later discovered the aforementioned NZXT radiator didn't fit, and I moved the radiator to the top mount like a good little boy who obeys his limits meekly. This worked fine for about a month, though my temps were never anything to write home about.
Inspiration struck later, and I figured out how I could make the radiator act as an intake. -I simply needed to attach it to the hard drive cages.- Why not, I thought? The hard drive cages literally have fan mounts drilled into them. I tried attaching my NZXT fans to them. They only accepted 120mm fans.
Oh ho ho Phanteks. You thought you could make me kneel forever? The man who fixed his Ion Drum Rocker's drooping drum pads using duct tape, dog leashes, and a length of stick? Well you thought wrong.
I attached four pieces of cut-up command strips to the top NZXT fan (I didn't bother putting it on the bottom one because I removed the hard drive cage from there. Seriously who the hell needs 6 hard drive cages? Aah, feel that better airflow), then braced it at the bottom with the alcohol-stained cotton pads I used to clean up the thermal paste because I had to remove the pump to comfortably manipulate the radiator. The radiator held. Best of all, it's still so huge you can barely even see the fans. And it's impossible to see the command strips or the cotton pads. Now my 200mm fan blows cool air at my NZXT fans, which cools the NZXT radiator which is -so- much better than using it as an exhaust.
If I ever upgrade my GPU from an Asus Strix 960 to an Asus Strix 1080, I'll have exactly 2/5ths of an inch left for clearance between my GPU and my radiator, so despite how badly this tries to control me, in the end, I am the one who controls it.
4/5 stars, one star off for making me work.
Afterthought:
The fans are Phanteks fans and unless you really like the color brown, you won't have any reason to upgrade those to Noctua fans. They perform more or less the same in the amount of air they move and the sound they produce, but the Phanteks fans work better color-wise with most builds. Cable management at the back felt nice. This was a really fun case to tinker with for my first computer build.
The filter do a great job in blocking the dust and whatever gets stuck ...
Andre Cardoso✓ Verified Purchase•May 29, 2017
Update on 5-start Review:
It's probably my tenth time cleaning this case, which is completely normal since it was right under my AC. The filter do a great job in blocking the dust and whatever gets stuck there can easily be removed using a rag (doesnt even have to be wet). Some dust still manages to get inside the case but again, can easily be removed with a rag or air cans. Two years ago, when I was building my computer, I was surprised on the amount of extra accessories and manuals that came with the case. Now that I'm cleaning the case with a dry rag, I can tell their attention to detail. If I build another computer after I sell this one, I will probably order another case from Phanteks. Great Value!
It's probably my tenth time cleaning this case, which is completely normal since it was right under my AC. The filter do a great job in blocking the dust and whatever gets stuck there can easily be removed using a rag (doesnt even have to be wet). Some dust still manages to get inside the case but again, can easily be removed with a rag or air cans. Two years ago, when I was building my computer, I was surprised on the amount of extra accessories and manuals that came with the case. Now that I'm cleaning the case with a dry rag, I can tell their attention to detail. If I build another computer after I sell this one, I will probably order another case from Phanteks. Great Value!
Sleek, durable design - Highly recommend
Coach Miller✓ Verified Purchase•November 11, 2016
I upgraded from my 2011 Antec 900 (mid-size Tower) case to this beast. It's like going from a Winnebago to a Ferrari. My old case was cramped with cables, and the latest graphics cards, which are huge, barely had room to fit. Not so with this Full Tower case. There's an immense amount of room and a more than enough cable holes to make cable management a breeze. The right side of the tower (back side) has small Velcro straps placed intermittently that slide over your cables to secure them to the side. There are multiple HDD bays that are easily mounted by simply sliding out the tray and sliding in your HDD. The sides of the case are easily removed, as well as the front and top, which just pops off. I did not run into any sharp edges, and the case feels extremely durable (no plastic pieces sticking out to accidentally kick off).
There's a giant 200mm fan in the front and a 140mm fan in the rear, with options to mount multiple fans to the bottom or top on a track. The track allows you to choose where you want to mount each fan (up to 3 120mm on top). The bottom of the case has 2 dust vent inserts that slide out from the front and back for better air flow. I mounted two 120mm fans to the top and 1 at the bottom next to the PSU. There is a PSU shield that comes with the case but I ended up leaving it off for better air flow from my bottom fan.
All of the fans are connected to a Pulse Width Modulation (PWM) hub on the right side of the case behind the motherboard. The idea is that you can connect the 4-pin connector from the hub to your CPU_Fan1 on your motherboard and then plug your CPU fan into the hub and you will be able to adjust the speed of your fans. Even if your CPU fan has 4-pins you can connect it to the 3-pin hub. Just use the 3 pins between the small ridges on the underside of the connector.
I ran into some trouble getting the PWM hub to work. The documentation from Phanteks in the manual is good, but not great. When I connected it the way it was supposed to be connect (as previously explained), none of the fans worked. I ended up connecting the CPU fan to my motherboard so it would run and went into the BIOS and changed my setting for CPU 1 and 2 fan to "AUTOMATIC" instead of Enabled. This allows you to adjust the fan speed. I have an ASROCK mobo so I set my fan speed to level 3, saved & exited, shut it down, and reconnected the PWM to the CPU_Fan and my actual CPU fan to the hub. Upon restart everything ran like a charm.
Fantastic PC case. Great value.
Lindsay Finney✓ Verified Purchase•October 29, 2016
If your budget for your case is around $100 or below, stop searching now and go ahead and buy this case. In fact if you have a budget of $150 I would still recommend this case and put the other money towards an ssd or getting the next level up processor or gpu. Imo you aren't going to find a case better than this one under $150. The case is MASSIVE. I'm used to building in mid towers so this may just be a gut reaction. It is a joy to work in, plenty of room for all your components and very thoughtful placement of virtually everything. My build isn't exactly top notch. I've got an 8350 with a 212 evo wig push pull coolermaster silencio fans. Amd r9 390x, asus 970 gaming aura motherboard, 16 gb of Kingston hyper x ram. 750 gq evga power supply. A couple hard drives and an ssd. And to me the computer looks like one of those fancy builds you would see being made on YouTube. Just because of the case. One thing to note is that the CPU power supply cable provided by evga in the 750gq power supply is not long enough to route behind the case because of the case height. I'm sure that is not true with all power supplies. I got an extension and fixed it. Over all the quality of the case and included accessories make this an outstanding value. Oh and on an old video linustechtips reviewed this case and mentioned the only downfall being the foam packing being junk. Well I can confirm they have started to use better packing material so don't hesitate to have your computer built and shipped in this case.
Page 1 of 2