Daich DCT-MNS-OY Quart Spreadstone Mineral Select Countertop Refinishing Kit, Oyster
Key features
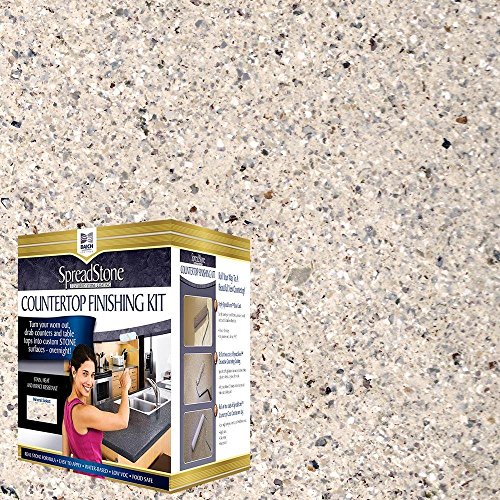
- •The new SpreadStone Mineral Select Countertop Finishing Kit is now available in a new premium stone blend for ultimate natural design elegance
- •Offering all the performance and easy roll-on application of the original SpreadStone Countertop Kit, this new patent-pending system offers shimmering mineral accents and color highlights found in natural mined rock
- •Never before has it been this easy or economical to add the functionality and visual appeal of real premium stone to all kinds of surfaces, without the need for careful artistic skill
- •The NEW Mineral Select Countertop Finishing Kit is a fast and easy process accomplished in three fast and simple roller applications: Base Coat, Stone Coat, and Clear Top Coat
- •This means that in just one weekend, you can take existing laminate, MDF, plywood, particle board, concrete and tile countertop and table surfaces and turn them all into durable, stain resistant surfaces with the design elegance of real stone
Daich DCT-MNS-OY Quart Spreadstone Mineral Select Countertop Refinishing Kit, Oyster
List Price: $252.78$227.50DEALYou Save: $25.28 (10%)
Free shippingFree Returns – 30 daysFree Order CancellationSecure Payment2–3 Days DeliveryGet It June 23, 2026In Stock (7)No marketing spamNo account requiredFulfilment by FedEx / Amazon / UPS / ShipwirePayPal / Card Buyer Protection
Customer Reviews
Reviews sourced from verified Amazon purchasers4.4
out of 5
Based on 10 reviews
5★
100%
4★
0%
3★
0%
2★
0%
1★
0%
Wow!
Julie Van Den Brandt✓ Verified Purchase•November 23, 2017
This product was so easy to use! Am trying to update a kitchen to sell the house so I'm hoping prospective buyers will be as impressed as I am.
This product is so easy to use! I have friends who are anxiously waiting to see the final product so they can try it too!
This product is so easy to use! I have friends who are anxiously waiting to see the final product so they can try it too!
A lot easier than expected and I put extra epoxy ...
Linda✓ Verified Purchase•November 22, 2017
A lot easier than expected and I put extra epoxy (clear top coat) just because we used this in the kitchen and want it to hold up as much as possible...had it for a month now and no stains or chips thus far.
Fantastic product!
Aldrena C.✓ Verified Purchase•August 30, 2017
This product was so easy to apply and looked amazing when all finished. Everything you need is included in the box, which makes it even better enjoy. Well worth the money spent!
Amazing Product
R. Wm. Gray•May 6, 2017
Amazing product. My first exposure to this product was from my son & his wife"¦they used it to resurface their counters. They were pleased with the result. By observing their project, it gave me some insight into the product. I not only observed their project, but I researched this product on line and on YouTube. I needed to be sure of my confidence that this product would do an excellent job, and I wouldn't screw it up and end up having to spend hundreds, perhaps thousands, replacing screwed up counters. After a great deal of deliberation (and research), I finally ordered the product.
I originally shopped Amazon for this product, but they didn't have the color I wanted, so I bought directly from the Daisch web-site. The package arrived timely, and in decent condition. I did have to replace the small plastic tray that came with it, as it was damaged in the shipping. Not a big deal. After opening the package, it sat on the shelf in our utility room for another month, while I stalled. I was really concerned (worried) that something could go wrong. Finally, after some polite needling from my wife, I began the project.
In the directions, it indicates you can mask off around the sink, so you don't have to lift or remove it. I would recommend removing the sink"¦the result will look so much better. I also have a slide in glass-top stove, that I removed.
I prepared the counters as per the instructions. I do have one recommendation regarding the preparation. My counters are Formica, and the edges are squared. My sons Formica counters were also squared. After seeing their finished product, with square edges, it looked obvious to me, that they had simply covered the existing Formica counter with this product. I decided to slightly round the edges (and the outside corners) off on my counters with sanding. What a difference in the finished product. It looks more professional, and not so obviously recovered. Another reason I decided to round the edges and corners, was that my feeling is that it will be less likely to chip off, if accidentally hit with something solid. So far, I'm right. Just last night, my daughter-in-law, not thinking, took a jar she was trying to open, and banged it against the edge of my counter. I quickly interrupted her. After three pretty good hits, my counter edge is still there. No harm, no foul.
Anyway"¦I continued with the project, following the directions closely. There wasn't much guess-work, as the instructions were complete, and for the most part, easy to follow. There were some differences between the written instructions and those on the video. Between each step, I re-read, and re-watched the specific section of the video, that applied to the step I was preparing to implement.
When applying the granite part of the product, it does take some getting used to. You should do a combination of pushing and rolling the product out, to get the right coverage and finished effect.
When applying the final clear coat, as the instructions say, you don't want to roll over it too much. I thought I was careful, but when it was dry, I noticed some spots where it had gotten tacky, and there were little furry strands sticking up"¦not a lot, but I thought I was going to have to sand it down and refinish with the clear coat. Not. I soon discovered they would come off easily with use. I finished this project over a month ago, and my counter no longer has those little furry pieces on it.
I calculated my counter surface, and figured I would probably use up most of the material in the package. I ended up with enough liquid product left-over, that I will be able to do a matching six-foot counter in the utility room, which is off the kitchen.
After applying this product, myself, I think most people could do it without any skill. In fact, my daughter-in-law did most of the work on their counters, and (with apologies) she had no previous experience, or skill set to tackle this job. All she had was a willingness and desire to improve her kitchen.
Bottom line"¦this is a wonderful product, and the result is amazing. Removing my stove and sink, I think was a good idea. I think my counters look up-dated and professionally done. I am very pleased with the look. So is my wife. I would not hesitate to recommend this product to anyone.
Great bargain
Amazon Customer✓ Verified Purchase•May 4, 2017
This looks better than expected. I covered green laminate countertops and it feels and looks great! Give yourself 2-3 days due to drying time between applications.
Page 1 of 2
Related products


RUST-OLEUM 7860519 Acrylic Tub and Tile Refinishing 2-Part Kit, White 2 Pack
List: $133.37$120.03DEAL


