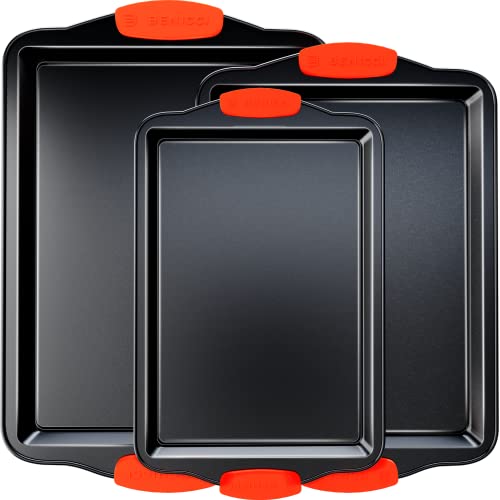
EaZy MealZ Bacon Rack & Tray Set | Specialty Tray and Grease Catcher | Even Cooking | Non-Stick | Healthy Cooking | Durable Material | Customized Cooking Experience (Large, Gray)


Key features
- •ACCOMODATES up to 14 strips of bacon and the tray under it catches the grease.
- •UNIQUE WAVE DESIGN ensures food is separated to allow heat circulation around food, resulting in even cooking.
- •BOTTOM TRAY is designed to catch all the excess oil, which results in less greasy cooked food.
- •TOXIN-FREE NONSTICK COATING on both the Rack & Tray
- •Tray can be used separately as bake pan.
EaZy MealZ Bacon Rack & Tray Set | Specialty Tray and Grease Catcher | Even Cooking | Non-Stick | Healthy Cooking | Durable Material | Customized Cooking Experience (Large, Gray)
List Price: $47.12$42.41DEALYou Save: $4.71 (10%)
Free shippingFree Returns – 30 daysFree Order CancellationSecure Payment2–3 Days DeliveryGet It June 23, 2026In Stock (1)No marketing spamNo account requiredFulfilment by FedEx / Amazon / UPS / ShipwirePayPal / Card Buyer Protection
Customer Reviews
Reviews sourced from verified Amazon purchasers4.3
out of 5
Based on 10 reviews
5★
70%
4★
30%
3★
0%
2★
0%
1★
0%
Best bacon ever
Alfonso E.✓ Verified Purchase•August 25, 2023
I bought 2 sets of this. I traditionally used a flat screen with a cookie sheet but these are on another level. Awesome product to make some great bacon
BACON EASY IN OVEN
Linda✓ Verified Purchase•August 4, 2023
Cleaned well in dishwasher. X-large pan cooked an entire package of bacon in one shot. No need to turn over. No stove-top spatter to clean. Doesn't spatter in oven. Very happy with this purchase.
Love it!
Carol Halpin✓ Verified Purchase•July 31, 2023
Bacon stays perfectly straight and cooks in 8 minutes in Emeril 360 oven.
Better than a regular baking sheet, not sure about non-stick, baking times will vary
starchild71✓ Verified Purchase•June 14, 2023
I used these for the first time today. I definitely love that I can bake an entire package of bacon at one time, with (I think) less mess than a cookie sheet. I have a brand new oven and this was the first time I've used it. I started off with a lower temp, at 350, but it seemed like it took forever to bake, minimal 25 minutes. When I turned it up to 400, for the next batch, my smoke alarms went off and I quickly got smoked out of my kitchen, and surrounding areas, even with windows open and fans on, and it didn't really cut the baking time down that much. I bought 2 of the XL grey pans and they were quite a mess when I was finished. I used a scraper tool to get most of the crud off, but there was still residue left on the pans. They are currently soaking and I shall see if they come clean or not. Unfortunately, I threw the boxes out, so if they don't come clean, I'll have to take a loss on it. I will probably line the pans with foil next time to cut down on the cleaning. I'm also running my oven cleaner right now, as it tended to leave my oven a little messy also. All in all, it's a nice gadget. Time will tell if it's too much of a hassle to continue using.
Bacon done right.
MRTN✓ Verified Purchase•June 9, 2023
I received my Eazy Mealz Crisper Basket & Bacon Crisper in good shape. I could not wait to try it out. I had plenty of bacon and so I experimented to see what I needed to do the get the bacon just the way I wanted it. I had another brand bacon rack that I used to use that was supposed to be non-stick, but it wasn't. However, I started using the temperature and time that it suggested. So, I started with the convection oven at 450 degrees F and 20-22mins. I arranged the thick sliced bacon with the fatty side of the bacon down. That worked fairly well, but some of the bacon was burnt and the fatty part of the bacon was not quite the way I wanted it. I then tried with the fatty side of the bacon up and that worked better, but still the top side of one side of a few slices were burnt. I continued to put the fatty side up, but I reduced the cooking time to 18 mins but turned the entire pan around after 9 mins. That was the trick. I can now get great crispy bacon that is not burnt. Well, almost all not burnt. Even though this is thick sliced bacon, the ends of the bacon slab some times are a lot thinner. The thin slices were a little burnt from this, but that is to be expected at this temp and time. During the entire experiment, the bacon never stuck to the pan or the rack. It was great. Clean up was a breeze. I really love this pan. And now that I know the parameters to making the bacon the way I like, I should have continued success in the future. I bought the smaller size pan because a review that I read said that the large rack had a shallower drip pan. With the one that I got, the drip pan was quite deep and collected all of the drippings. I really like to read good reviews. Now that I see how well this pan functioned, I am not sure that the negative reviews that I read were about this same brand of pan. I saw one review that showed that people lined the pan with aluminum foil and their bacon was burnt. There is no need to line this pan. It does not stick. And the aluminum foil could have contributed to the burnt bacon. I also bought the grey pan, not the copper one. So, I cannot comment on how well the copper one works, but the grey one is great. I saw one review that said that the bacon they had was too long for the pan. I bought regular size think sliced bacon and the sliced are about a foot long and they fit great. The way the rack is constructed, the bacon fits in there very nicely and is forced to remain straight up during the cooking process. It does make a different on how many slices you can get in the rack depending on which side of the rack you have up. The first time I could not get as many slices in the rack because I had it going the wrong direction. The next time I think I got 12 slices in the rack with it flipped over. My reason for trying to debunk some of these negative reviews is because I almost did not buy this product because of those and I am glad that I took a chance and got it anyway. I hope this review is helpful to all you bacon lovers.
UPDATE: 6/3/2020 - I am still over the moon in love with this bacon pan. I have cooked over three cooking sessions at least 18 lbs of bacon on this rack. When I am done, I just empty the greese, spray a little white vinegar, and some Dawn and the pan the the rack. I only use nylon brushes and pads to clean with. I have a nylon brush with a nylon scraper on one side of the brush and it loosens any of the bacon droppings that coat the bottom of the pan. Then today I found that if I used a stiff nylon bottle brush, I can get into the groves of the rack and loosen any bacon fragments that coat the rack. Then I just use a sponge enclosed in nylon mesh to finish washing the pan. Please notice that I used the word coat instead of the word stuck. Coat is what spaghetti sauce does to pasta or what grease does to bearings. I would have used the word stuck if the bacon fragments would have caramelized themselves to the pan. But so far, they have not. Actually the word scrape that I used up above is really more harsh than it needs to be because I really don't have to scrape the bacon fragments, I just have to push them free from coating the bottom of the pan. The picture of the pan above is not one of when I brought it brand new. It is what it still looks like today after cooking all of that bacon. So my definition of a non-stick pan is one that you can easily remove any food that is coating the pan. If you are looking for a pan that you just spray on Dawn and then spray it with the sink sprayer, then I am not sure that pan exists. But if you will just spray the pan and rack and use the nylon brushes and pads to loosen the food coatings, then you can spray it all way with the sink sprayer. I did not have to spend hours with the bottle brush to clean the rack, but I did need to pass the brush through any of the rack loops that had something on them just to loosen the bacon fragments. My previous rack of a different brand, I could have worked for hours and still not have loosened the fragments from the rack. That one was really not a non-stick rack. This one really is. I also wanted to pass on some things that I have tried while cooking. I am still heating the oven to 450 degrees, but I am using a convection oven. So that means that there is hot air circulating inside the oven as it cooks. I have found my best results so far is to put the bacon in the rack with the fat sides up and the majority of the lean sides down. Since the sides of the bacon may not be exactly parallel, if one end is wider than the other, I alternate each side so that the wide side is on the right for one slice and on the left for the next slice. When I put the pan in the oven, I orient the rack so that the air from the fan will blow between the slices and not against just the first slice. I set the cook time for 18 mins, but I rotate the pan 180 degrees after 9 min so that each end of the bacon is exposed to the hot air from the fan. After the 18 mins, if the bacon is not yet as crispy as I want it, I do additional cooking at 2 mins intervals until the bacon is just as I want it. Now, please note, these instructions are for a full rack of bacon. It you only have a few slices to cook at the end of the package, please set the time more like 12min - 15 min and monitor how the cooking is going. I just learned today that without a full rack, the bacon could end up over done with only a few slices. Today I only had three slices left and I spaced them out over the rack, but I left them for the 18 mins and they came out black. You learn something every day. Now, once again notice that I bought the gray rack. I cannot comment on if the copper rack will act the same. But I am still very pleased with this rack. ( At the time I am writing this review, I am sorry to say, there were none of these currently available. I hope they get more in stock because they really are great.)
UPDATE: 6/3/2020 - I am still over the moon in love with this bacon pan. I have cooked over three cooking sessions at least 18 lbs of bacon on this rack. When I am done, I just empty the greese, spray a little white vinegar, and some Dawn and the pan the the rack. I only use nylon brushes and pads to clean with. I have a nylon brush with a nylon scraper on one side of the brush and it loosens any of the bacon droppings that coat the bottom of the pan. Then today I found that if I used a stiff nylon bottle brush, I can get into the groves of the rack and loosen any bacon fragments that coat the rack. Then I just use a sponge enclosed in nylon mesh to finish washing the pan. Please notice that I used the word coat instead of the word stuck. Coat is what spaghetti sauce does to pasta or what grease does to bearings. I would have used the word stuck if the bacon fragments would have caramelized themselves to the pan. But so far, they have not. Actually the word scrape that I used up above is really more harsh than it needs to be because I really don't have to scrape the bacon fragments, I just have to push them free from coating the bottom of the pan. The picture of the pan above is not one of when I brought it brand new. It is what it still looks like today after cooking all of that bacon. So my definition of a non-stick pan is one that you can easily remove any food that is coating the pan. If you are looking for a pan that you just spray on Dawn and then spray it with the sink sprayer, then I am not sure that pan exists. But if you will just spray the pan and rack and use the nylon brushes and pads to loosen the food coatings, then you can spray it all way with the sink sprayer. I did not have to spend hours with the bottle brush to clean the rack, but I did need to pass the brush through any of the rack loops that had something on them just to loosen the bacon fragments. My previous rack of a different brand, I could have worked for hours and still not have loosened the fragments from the rack. That one was really not a non-stick rack. This one really is. I also wanted to pass on some things that I have tried while cooking. I am still heating the oven to 450 degrees, but I am using a convection oven. So that means that there is hot air circulating inside the oven as it cooks. I have found my best results so far is to put the bacon in the rack with the fat sides up and the majority of the lean sides down. Since the sides of the bacon may not be exactly parallel, if one end is wider than the other, I alternate each side so that the wide side is on the right for one slice and on the left for the next slice. When I put the pan in the oven, I orient the rack so that the air from the fan will blow between the slices and not against just the first slice. I set the cook time for 18 mins, but I rotate the pan 180 degrees after 9 min so that each end of the bacon is exposed to the hot air from the fan. After the 18 mins, if the bacon is not yet as crispy as I want it, I do additional cooking at 2 mins intervals until the bacon is just as I want it. Now, please note, these instructions are for a full rack of bacon. It you only have a few slices to cook at the end of the package, please set the time more like 12min - 15 min and monitor how the cooking is going. I just learned today that without a full rack, the bacon could end up over done with only a few slices. Today I only had three slices left and I spaced them out over the rack, but I left them for the 18 mins and they came out black. You learn something every day. Now, once again notice that I bought the gray rack. I cannot comment on if the copper rack will act the same. But I am still very pleased with this rack. ( At the time I am writing this review, I am sorry to say, there were none of these currently available. I hope they get more in stock because they really are great.)
Page 1 of 2