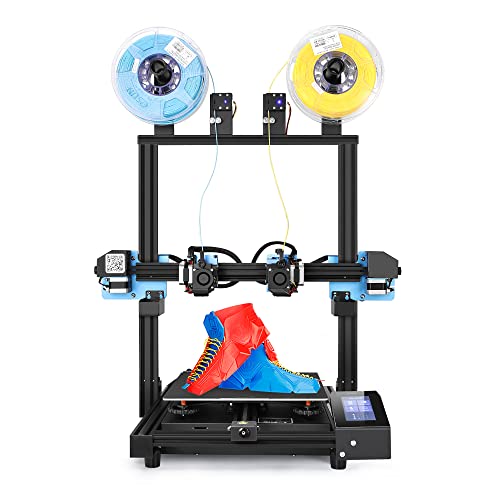
Sovol SV04 IDEX 3D Printer, Independent Dual Extruder 3D Printer with All Metal Direct Drive 32-bit Silent Motherboard Auto Leveling, Larger Build Volume 300 x 300 x 400mm


Key features
- •[Dual Direct Drive & Large Build Volume] - SV04 equips with dual metal Titan extruders which are more capable to produce high quality prints across a vast range of material, such like PLA, ABS, PETG, TPU, PC, PA, Wood, ASA, and PVA. 300x300x400mm build volume makes SV04 the best large format independent dual extruder direct drive 3D printer in the market. Please download the latest firmware from official website and flash it before your printing to avoid error occurs.
- •[Auto Leveling & 4.3 inch LCD Touch] - Auto-leveling sensor on SV04 will make adjustments to ensure the bed and nozzle are at an optimum distance throughout the printing, which improves bed adhesion and print quality. Screen operating with an responsive and sensitive touch button, all the modes are clear and easy to use.
- •[32 Bit Silent Board & Flexible Spring Steel Plate] - Creality V5.2.1 32 bit TMC2209 silent board, up to 7 additional drivers, more functions, more stable, super silent. Flexible magnetic build plate ensures your print get a good grip to it, to help prevent warping and failed prints. It allows you pop off the prints without any tool, just bend the plate and your prints removed.
- •[2 Filament Sensor & Dual Z Axis] - The filament detector will remind you to change the filament, no worries about long time printing anymore. The wheels on the holderhelp load the filament more smoothly. Dual Z-axis screws and stepper motors improve the accuracy and precision of nozzle's vertical movement with a specified Z-axis accuracy of 0.001mm.
- •[500W Power Supply] - Built-in 500W Chengliang power supply ensures stable and sufficient power, fast heatup for the hotbed and nozzle. It protects SV04 from unexpected power surges.Any questions or issues about the product please feel free to contact us. We will try our best to help you resolve it.
Sovol SV04 IDEX 3D Printer, Independent Dual Extruder 3D Printer with All Metal Direct Drive 32-bit Silent Motherboard Auto Leveling, Larger Build Volume 300 x 300 x 400mm
List Price: $726.05$653.45DEALYou Save: $72.60 (10%)
Free shippingFree Returns – 30 daysFree Order CancellationSecure Payment2–3 Days DeliveryGet It June 24, 2026In Stock (1)No marketing spamNo account requiredFulfilment by FedEx / Amazon / UPS / ShipwirePayPal / Card Buyer Protection
Customer Reviews
Reviews sourced from verified Amazon purchasers3.7
out of 5
Based on 10 reviews
5★
20%
4★
80%
3★
0%
2★
0%
1★
0%
Works great
John G.✓ Verified Purchase•August 16, 2023
Bed leveling takes time to get setup but once complete the printer does a great job of printing 2 colors and copy mode is nice feature.
Great quality and value
Amamar✓ Verified Purchase•August 3, 2023
EDIT 2: I'm also impressed with the response from Sovol, both by their presence in the Facebook users group, and the fact that they responded to me, quickly, with recommendations on how to make the printer quieter. I can't quite give the printer 5 stars, but I wish I could give it 4.5.
EDIT 1: added a star
I've had this printer for a about a week now. I've printed quite a bit with it and I'm really enjoying it. It's still louder than I would expect, but I'm really impressed by the quality of prints I've been able to achieve by a printer at this price point. Most of what I've done is just fiddle with the slicer settings to find what works best with this printer. The only thing that I've done to the printer is use some hairspray on the bed just to help with adhesion. I experienced a few prints that peeled up at the corners (both PLA and TPU) which a small amount of hairspray solved.
Orig:
I just got mine yesterday. It was easy to set up and I was able to print really nice prints straight away with no adjustments. Obviously, the slicer settings had a lot to do with it, but I was really impressed.
Too get it out of the box, I would recommend turning the box over and sliding it all out. The base and gantry are connected, so it would be hard to try to lift it all out.
The instructions are pretty clear. There are a couple things that aren't obvious, but overall, they were good.
Upgrading to Marlin 2.0.0 was easy, especially since they included the USB mini cable (not too many of those around anymore).
The run out sensor is kind of worthless. It puts a significant amount of drag on the filament the higher and further off center the print is. I just disabled it in the Marlin 2.0 firmware. It's too bad, really. I've run out of filament a couple times and it would have been nice to be able to load more up and resume.
TPU doesn't seem to stick to the bed particularly well, although running a higher bed temp than I usually use did help a bit. I used 60c, although I think I might try a little higher and see if that helps more.
PLA sticks great and releases fairly easily. I used 55c.
You have to be fairly careful where you put the clips that hold the glass down so they don't interfere with the hot end.
The Z stop isn't particularly easy to adjust. When the screws are loosened enough for it to move, it's a bit floppy, so it's hard to be accurate. Not a huge issue, but they could have figured out a better way to do it.
The only real complaint so far is how loud it is. It seems to be the fans. Part of the issue is there are very few vent holes in the box that houses the main board and the power supply. And, there are no holes where the power supply fan is. No idea what they were thinking when they did that. Luckily, I have my printer in my basement, so it doesn't really bother anyone, but again, it seems like it'd be pretty easy to have engineered this a bit better.
Overall, I'm happy with it and would recommend it.
Calibration is key
zjbdragon✓ Verified Purchase•July 29, 2023
Overall, this is a good and reliable printer. The SV04 is much more advanced than my 7 year old FT-5. The SV04 heats fast, accepts a variety of materials (I've had success with PLA, PVA, and PETG), and mine had an automatic Z-leveling mechanism compared to some older online reviews with manual leveling. Negatives are the filament runout sensors are too narrow (tolerances too tight), printing platform is mildly warped (can be calibrated out), and the printer is slower than I'd like (60mm/s seems reliable).
Spend the time to calibrate and don't be afraid to deviate from the instructions to really dial things in. Once calibrated, the SV04 does a more consistent job than my old printer. This printer could be improved, but not enough to knock a star off at this price range.
Lessons learned:
- Use a small purge tower to counter oozing and avoid having little filament noodles attach to 2-material prints. Sovol slicer doesn't handle purge towers well so get stock Cura and import Sovol profiles. The wipers on either side of the printer sometimes don't fully remove ooze.
- REMEMBER TO SET THE RIGHT PRINTER MODE BEFORE BEGINNING A PRINT. If you skip this step, the print heads may collide! Name your print files single, twin, mirror, or dual to help remind you.
- Calibrate multiple times. Once you dial in the X and Y offsets, the IDEX system works great! I had no problems printing PLA with PVA supports for a custom 3D art project. It did take 3 calibrations to nail the values. Z offset screw on the second print head may need to be adjusted by hand during a print.
So far so good
Ana O✓ Verified Purchase•July 26, 2023
Ok folks, I don't write reviews but I feel like this printer (so far) deserves some praise.
I've been printing for 8 years primarily with creality. In the past year I've been searching for the right IDEX printer. I've been through maybe 4 or 5 and for various reason have returned before 30 day policy.
PRO
1) heater block and nozzle are same as creality so I don't have to buy proprietary parts. I already have a stockpile.
2) instructions are required reading if you want to print successfully. Bed leveling and nozzle aligning is very clear to understand. Videos on sd card are also helpful. Best instructions I've seen for IDEX yet.
3) they have their own version of Cura which comes ready to truly print mirror, dupe, dual, single without having to modify g code. You change mode in Cura, change to same mode on printer, load and print.
Other IDEXs advertise these other modes but you have to jump through hoops to actual use it.
4) Comes with a mechanical auto bed leveling device mounted on the main extruder. Similar to the digital laser auto bed level tech. So far it works well. This mechanical device is also used to do the 16 point leveling inspection of bed to compensate for minor bed differences.
5) The way you align the 2nd nozzle z axis has been the easiest so far. You level main nozzle first, then use a knob mounted on top of 2nd nozzle to hone in on a single corner. check if its level with paper and done. No need to check other corners.
6) when screwing the main frame to the base, the screw holes are on the SIDE (smart move) instead of having to bend over upside down and screw from the bottom. I'm fat. I feel like I'm under a truck stealing a catholic converter.
5) The wiping mechanism, used when switching nozzles mid-print, isn't made of horse hair or some weird bristles. Plastic bristles collect oozing filament but collection cools and hardens. This is impossible to take out unless you watch your printer and catch it every time there's a switch. I ended up having a lump of plastic over time collect in the bristles. I've had IDEX printers with more soft bristles like horse hair but the strands would come loose, hitch a ride on the nozzle and deposit on my model. So you have these random hairs embedded in the model. The wiping mechanism here is a rubber-like block. Feels like the rubber when you squeeze a tennis ball but firmer. Set it to the right level and it wipes beautifully. no bristles.
6) Some things I print require the side that's on the bed to be clean and neat. Other brands put their freakin logo right in the middle of the magnetic print bed in white. So when I print something, their white logo gets stuck to the bottom of my print like an unwanted decal. The logo here is kinda big but its at the bottom away from the center. Good job Solvo.
7) Last pro. Finally I found an IDEX that when you switch nozzles mid print, the nozzle that is waiting doesn't head up OVER the model depositing a blob. It heats off to the side then starts to print. There was a backdoor way to fix this but required modding G code and I'm not comfortable doing that. All the IDEXs (from what I can recall) did not have a solution to this. What I would do is leave the nozzle thats not in use at the desired printing temperature which is kinda silly. 210C sitting idling is silly. Perhaps because Solvo has their own version of CURA, this bug was also fixed. Who knows.
CONS
1) When switching filament, it can be a pain to thread the new filament because it has to go precisely straight into the hole, be caught by the gear, and fed even further down which you can't see because its a direct drive and is shrouded by all the parts. I had a hard time feeding one of my filament spools because it had a natural curve in it and wasn't going in straight. Oddly enough it was only the main extruder I had trouble with. Call me demanding but it should be able to accommodate any filament in decent condition. This isn't an issue with Bowden Tube Printers.
2) the hole on the sensor module (used to detect if filament runs out) may be too small to fit some filament. I had trouble feeding filament through one of these sensors. It just wouldn't thread through. The other sensor was just small enough that 1.75mm filament was being shaved as it went through. So it came out the other end with slightly less diameter and the shaving collected on top. As of right now both sensors are bypassed and unplugged. If you keep track of how much you use you don't really need them.
If these two cons were improved somehow it would be a five-star from me.
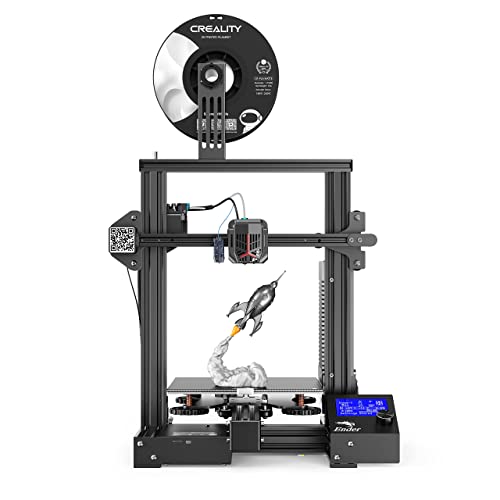
What the Ender 3 Pro SHOULD have been, but wasn’t.
The BV3D Channel ✓ Verified Purchase•July 22, 2023
I want to talk about what I like, and what I don't like about the Sovol SV01. It's a pretty nice 3D printer for the price. Speaking of price, I want to tell you right up front that I got this printer at a discount. What follows is my honest impression of this printer. All opinions expressed are my own.
Before I get into my likes, dislikes, and experiences, I want to compare the SV01 to the Ender 3 Pro. As I see it, that is the printer it's trying to beat. And really, I think the SV01 is what the Ender 3 Pro SHOULD have been, but wasn't.
COMPARISON WITH ENDER 3 PRO
Don't get me wrong, I own an Ender 3 Pro and I love it. When it was released, it had a $300 price tag, but it only had three differences from the original Ender 3:
- The Ender 3 Pro uses a 24v Meanwell power supply, which is a well-respected brand.
- The Ender 3 Pro uses a 4040 extrusion on the Y axis, instead of a 2040 extrusion.
- The Ender 3 Pro flipped its electronics box upside down, so the fan was on the bottom.
Now, compare that with the Sovol SV01, which, as of this review, is priced at $279 ($299 with a $20 instant-off coupon on the page).
The SV01 has:
- A 24v Meanwell power supply, like the Ender 3 Pro
- A larger print volume, in every dimension (SV01: 240 x 280 x 300 vs E3P: 220 x 220 x 250)
- Dual Z motors (Ender 3 Pro only has one)
- A direct-drive extruder (Ender 3 Pro uses Bowden-style extruder)
- A filament runout sensor
MY EXPERIENCE WITH THIS PRINTER
The SV01 was easy to assemble. The frame is made of the typical black aluminum extrusions. Basically, it goes together like this:
- Bolt the "tower" part of it to the base part
- Attach the screen to the front of the printer and plug in its cables
- Attach the Z end stop switch to the tower
- Plug in the cables for the motors and end stop switches
- Level the bed
- Start printing
During assembly, I did have an issue with a screw that fell out of the printer and was loose in the box. I identified it as belonging on the wheel bracket on the right side of the printer, so I reattached it. A loose screw isn't completely unheard of on a 3D printer kit. But it could've been a problem if I hadn't looked around on the printer to see where to put the screw.
Almost every other printer I've ever bought only had a few meters of filament. The SV01 included a generous 200g spool of white PLA filament. It's a small spool, but still, it's really a spool. Usually you only get a little coil of filament. If this is your first printer, you'll be able to print a few little models before you have to buy some filament.
The SV01 also has an "Ultrabase"-style glass bed, which clips onto the heated aluminum platform. Prints (usually) release when the bed cools down. If they don't, a gentle tap with the handle of the included scraper will usually set them free. Some prints "” those with a big footprint on the bed "” may need a little more convincing to set them free. But don't use the included scraper to do this. You'll likely scratch the glass bed. I printed a large architectural model (a scale model of a particular room in my house), which was held tight by the bed. I ended up using a wide plastic putty knife to get under it and release it.
If you're concerned about the unusual bed size, its 240x280 dimensions are the same as the Anycubic 4Max Pro. While I don't see additional bed surfaces available for the from Sovol either on Amazon or their own web site, you can get the Anycubic glass bed here on Amazon. I might pick one up so I have a spare, or so I can swap the glass between prints. That way I can start a new print without waiting for the first one to cool down.
Oh, that architectural model I mentioned? I printed it at a speed of 80mm/s. That's pushing the limits of this printer, and is the typical top speed for printers in this price range. The print quality was"¦ pretty good. I consider that speed to be the equivalent of "draft mode" on a paper printer. It goes fast, but the results aren't showcase quality. Having said that, my usual print speed is around 40mm/s, and I get REALLY good results with the SV01 at that speed (that XYZ cube was printed at 40mm/s). I tend to print at speeds around 40mm/s on ALL my printers, unless I need "draft mode quality".
I did have a problem with the input knob on the screen. Turning the knob didn't consistently send input to the printer. This is being taken care of under warranty. If you buy the SV01, know that if you have a problem, Sovol will honor the warranty on it. It can take a few days (ok, 10 days) to receive a part like the screen, but they will take care of you. And don't forget, this is Amazon "” you have 30 days to return or exchange it if you run into an unresolvable issue.
WHAT I LIKE ABOUT THIS PRINTER
I like the print volume. This is the largest printer I own, and the architectural model I mentioned earlier easily fit on the print bed.
I also like the direct-drive extruder. Out of all my printers, only my Ender 3 Pro uses a Bowden-style extruder. And while Bowden extruders work well, I feel that direct-drive extruders work even better. The filament path is straight from the extruder into the nozzle on a direct-drive system, so all filaments feed easily. This is especially true if you are printing with flexible filaments, or brittle ones. And this is a geared extruder, which uses gear reduction to create a lot of torque.
The dual Z motors ensure that the X gantry stays level and doesn't sag on one side, as can happen with a single Z motor arrangement.
And while the filament sensor is nice to have, I usually monitor my prints so that running out of filament isn't really an issue for me.
WHAT I DISLIKE ABOUT THIS PRINTER
The biggest complaint I have with this printer is that its case fan is LOUD. There's a fan inside the case that's supposed to keep air moving across the circuit board inside. When the printer is turned on and not actively printing, this is the loudest thing on it.
Cable management for the print head is not perfect. It would benefit from having a little more thought put into it. The cables can sag down into the print area, and potentially catch on, or knock over, part of a print. So you'll want to keep an eye on that. I printed a cable chain to keep those cables under control.
THE TAKEAWAY
For the price, the Sovol SV01 is everything the Ender 3 Pro should have been, but wasn't. It has a larger print volume, dual Z motors, a direct-drive extruder, a filament runout sensor, and as of this writing the SV01 is $279. A quick glance shows Ender 3 Pro printers on Amazon for $259. So, for a little more than the cost of an Ender 3 Pro, you can get the SV01 with some pretty nice features.
Page 1 of 2